
This post and photos may contain Amazon or other affiliate links. If you purchase something through any link I may receive a small commission at no extra charge to you.
I think every crafter has their favorite holidays for making stuff. And it might not be their favorite holiday full stop. For example… my favorite holiday is the Fourth of July and 99% of that is because I like the boom stuff :) But my favorite holiday to craft for is Easter! There’s just something amazing about Easter eggs, you know? And it doesn’t hurt that I’ve had a few Easter egg crafts go viral… like my Galaxy eggs that I initially didn’t care for but my sister insisted I post. And I’m so glad I did!
Last year I started working on some edible Easter eggs. Because pretty eggs are one thing and pretty and edible eggs are a whole ‘nother thing. Last year I shared how to dye gorgeous and vibrant eggs without a kit, make edible alcohol inks for egg dyeing, DIY baking soda paint for vibrant abstract eggs, tie dyed eggs, and finally on trend patterned eggs… all pretty and still edible!
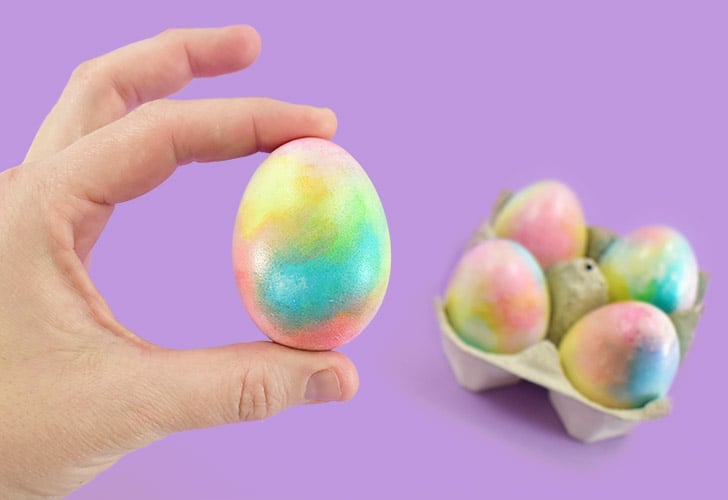
Today’s eggs are actually ones I made and wrote the tutorial for last year but forgot to post. And so, today I’m super pleased to share these DIY dyed rainbow Easter eggs that are vibrant and ethereal and just plain lovely.

Supplies Needed to Make Rainbow Easter Eggs
- Boiled Eggs (try our easy Air Fryer Hard Boiled Eggs!)
- Vodka or Everclear
- Food Coloring (Assorted Colors / Neon Colors)
- Precision Tip Applicator Bottles (or a Paint Palette Tray & Pipettes)
- Paper Towels
- Vegetable Oil
For these lovely and dreamy pastel rainbow swirl eggs you’ll need an alcohol and food coloring mixture. It’s basically an edible alcohol ink. If making a lot of eggs or a lot of different types of eggs I’d suggest making your edible alcohol ink in squeeze bottles like this (I have several designs this year alone using this alcohol/food coloring paint). If you don’t have or want to use squeeze bottles, you can also mix up your edible egg paint in a paint palette tray.
Also, this project uses alcohol (like from the liquor store). Both vodka and everclear will work but the everclear will dry more quickly. For this particular project the dry time is not an issue. I’d suggest using vodka simply because it’s the cheaper of the 2 clear liquors. If you’ll be also creating other edible Easter egg designs from the tutorials I’m sharing this year, you might go ahead and spring for Everclear as the quicker dry time works better for some of the other projects.
How to Make Heavenly Rainbow Easter Eggs
Mixing up your Easter egg dye for this project:

To make a nice and vibrant Easter egg paint, mix 15-25 drops of food coloring (less for darker colors more for lighter) to 0.75 ounce of alcohol in a squeeze bottle. If using a paint palette or small bowls, mix up your colors a splash of alcohol to 1-2 drops of paint at a time.
Application:

Holding your egg in a paper towel, drop 2-3 drops of paint in your first color onto the surface. Use the paper towel to rub the the paint into the egg until the color soaks into the shell. When rubbing in the paint, apply with the paper towel in a CIRCULAR MOTION.
*Note – If using paint from a bowl or palette, use a pipette or a tiny paint brush to pick up and release single drops.

Apply a few drops of another color in on an area of the egg nearby your first color. Use your paper towel to rub the paint into the white space of the shell in a circular motion. Slightly overlapthe first splotch of color. Rub until the color is full soaked into the shell.

Continue adding colors working around the egg covering all of the white space and overlapping the colors as you go.
*Note – After done, I stored my rainbow Easter eggs in the refrigerator. When I removed them a few days later and they started coming to room temperature they began to sweat. I was able to rub away the sweat without ruining the eggs but the color did fade a bit. They’re still gorgeous, just a little more pastel than what I was going for. If you will be storing your eggs in the fridge I’d suggest layering your dye until the eggs are just a little darker what you want to end up with post refrigeration.
Adding a gorgeous, natural sheen to your rainbow Easter Eggs
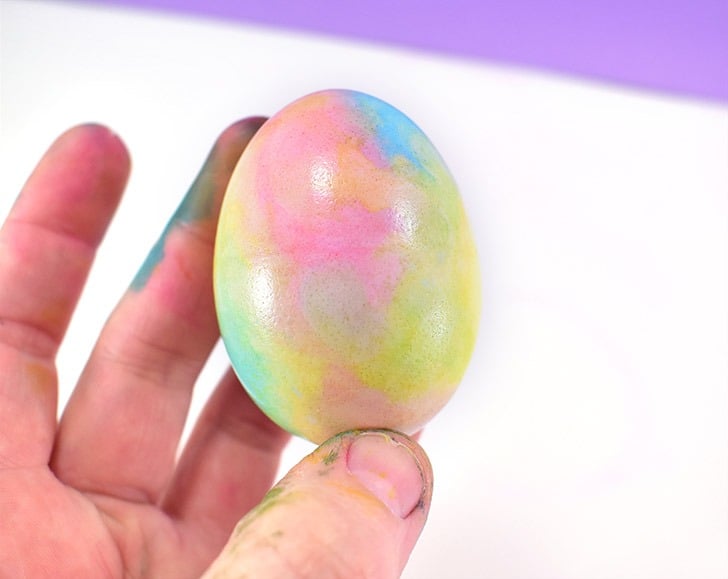
Apply a dot of paint onto a clean paper towel and rub paint in small parts of the areas where the colors overlap. Keep adding more paint until you’re happy with your rainbow swirl.

Apply a few dots of vegetable oil to the egg once you’re happy with the design. Rub the oil into the egg with your hands. Buff the excess oil away with a clean paper towel or cloth.
*Note – be sure you don’t want to add more color to the egg before adding the oil. Once the oil is on the egg, adding more color is difficult.

The shine from the vegetable oil will make your colors more vibrant and give the egg a pretty shine. Just make sure to buff away all excess oil so that the finished eggs are not slippery.

Voila! Isn’t that just so darn pretty?
