
This post and photos may contain Amazon or other affiliate links. If you purchase something through any link I may receive a small commission at no extra charge to you.
I’ve been super busy but even working a LOT of hours my OCD sometimes still manages to get the better of me. Frustrated with how poorly organized my craft supplies are, one day I took an ENTIRE DAY to whip things back into shape. And I’m like SUPER organizing things. I’ve got 62 white and kraft colored photo boxes neatly arranged in my hall closet and I can find SO MANY THINGS without having to buy, buy, buy supplies. It’s a real relief.
Luckily earlier this year I had already tackled my yarn stash and I’ve got tubs divided out by weight and color. And when I realized that I have an entire tub of remnant Hometown USA yarn balls I decided to put some of them to good use.
I brought in a ball of my favorite mustard color and started to crochet up a pumpkin. But I thought, I totally did that last year. I also have a tub full of my knitting looms. And so I went back out, grabbed a medium sized loom for chunky yarn and got after it.
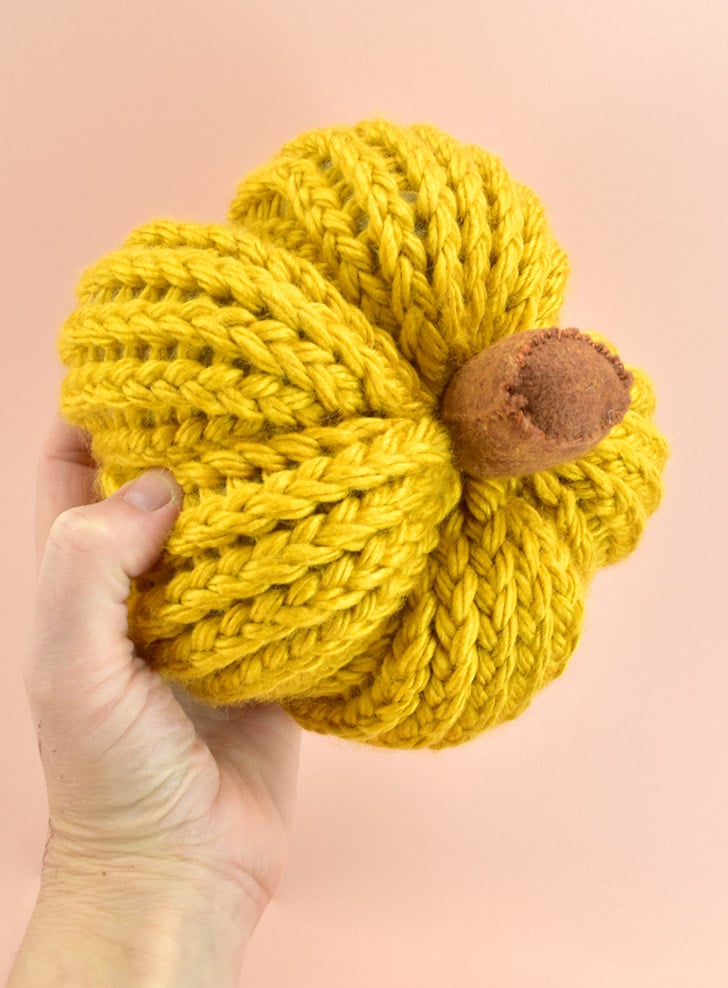
Sitting on my sofa I also had a little stash of felt from another project I’d been working on while couch surfing. And so my little pumpkin stems were born out of the brown felt from that little photo box and even if chosen out of convenience, I don’t think I could love any other DIY stem option more.
Today I’m going to show you just how easy it is to make these pumpkins. Once you get going you can get one done, start to finish in about an hour. And if you’re a brand new loom knitter… no sweat. I’ll show you each and every step to make your own loom knit pumpkins.
This is a long ride… ready to tuck in?
Tools Needed to Make Pumpkins on a Knitting Loom:
My loom knit pumpkins were made using a knitting loom specifically sized for weight 5, bulky yarn. There are also looms for thinner medium weight yarns (e.g. Red Heart Super Saver Yarn). When side by side, you can tell the difference in loom by the size of the pegs. The thinner pegs are used for thinner yarns. Both will work well to knit up some pumpkins but the chunkier yarn will yield results much more quickly. I was able to knit 5 different bulky yarn pumpkins in less time than 1 pumpkin using medium yarn pumpkins. In fact, I haven’t quite finished that one, yet! :)
Be sure to use the right sized loom for your yarn.
To finish your pumpkins you’ll need yarn needles. I really, really recommend these 3.75″ Boye Yarn Needles because they are the longest I can find with a dull end and will easy go all of the way through even a fat yarn pumpkin.

Supplies Needed to Make Pumpkins on a Knitting Loom:
- Bulky Yarn
- Brown Felt
- Brown Embroidery Floss
- Poly-Fil
Even if a yarn says that it is a Weight 5 Bulky yarn on the packaging, not all will be exactly the same. I found that Lion Brand Hometown USA and Lion Brand Wool Ease Thick & Quick worked the best for loom knit pumpkins. I tried other brands, including Michael’s Charisma, which is also listed as a Weight 5 Bulky. The Charisma was much thinner than the Lion Brand yarns and yielded huge gaps in the knit, which I wasn’t happy about. If using a brand other than recommended, I’d suggest buying one skein and making sure you’re happy with the knit before committing to a full shopping basket of bulky yarn.
A Cat Craft Assistant is Fun but Not Necessarily Helpful :)
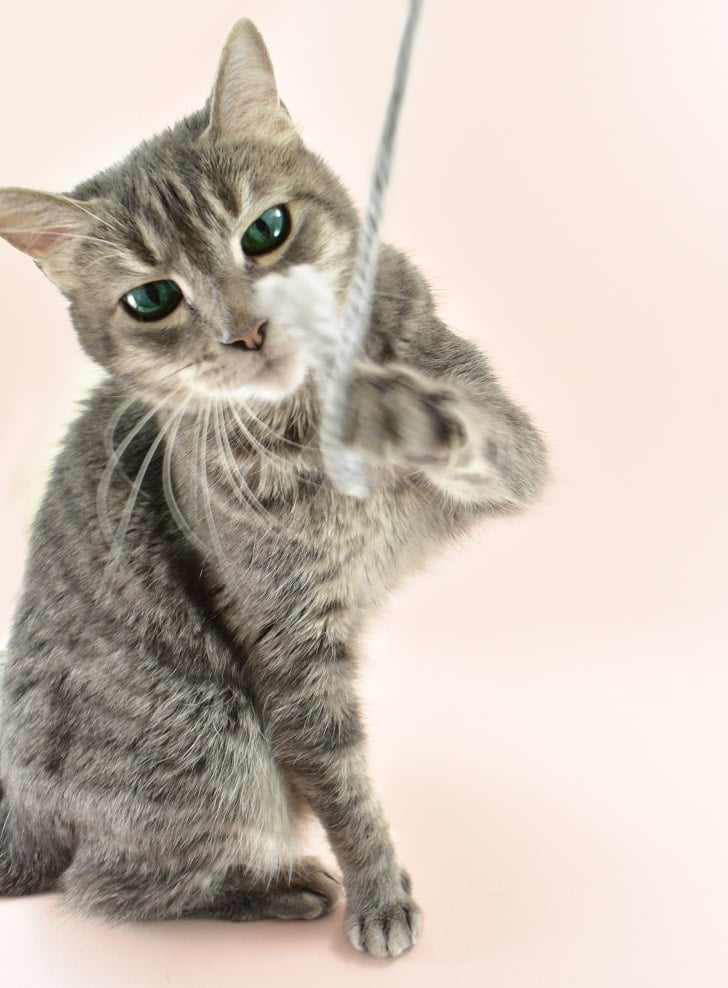
Say hi to my cat Marla. She’s the furry legs and paws you’ll see in the tutorial photos. She’s going blind and I have to put her in the light box with me when she asks. Sight or not, she still manages to get involved :)
First, let’s cover the basic how to for E-Wrap Knitting on a Round Loom:

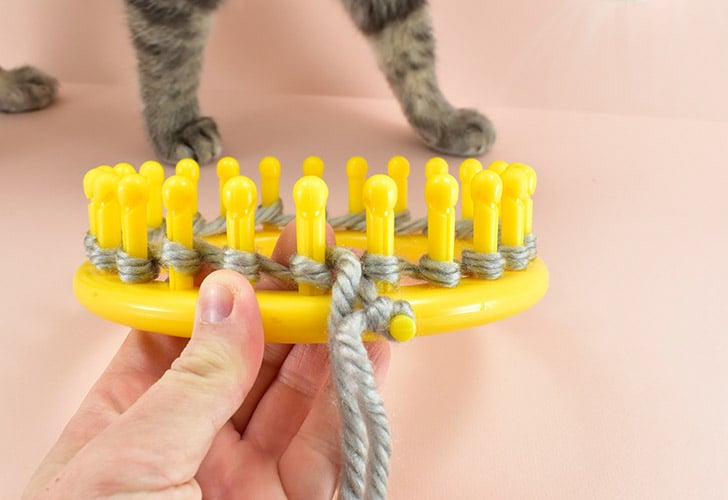
There is a peg on the side of your loom. Making a simple, overhanded knot, tie the yarn to this peg.
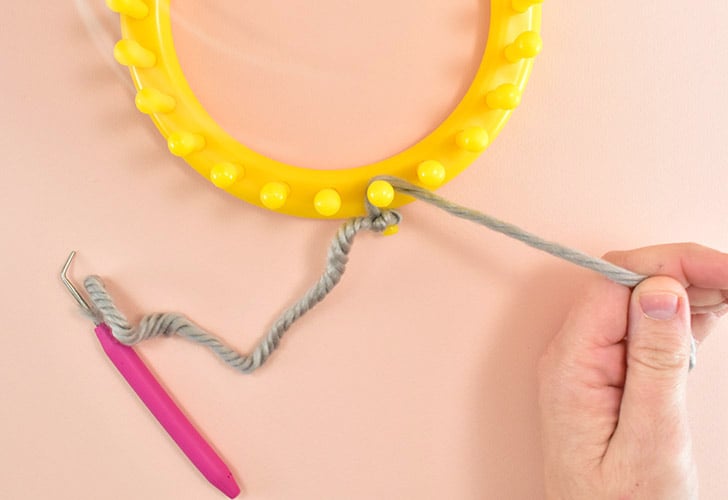
Wrap the yarn around the first peg in line with your tied knot in a clockwise fashion.
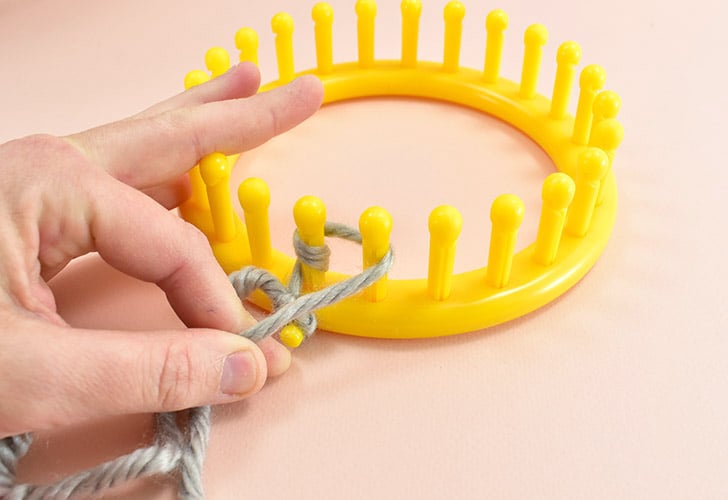
Wrap around the next peg, and each peg around in a clock-wise. Be sure that the wrap is tight enough that the yarn stays where you wrap it high on the peg and does not droop down to the base of the loom. You don’t want the yarn to get too tight, though, as it will make knitting difficult. If you’re brand new to loom knitting, this might take a few turns around the loom before you find the right tension for your wraps.

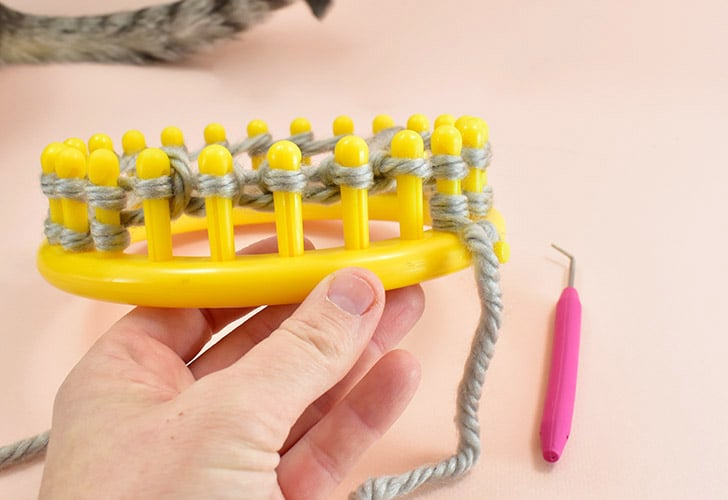
Stop wrapping when you get to the last peg on the loom.
Holding your last wrap in place, push the yarn to the base of the loom on all pegs.

Repeat the wrapping process, running your yarn around clockwise for each peg, starting with the first (right above the knot on the side of the loom).

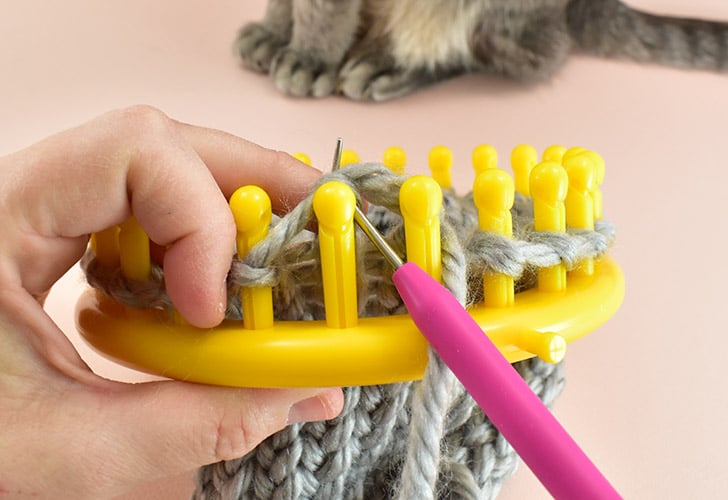
Holding the last wrap in place, put the loom knitting tool inside of the last peg’s groove. Pull the tool upward to hook the yarn.

Pull the bottom loop over the top loop leaving the top loop in place on the peg.
Continue pulling the bottom loops over the top and off of the peg for around, working counter-clockwise until you return to the first peg.

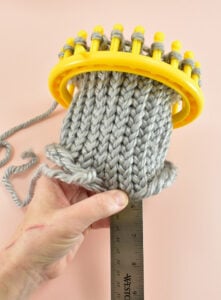
When you’ve taken off all of the loops, repeat the knitting process… Push the loops on the pegs down to the loom’s base. Wrap the yarn around each peg until you reach the last. Holding the last loop in place, hook the bottom loop with your tool and pull over the the top loop and off of the peg. Continue until you knit approximately 6″ of length for a short, squatty pumpkin and up to 10″ for taller pumpkins.
Removing Your Knitted Piece from the Loom:

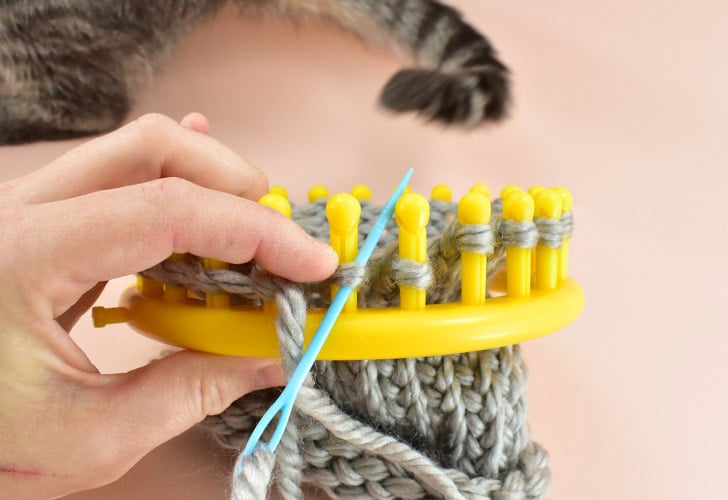
Cut your yarn from the skein leaving a tail of 18-24″. This tail will be used to create the segments of the pumpkin a little later on. Thread the end of your tail through the eye of your long yarn needle.

Push the tip of your needle into the first peg’s groove and push the needle beneath the loop on the peg. Pull the needle all of the way through the loop. Continue pulling your threaded needle through all of the loops on all of the pegs.
Quick Tip – If the loop tries to slip off of the loom, hold it in place with one hand while pulling your needle through with the other.
Use your loom knitting tool to pull all of the loops off of the loom.
Creating Felt Stems for Your Loom Knit Pumpkins:

From a piece of brown felt cut a circle approximately the size of a quarter and a rectangle that measures 2″ x 3.5″. Thread and embroidery needle with matching floss.

Using the blanket stitch, sew together the round and long side of the rectangle pieces to form a stem. Need help with the blanket stitch? Check out the full tutorial.
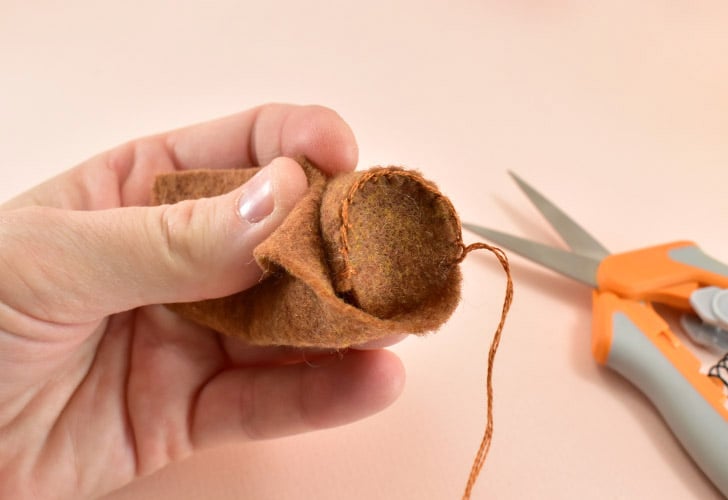
When you get to the point where the felt will overlap itself round the stem, trim the excess. Stitch together the gap to the bottom of the stem. Leave a tail of embroidery floss of 6-8″.
How to Stuff Your Loom Knit Pumpkins:
Take your knit piece and turn it so you are working with the bottom. If you need help, the bottom has the starting tail (shorter). Also the V shape of the stitches will point toward the bottom of the piece.
Thread one of your long yarn needles with 8-10″ of yarn.

The bottom of your knit piece will have a loop on each stitch that is naturally looser than any other stitches in the whole piece. Run your threaded yarn needle up and through each of these loose loops for each stitch all of the way around the base. Always bring the needle up underneath the loop and through before passing onto the next.

Once you’ve run the yarn through all loops remove the needle. Pull both ends of the yarn piece tight to close the bottom of the loom knit pumpkin like a drawstring bag. Push the tails in through the hole into the inside of the pumpkin. Pull both strings as tight as you can to close up the cinch as much as possible. Tie both ends of the yarn into 2 overhand knots to secure. Leave the tails inside of the pumpkin.

Fill the inside of the pumpkin with Poly-Fil until approximately 3/4 full.
Note – the more you stuff the pumpkins the more spread out your stitches will be and the more visible the filling inside.

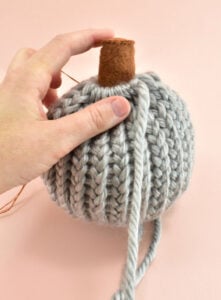
Begin pulling the tail at the top of the pumpkin to begin closing the hole. Place the stem into the hole and pull the yarn tightly for a secure fit. It might be necessary to finagle the pleats around the stem for a neat look.
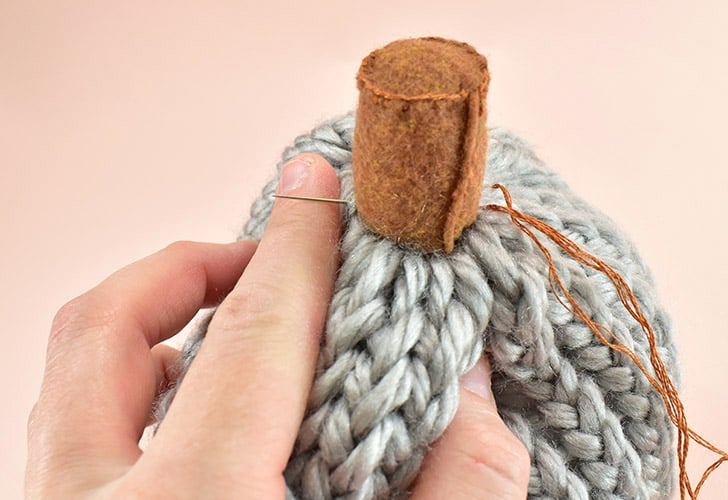
Re-thread your embroidery needle with the tail from your stem. Use it to stitch through the yarn into the stem and out of the other side to secure the stem to the pumpkin.

Push the needle through the interior of the pumpkin and out of the side or bottom. Pull the thread taut and trim. The tail will get lost inside of the pumpkin’s stuffing.
Creating Segments in Your Loom Knit Pumpkins:

If necessary rethread the tail around the pumpkin’s stem into a yarn needle.
Push the threaded needle down in through the center of the pumpkin and out of the center of the bottom. (This is when these long 3.75″ yarn needles come in crazy handy!)

To create your first segment push the yarn needle into the pumpkin where you’d like the segment to run. (For your first segment it doesn’t matter where you start, but needle placement will matter for your following stitches).
Pull the needle all of the way through the bottom center of the pumpkin but leave the stitch loose.

The segment will occur where this stitch is tightened. Make sure this running segment is nice and straight.

Pull the stitch tight to form your first segment.
Push the needle through the top along the stem where you’d like your next segment to be through the bottom. Pull the stitch tight to form the segment. Repeat until your pumpkin has enough sections.
Quick tip – Last year I hooked up some crochet pumpkins that were very symmetrical. This year I wanted a kind of wonky pumpkin akin to an heirloom tomato. For my odd shapes and segments I varied pulling the stitches loosely through to very tightly through. If you would prefer a more symmetrical look, make all of your stitches using even tension.

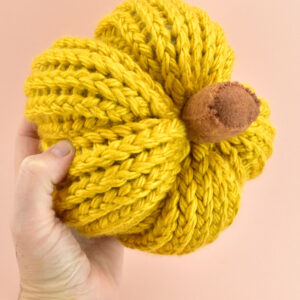
To finish your pumpkin make a few small stitches at the bottom center to secure. Run the needle up through the inside of the pumpkin and out of the side. Pull the yarn taut and snip close.
Loom Knit Pumpkins
Equipment
- Scissors
Ingredients
- Hometown USA Bulky Yarn (or other bulky yarn)
- Acrylic Craft Felt
- Embroidery Floss
- Poly Fil
Instructions
- Loom knit a piece on a round loom that is 6-10" long.

- Thread your yarn needle with matching yarn and close up the bottom of the piece with stitches in each of the outer-most loops. Cinch shut, tie the tails tightly and place inside of the piece.

- Cut a round piece of felt approximately the size of a quarter and rectangle that is 2" x 3.5". Stitch together using the blanket stitch to create a stem.
- Fill the inside of the pumpkin and stem with Poly-Fil. Stitch the stem in place and cinch the top closed.
- Run the threaded yarn needle through the center of the pumpkin and out of the bottom.
- Run the needle back through the center from the top, near the stem and pull taut to create segments. Repeat as desired. Tie off ends and secure.


Notes
