
This post and photos may contain Amazon or other affiliate links. If you purchase something through any link I may receive a small commission at no extra charge to you.
I fell in love with Kumihimo sometime before 2012 and I would whip up braids here, there, and everywhere. And in the last few weeks I found myself really getting interested in dusting off my Kumi disk and getting after it again.
But these days I struggle to make one or two braids in a day. You see, I’ve started developing arthritis in my left hand, the one that holds onto the disk while the right hand moves the cords. Sometimes it is uncomfortable just to hold the disk. And at the worst times my hand just randomly releases and I drop that Kumi disklike it is hot. Which absolutely is the pits because if I wasn’t paying attention right before, I might forget which side of the disk was facing north and that means I have to pay really close attention as I braid. Crud!
So I Decided to Make Hands Free a Rotating Kumihimo Stand.
The whole idea behind this was that I could sit on the sofa with a stand on my lap. My right hand would still move the cords but now my left hand would only need to gently nudge the stand to rotate it along with the disk. No holding required!

And, as it turns out, even on days where my hand wants to curl up into a fist all stinking day long, I can still twist my rotating kumihimo stand with a fist bump. Boom!
Note: The disk used in this tutorial is brand new and the slots are still very tight so it is taking some force to move the cords around. Until the foam loosens up a bit I have been placing my left hand on top of the disk just to ensure the Velcro doesn’t pull up as I work.
Want to be Able to Make Kumihimo Braids without Holding the Disk?
With a trip to the craft store and an online order for the lazy susan hardware you can twist that disk without the need to hold onto it.
Supplies Needed to Make a Kumihimo Stand:
Unfortunately a lot of the items for this project come 2 to a package. You can add the extras to your craft stash or build a second kumihimo stand for a friend!
Round Wood Plaques
I purchased my round wood plaques from Hobby Lobby and Joann. There doesn’t seem to be any difference between the different sizes quality-wise. You can save a lot of money on these by purchasing at a craft store vs. on Amazon.
For my stand I used a 7″ round plaque for the base and it works pretty well in most situations. As I was trying to film how it worked, however, I was in a bit of a tight space with the camera and it felt more wobbly when I had to reach around the camera stand. I realized that a 9″ plaque would also work and be a bit more sturdy in awkward situations but it obviously has a bigger footprint and will need more space to store.
Wood Dowels
You will need 4 equal lengths of 3/4″ wood dowel to make this Kumihimo stand. Simply because I was feeling lazy, I purchased a package of dowels already cut down to 12″. By purchasing a 48″ dowel from a hardware store, you can save a few dollars. You don’t need a fancy saw. A mitre box and simple saw will work just fine.

Lazy Susan Hardware
For this stand you need one 4″ steel lazy susan bearing. This is a pair of connected metal plates that have screw holes. There are bearings in between the plates that allow the two pieces to easily twist so that you can spin whatever the hardware is attached to.
You can also purchase an acrylic or plastic lazy susan and attach your stand to it using glue. If you plan on moving your stand around, even just from the craft room to the living room, I recommend going with the much sturdier screw installed steel hardware.
Kumihimo Disk
I most often like to use a foam Kumihimo disk but you can also use a wood wheel for this project. Whatever material/brand you choose, you need a 6″ round disk for this project. And it doesn’t have to be a new disk, you can use one you already have.
In fact, a disk that is already broken in works much better because the cords don’t stick in the slots and try to pull up where the Velcro holds the disk onto the stand.
Total Cost for this project $16.95 (2 for $22.93) : 7″ plaque – $1.99, 5″ plaque, used 1 from a package of 2 – $3.49, 3/4″ wood dowels, 12″, used full set of 4 = $3.99, self-adhesive Velcro, used 2 strips out of 4 – $1.50, lazy susan hardware, used 1 from package of 2: $5.98. All supplies with exception of the lazy susan hardware were purchased at Hobby Lobby.
Tools Needed:
Thin Drill Bit
The size of this drill bit doesn’t really matter. We just use it to mark the holes so that the dowel slots match up on the bottom and top wood rounds.
Staple Gun
Use whatever staple gun you already have on hand. I used a light duty stapler because it what I already had near me but a heavy-duty stapler will work, too.
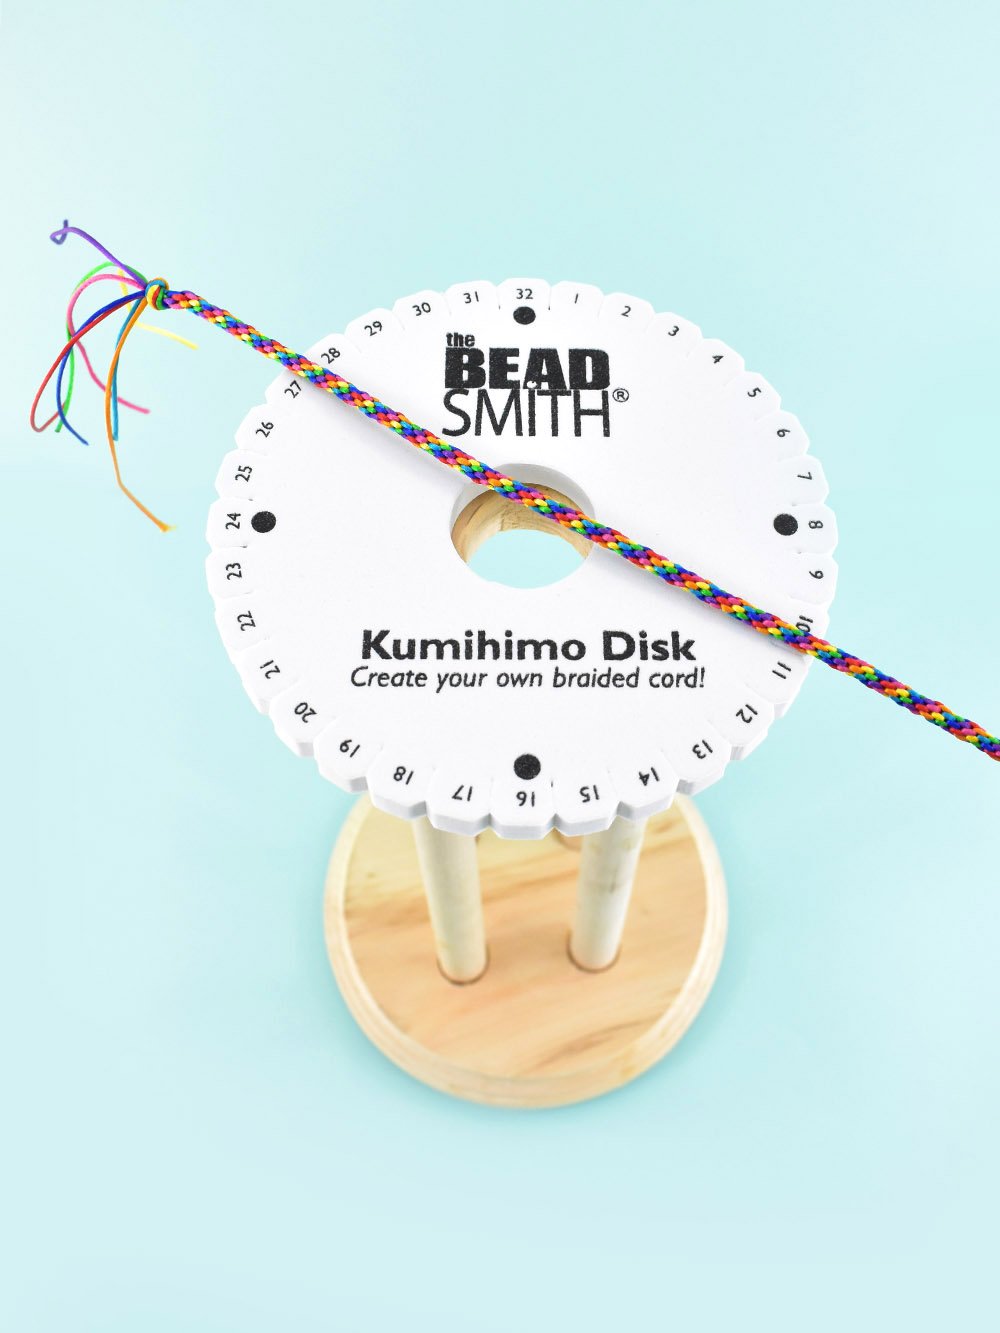
But wait! What is Kumihimo?
If you haven’t heard of Kumihimo before, here’s a little FYI on the quick… Kumihimo is Japanese and it means “gathered threads”. An ancient craft from the 6th century, Kumihimo is the art of braiding cords, threads, ribbons, strands of beads, jewelry wire and so much more into gorgeous ropes.
New to Kumihimo? Check out these beginner friendly Kumi posts:
How to Make a Rotating Kumihimo Stand
This stand uses a 5″ round wood plaque for the top and a 7″ or 9″ round wood plaque for the bottom. The top is small enough that you can place a 6″ round Kumihimo disk on it and have a gap all around the edge so you can easily slip cords into the slots. The wider base makes the stand harder to tip over. For more info, see the notes in the supply list for this post.
Cutting the Center Hole for Your Braids
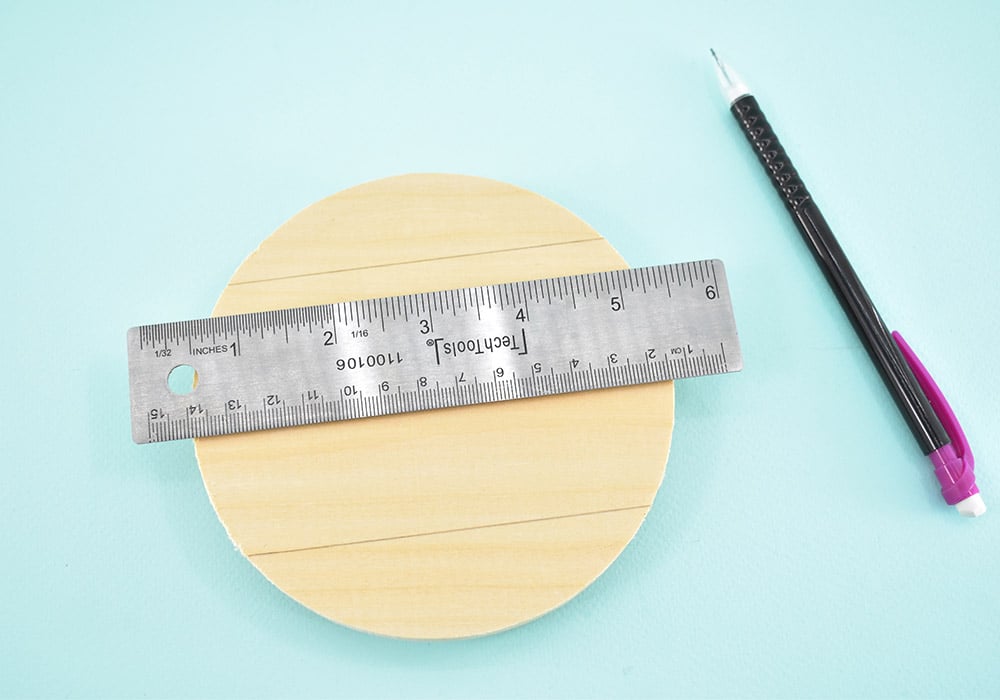
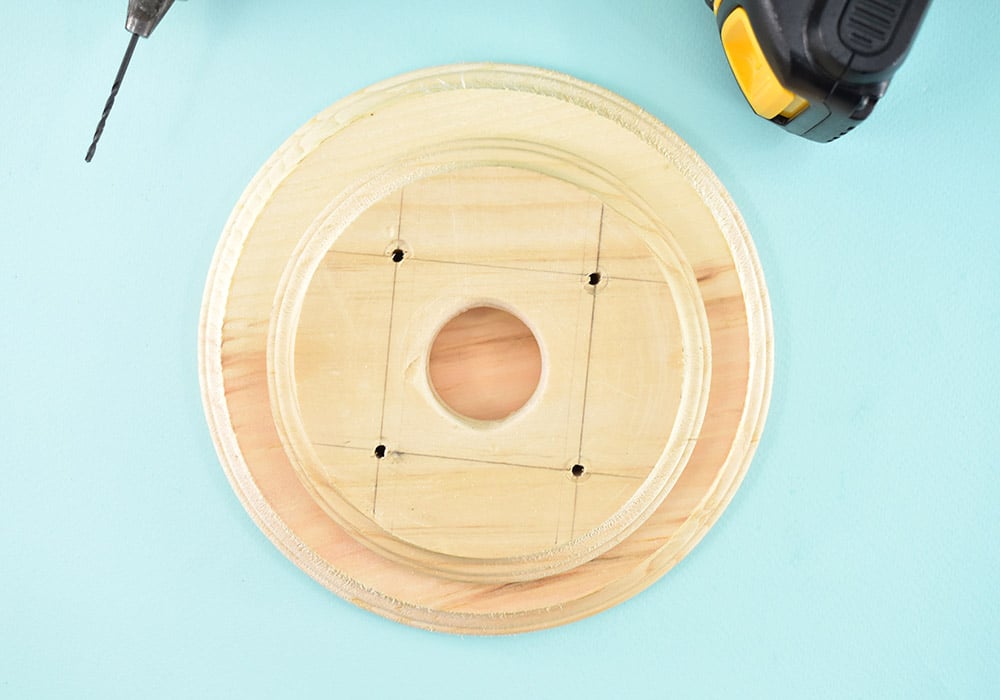
Place the unbeveled side of the smaller disk up on your work surface. Take a ruler and and match up the sides (nearer the top edge) to measure exactly 4 inches and mark a line with a pencil. Mark another line at 4″ moving up from the bottom of the circle, making sure the two lines are parallel and not wonky.

Connect the beginning and end of each line to form an “X”. The center of this X is the center of your round.
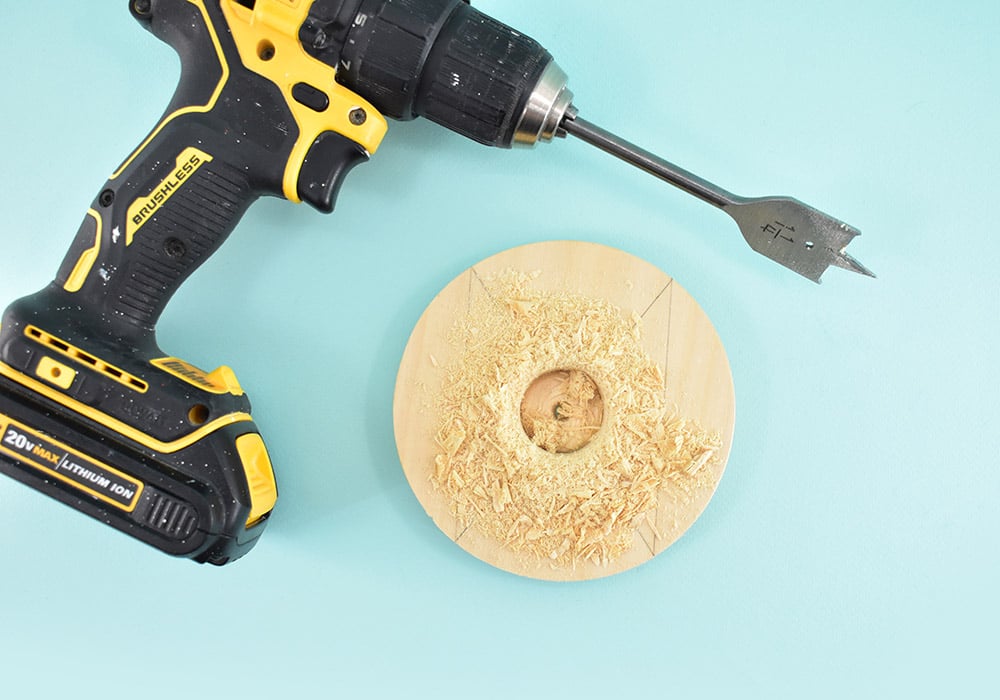
Place a 1-1/4″ spade drill bit into your power drill. Place the point of the bit right onto the center of that “X” you drew. Hold the drill nice and straight and drill a 1 1/4″ circle right smack dab in the center.
Quick Tips: (1) Place a piece of scrap lumber beneath your pieces of wood as you drill holes to prevent drilling into your worktop. (2) If your drill bit begins making a screeching sound as you drill, remove the debris from the hole and then resume drilling.
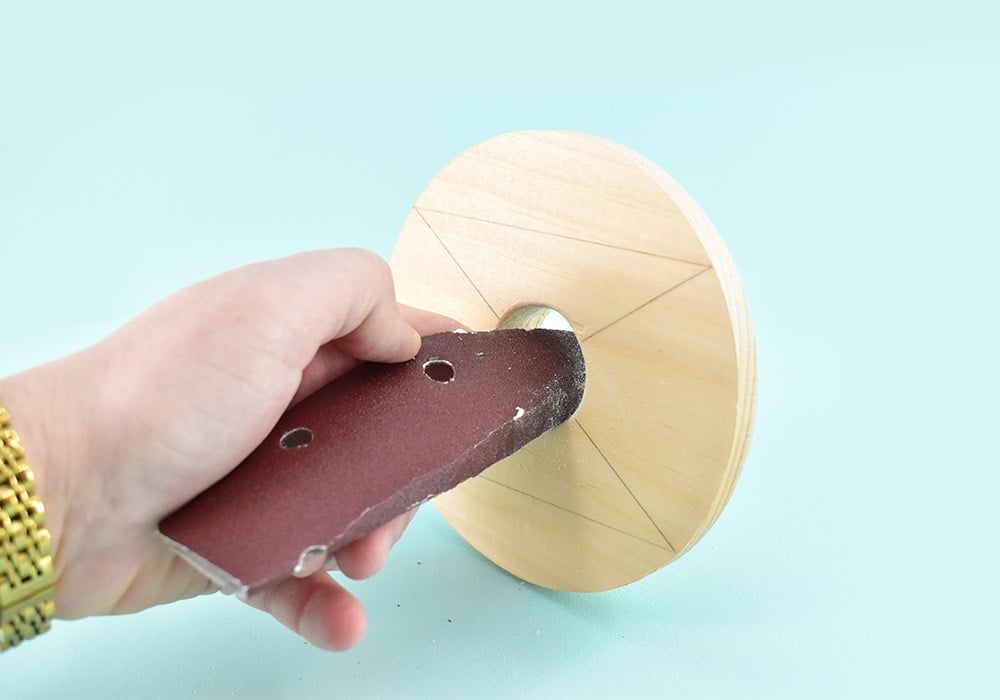
Using a piece of sandpaper clean up any jagged edges.
Quick Tip: When hand sanding I like to use old mouse sanding pads. They have a felt backing that is used to attach the sandpaper to the sander. This backing also makes a great buffer so that you don’t feel the heat from the friction as you sand your items smooth!
Marking the 4 Holes for the Kumihimo Stand Legs

Place the beveled side of the wood round facing up on your work surface. From the top of the round, line up the ruler to where the edges of the inner circle (edge of the bevel) match up at 3.5″. Repeat from the bottom making sure your lines are parallel.
Rotate the round 45 decrees and repeat, making 90 degree angles where the new lines meet with the old, and keeping the new lines nice and parallel.
Quick Tip: This might take a try or two to get good lines. Erase and redraw until you are happy.

Using a small drill bit create 4 small holes where the lines intersect.
Place the smaller circle on top of the larger, both with beveled sides facing up, and center the two pieces as well as you can.

Drill through the holes in the top round into the bottom to mark the placement for your leg holes.
Drilling the Leg Holes in the Top and Bottom Pieces
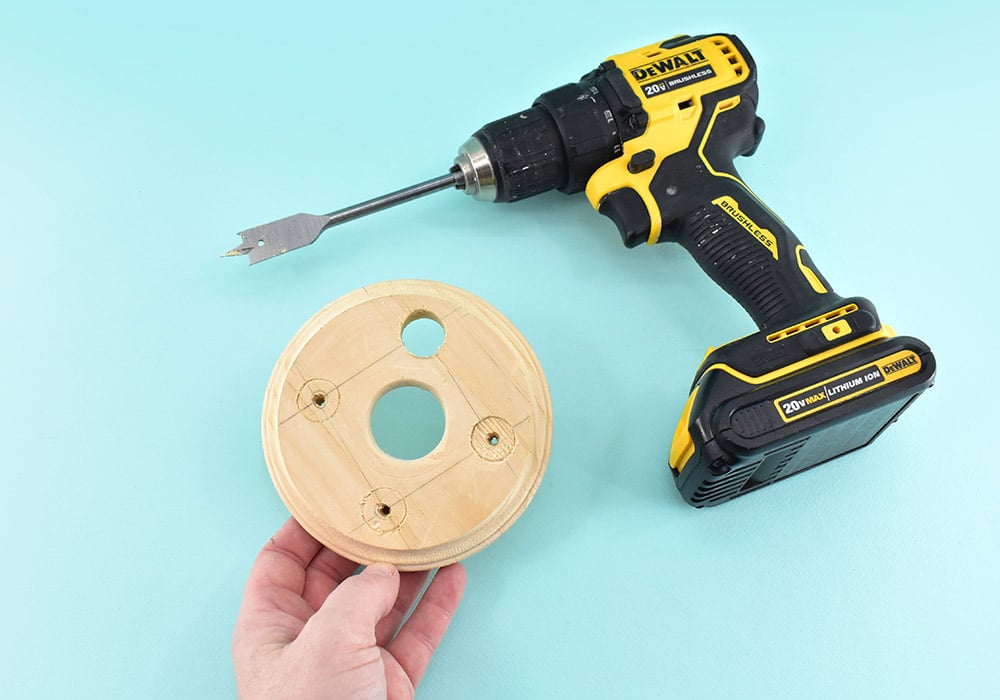
Change to your 3/4″ spade drill bit. Place the center point of the bit into the holes you pre-drilled to mark the correct placement. Hold the drill nice and straight and drill all the way through each.
Quick Tip: The wood is going to try and spin on you while drilling the holes. I typically drill holes on the ground with my knee holding the wood in place. You can, however, clamp the wood in place on a work surface (with a piece of scrap beneath to prevent drilling into your tabletop) to prevent this if it becomes a problem.
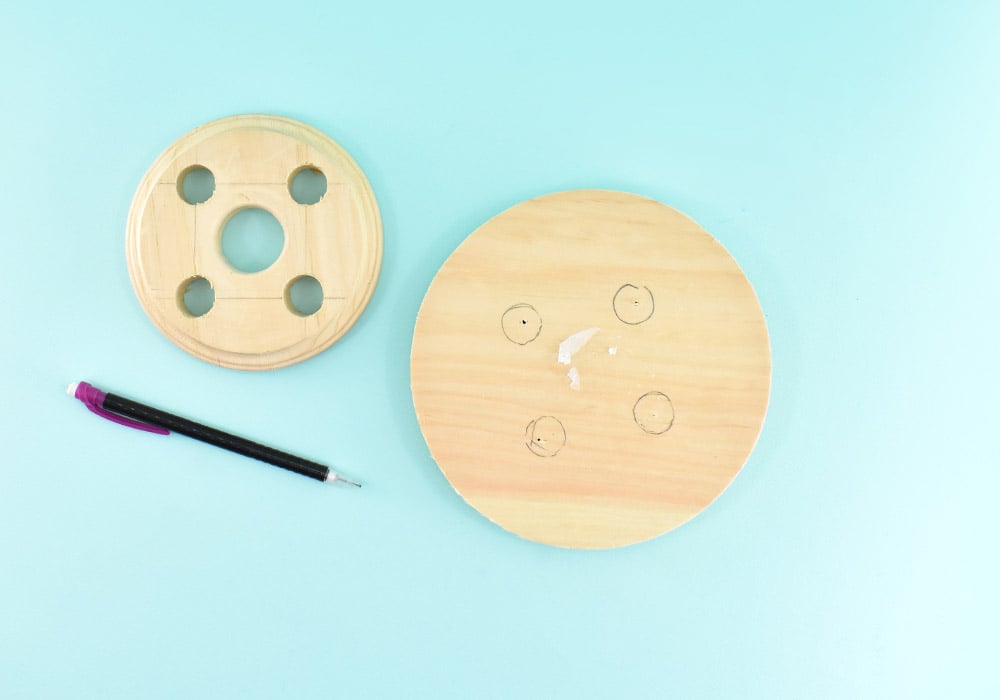
Place the larger wood round beveled side down. Place the top piece onto the bottom and center the larger holes around the predrilled tiny holes you previously created. Using a pencil trace the holes onto the bottom of that round. Drill each hole with your 3/4″ spade wood bit.
Adding the Legs to Your Kumi Stand
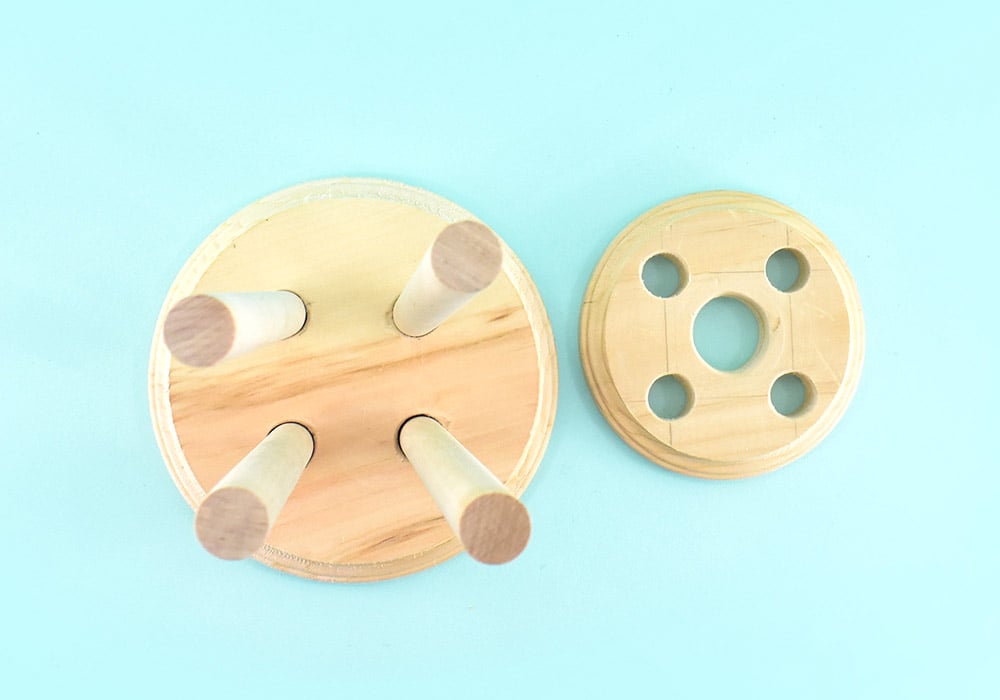
Flip your bottom round beveled side up on your work surface. Ensure that your wood dowels are the same length and trim, if necessary. Push a dowel into each of the leg holes on the bottom piece, making sure the bottoms are flush with the bottom of the plaque.

Keeping the bottom in place, match up the legs to the holes in the top piece, beveled side of the round facing down. Push the plaque onto the dowels making sure they are nice and flush with the top of the round.
Tips: (1) Because our wood dowels are 3/4″ in diameter and so are our drilled holes, adding the dowels should be a snug fit. If the dowels do not easily tap into place, rout out the hole slightly by wiggling the 3/4″ drill bit around the hole. (2) If you need a little force to get the top piece into place, gently tap in the center of the round only. Smacking over the holes can cause the plaque to crack and break.
Leveling Your Kumi Stand
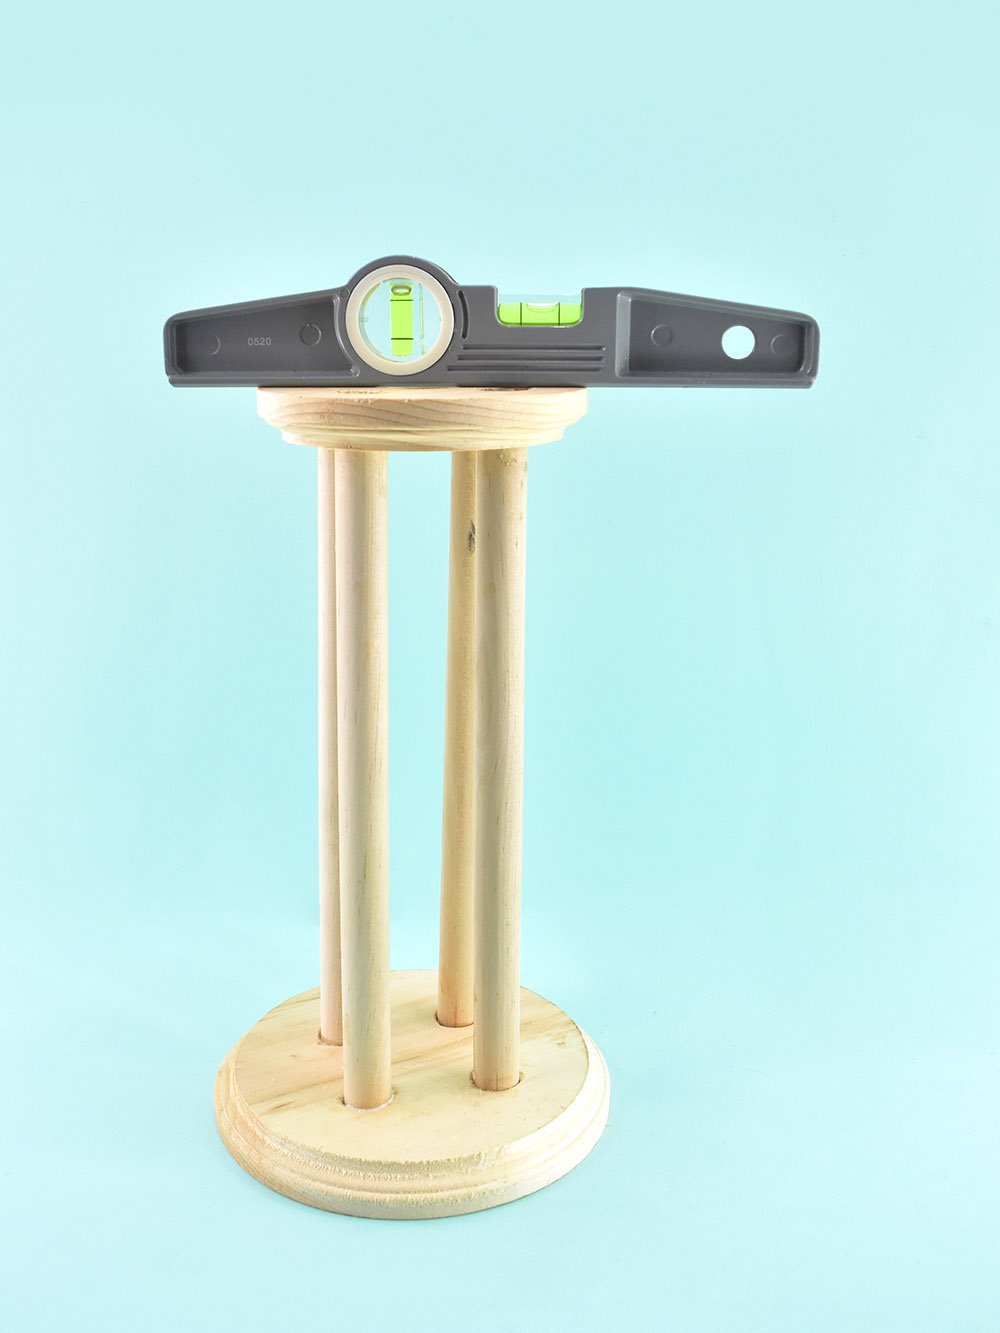
So all of your dowels are flush but sometimes woodworking is kind of funny and maybe your stand isn’t actually level. Place a level on the top of the stand and gently push up or down on the top round until the level reads as level. Twist the stand around and around leveling as needed until it works all of the way around.

To permanently attach the legs squeeze some wood glue onto each dowel. Using something with a straight edge, like an old gift card or a ruler, pull the extra glue off. As you do this you will also fill the gaps. Allow the glue time to dry, a few hours is best. Flip the stand and repeat for the other side.
Using Velcro to Keep Your Kumihimo Disk Attached to Your Stand
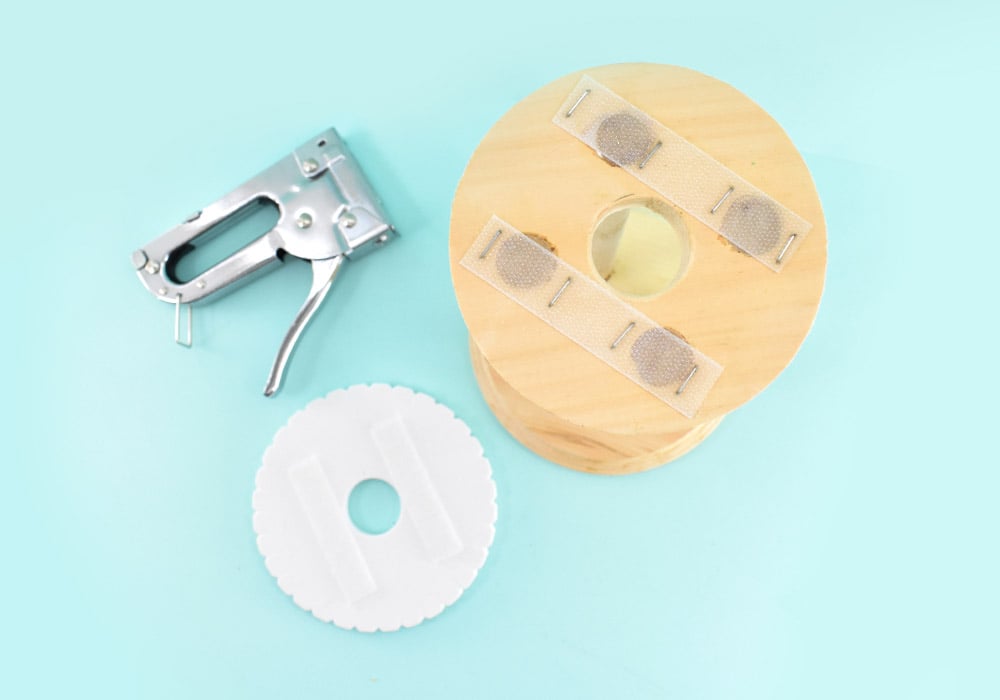
Grab some self-adhesive Velcro and peel to reveal the sticky and stick the scratchy side onto the top of your Kumi stand. Tack down with a staple gun to hold the Velcro firmly in place.
Match up the the softer, fuzzy side of the Velcro onto the strips on your stand. Remove the plastic to reveal the sticky. Push your Kumihimo disk directly onto the the sticky side of the Velcro, matching up the center hole of the disk with the center hole of the stand. Gently pull off the disk and go over the Velcro with some pressure to really make sure that sucker is going to stick.
Putting the Rotating into Rotating Kumihimo Stand
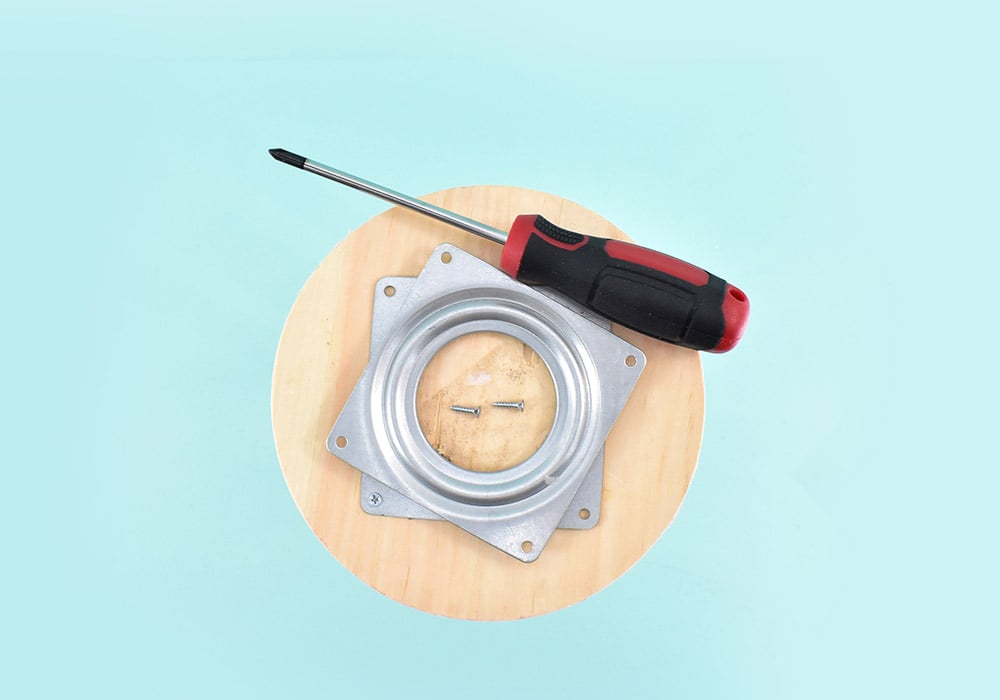
Flip your stand over so that the bottom is facing up. Twist apart the two pieces of the lazy susan hardware so you can see the screw holes on the bottom piece. Using a screwdriver and #4 – 1/2 wood screws, attach the plate to approximately the center of the stand.
Tips: Don’t use your drill for this step. You don’t need all that much pressure or torque and you can easily rout out your screws.
How to Use Your Kumihimo Stand

Pop your Kumi disk onto your stand matching up the Velcro strips.
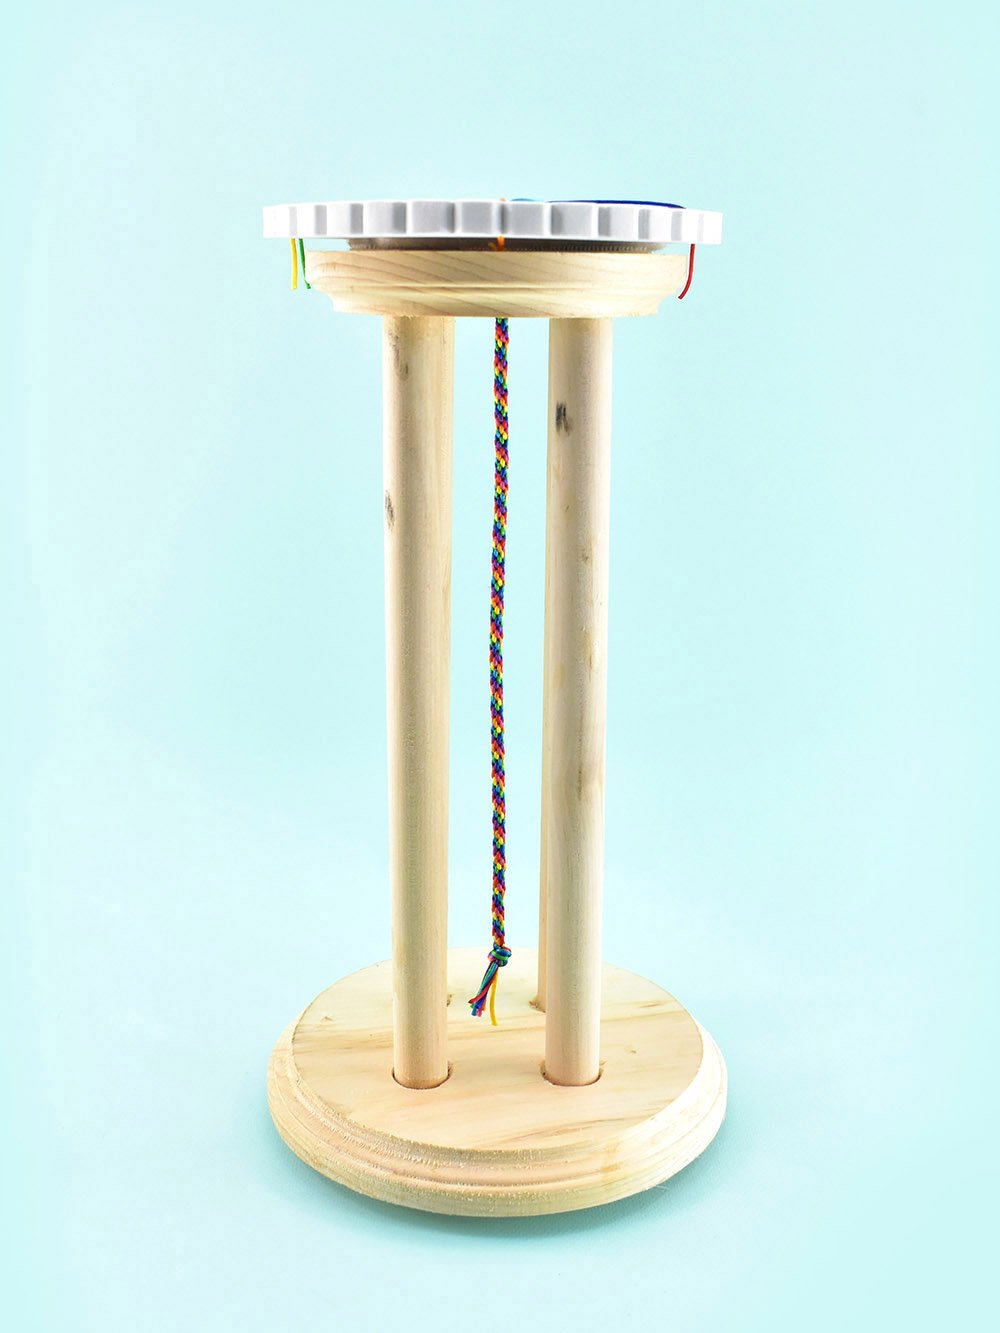
Add your cords in the correct places either before or after stocking the Kumihimo disk onto the stand. Work your braid as usual.
Twist the stand with a gentle nudge after every movement of the cord to knock some braids out with your new Rotating Kumihimo Stand!


