
This post and photos may contain Amazon or other affiliate links. If you purchase something through any link I may receive a small commission at no extra charge to you.
The very second I heard about Kumihimo I was online ordering a starter kit for myself. The. Very. Second. When it got here I jumped around the living room like a loon clutching my bubble mailer. I hadn’t even opened it yet.
When I opened it, I jumped right in. The directions were on the backside of the product card and it was easy enough to follow, though I did get a bit irritated. In my set was enough 1 mm cord to make 8 bracelets. Russell and I sat down to watch a movie, me with my new best friend, Kumihimo disk, and got to it.
By the time The Guilt Trip ended, I had used up all of the cord that came in my kit. Russell then thought to ask how it was going and I can only assume that the smile I gave him was that of a zealot as I displayed my arm full of new bracelets. His only response “so you like this kumi thing, huh?” Yep, yep I do.
So here I am now, trying to get you addicted to this fun little braiding technique, too! For this you will need:
- Kumihimo round disk
- Cords, rattail cords at Amazon, the Etsy shop I used (2mm)
- OR Kumihimo starting set
- Scissors

Before I got my disk in the mail I ordered a boatload of 2mm satin rattail directly from China through Etsy. I am so bad at understanding those little mm sizes, it drives me nuts. This is a lot thicker than I had anticipated and my braids are really chunky. A visit to the bead store told me that the norm is 1mm or 1.5 mm cord for Kumihimo.

Cut about 4 pieces of cord around 39 inches long. Depending on the thickness of your cords you’re starting with, you may need more or less but this will be our practice experimental braid. Gather the middle of the four cords and tie a knot.
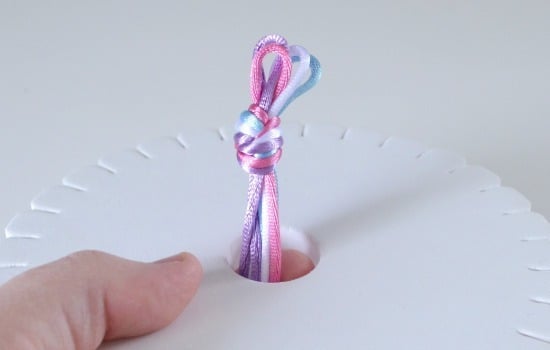
Push the knot through the center of your Kumihimo disk.
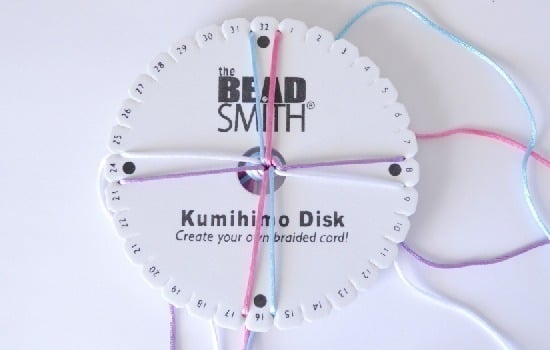
Now we’re going to lace our strands through the beginning slots on the disk. Like you see above. Now on your first use, the slots are going to be kind of tight. Don’t be scared to pull a bit to get them firmly in place. It won’t hurt the disk at all.

Your first pieces will be placed on either side of the starting point dots on the disk. If you use four different colors, here is how you’ll set up your disk . Note that the arrows are pointing to the same color.

And here is how the braiding actually works. With the disk facing you with the text the right way, take the bottom left strand and move it up to the left of the cords at the top.
Take the one at the top that is at the far right and move it to the right of the cord at the bottom.
Turn the disk 45 degrees. The directions showed me to go counter-clockwise but I always get confused so I just go clockwise and have had absolutely no issues with that.
Keep repeating: Bottom left to top left. Top right to bottom right. Turn.

As you continue to braid, the developing cord will come out of the back. If you have cats, beware because they will be all up in your business.

When your cord is as long as you’d like it, or if you run out of enough to continue braiding, grab the braid tightly so that it doesn’t come undone on you and remove the laces from the slots.

Carefully knot the end. If you’re using the satin rattail, you can take a lighter and hit the ends with a little bit of flame to seal off and keep from fraying or unraveling.

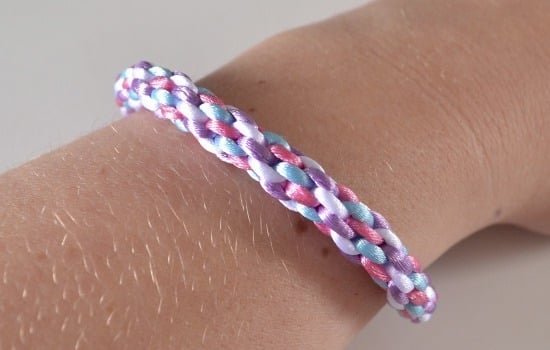
Bring the dangling cords and pull through the loop at the other end and tie on to secure and you’re all set. Like I said before, the fatter your cords are to begin with the bigger your finished braids will be. I used 2mm and I think I prefer the daintier 1mm. I’ll get in here soon and show some examples for you but this is a lot of info for one day, I think.
Hoping you have fantastic plans for the weekend!