
This post and photos may contain Amazon or other affiliate links. If you purchase something through any link I may receive a small commission at no extra charge to you.
I have been scared of spiders and all things creepy-crawly for my whole life. As a kid, I’d collect cicada shells and I’d panic when I grabbed one that had something living still inside of it. I would gather together their shells though I was terrified of what had just been living inside of it. Why? It was a competition. And just like everybody else in my family I am C-R-A-Z-Y competitive and Imma win.
For the last few months, though, I’ve found myself endeared to a spider living in my shower. At first, I was terrified of him but I really try not to kill something just because I’m scared of it. Unless it’s dangerous. Or poisonous. If it’s dangerous or poisonous then all bets are off. That business will be squished with a flip flop and no remorse. (But a whole lot of girly shrieking and sometimes tears. Okay, always tears.)

So how did we get to the point of making spider crafts?
My little shower spider would hide away from me behind my shampoo very often. If I knew he was back there I’d wait until the next night to wash my hair. It wasn’t ideal but, again, not gonna kill this thing. (But also not gonna risk touching it.)
But one day I wasn’t thinking and this little dude got on my hand and then hopped off and I realized he doesn’t want anything to do with me, either. And so these days we cohabitate quite well. Though it might be a weensy bit ridiculous, I’m proud of myself.
I’m not in such a panic anytime I see other bugs, which I think is really good for general well being. Especially since I almost died and got pulled over freaking out and driving like a moron because a ginormous leaf mantis thing magically appeared in my car one time.
And I guess I actually kind of like spiders now. I sort of check out their webs rather than blindly freak and knock them down. They’re okay. Heck, I even made a couple pom pom spiders and crocheted up some webs for them, too, this Halloween season!

What do you need to craft a spider pumpkin?
- Tiny pumpkins (7)
- White spray paint primer
- Black, Red and White Paint Markers (grab a set with all 3 colors already in it here)
- Black craft pumpkin
- Hot glue gun
- Galvanized Steel Wire
- Needle-nose pliers and wire cutters
- Giant black chenille stems (need 24″ per leg or 16 feet, I used 3 packages)
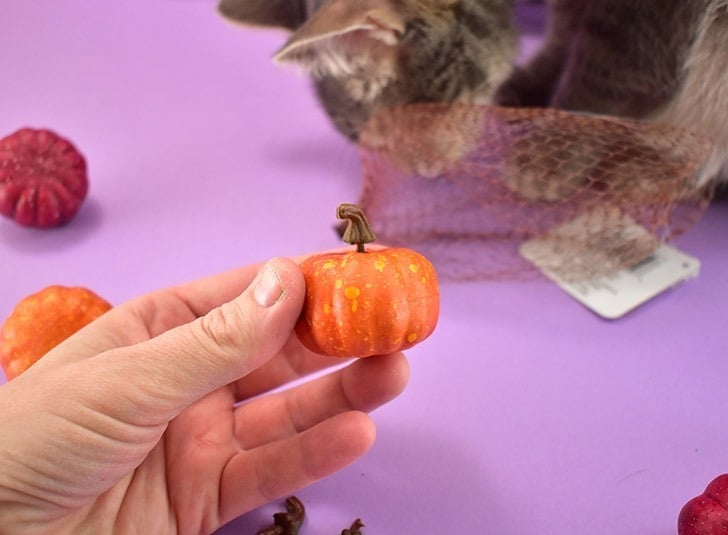
In the fall decor aisle of your craft store look for little pumpkins approximately this size. These were purchased from Michael’s.

I purchased my black craft pumpkin from Walmart because I like the stems better. They’re fatter, taller and more apparent so you notice that this is a pumpkin more easily.
In the supplies list, I link to thegiant chenille stems that make these legs so awesome. Currently, they are crazy expensive on Amazon but they sell for $2.99 a package at Michael’s and you’ll need 3. If you purchase online when they do their spectacular 40% off online purchases picked up in-store (check the banner at the top of the site to see what is the current special offer) they will cost you about $5.40 before taxes.
How to make the eyes.
For your finished spider pumpkin, you will need 7 small pumpkin eyes. My bag came with 9 so I painted them all and used the best 7.

Remove the stems from your small pumpkins and insert a long toothpick or skewer in its place. Spray paint your small pumpkins with white primer and allow them to dry. A box with small slits cut around it or chunk of foam from delivered packages makes a good way to dry all of the pumpkins at once.

Using a black paint marker draw a black circle in the middle of each pumpkin and fill it in. Set off to the side to allow to dry.

Draw a red ring around the black circle using your red paint marker. Allow to fully dry.

Using your white paint pen, draw a small white dot on the border of the black and red circles and, again, allow to dry.
How to make the legs.
*Note, if children are making these spiders you can omit the sturdy (and sharp) galvanized wire and just make legs using the fuzzy pipe cleaners with basically the same steps.

Cut 8 legs 23-inch from galvanized steel wire. Make a bend 8 inches from one end to form the top bend in the legs like seen above.
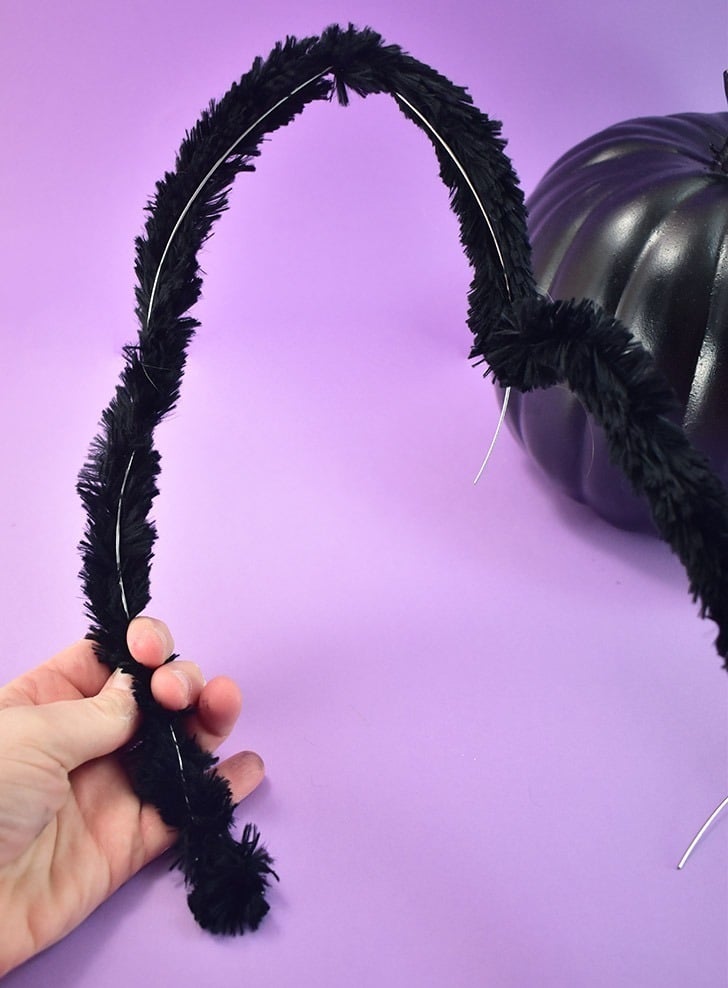
Wrap a large black pipe cleaner around each leg. Start at the top (where it will attach to the body) and wrap it around the leg. Pinch it in place 4 inches from the top bend and then wrap around covering the missed areas. Finish at the feet.
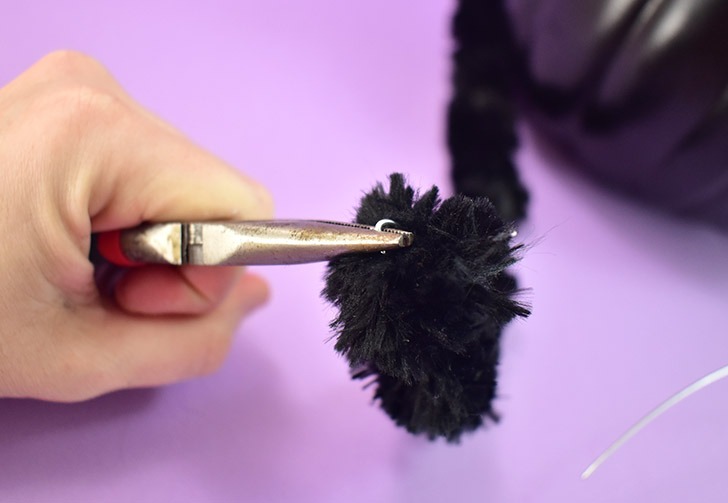
Since children will grab this off of your porch we need to secure all of the sharp metal edges. Using needle-nose pliers, simply curve any wires, especially at the ends of the feet, into themselves to prevent harm. Refluff your fuzzy stem to hide it away.
How to finish your pumpkin spider.

Using hot glue affix your eyes to the front of the pumpkin. Place them nearer the top, practicing placement before committing with hot glue.
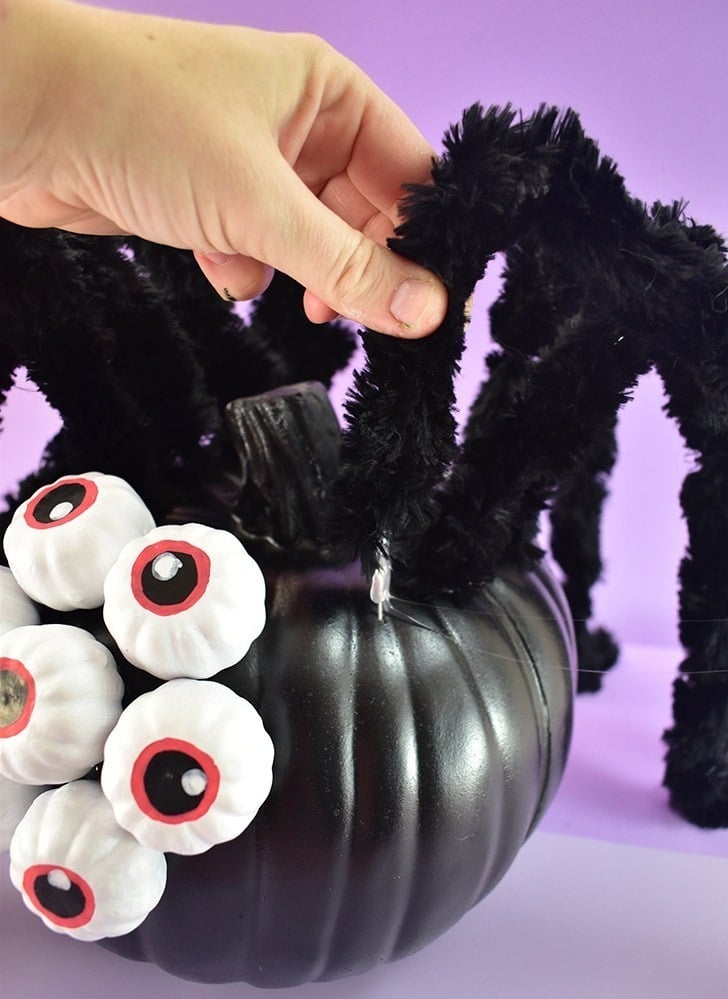
Poke the steel wires into the body of the pumpkin, 4 on each side, nearer the back until the fuzzy chenille meets with the pumpkin’s surface. Make sure you’re happy with their placement and change if not (it just leaves a tiny hole so don’t stress if you need to move them). Pull each leg up and apply a dollop of hot glue to the wire and push back in, holding until the glue has firmly set. Repeat for the other 7 legs.
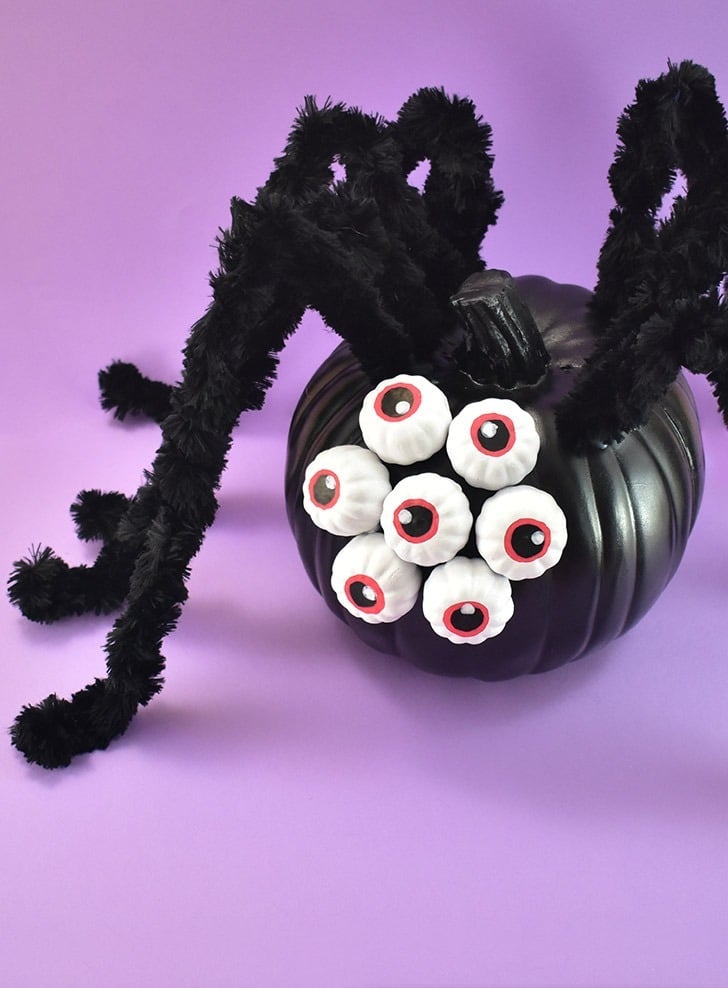
Enjoy (and maybe name) your spider!

There he is! I haven’t named my spider but I’m pretty sure he’s a boy, though I couldn’t tell you why really. Maybe I’ll call him “Sly” :)

