
This post and photos may contain Amazon or other affiliate links. If you purchase something through any link I may receive a small commission at no extra charge to you.
So I’m just totally realizing how Easter heavy my week of crafting has been. Not sure what’s gotten into me but we’ve knocked out 3 Easter crafts this week with more to come. Wow! My quest to make the coolest flippin’ Easter eggs in the whole wide world continues! In 2015 it was Galaxy Easter eggs that went absolutely nuts, shut down the blog for so much traffic again in 2016 (almost 200,000 visits on a SINGLE day last year!). Remember those?

I almost didn’t even share these on intergalactic ova the blog because they were so dark that I figured nobody would like them for Easter, a holiday chock full of more pastels than you can shake a stick at. But after sending a pic to my sis she was adamant that they really, really needed to go up on the blog. And I trusted in that and I’m so glad that I did!
This year I’ve got a similar kind of a project, also quite dark but so geeky cool that I just had to share them… mood ring Easter eggs. How does that work? Well these eggs look plain ol’ black until they start to change temperatures from the warmth of your hands, a blowdryer, your breath, whatever. With that temperature change the solid black morphs into that iridescent brown, red, green, blue thing that happens in a traditional mood ring. So cool. Literally. So. Cool.

Want to learn how to make them? Heck yes, you do! First up, here’s a video tutorial and then below is the regular ol’ tutorial with pictures. Check out whichever works best for you! (and just FYI, I cannot show off the color changes without these flourish-y magician hands :)
For this project you will need:
- Mood Paint
- Chalkboard Easter eggs (I could only find them at Target this year)
- Smooth bristled paint brush
- Wood skewers
- Foam block
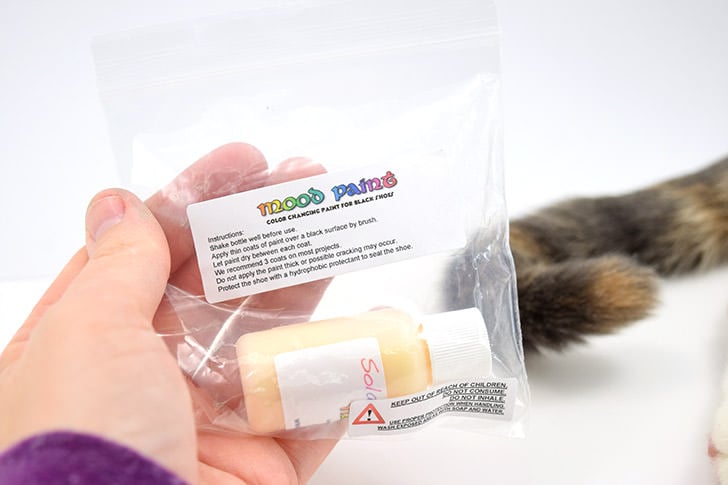
So, this is the key to making Mood Easter eggs, Mood Paint from over at Solar Color Dust. This is the same place where I got the scented pigments to make my homemade scratch and sniff paint. Now this stuff is not cheap. It runs $20 for 150ml. Oh. My. Goodness. AmIright? But wait a second… this stuff goes so far. Like, I emailed the people over there at Solar Color Dust asking for some advice about how much I would need for another project I have in the works and I was told that a little bit goes a long way.
Now, I’m so not going to lie but when I ripped open my package and actually saw that little bottle and realized how little 150ml is I was like, oops. Did I just waste 20 bucks? But thankfully I was given the straight up truth because this stuff goes on for days and days and days! I made a dozen mood Easter eggs and I used the tiniest, tiniest amount from the bottle that I’m completely amazed. And, on a side note, I’m totally in love with this Solar Color Dust because they have the COOLEST stuff and because their customer service is top notch. I’m not even sponsored or affiliated or anything. I’m just totally digging their business and playing with their nifty products. But let’s move on.

Grab some wooden skewers and pop your chalkboard eggs onto them (there should be a hole in the bottom, or if there isn’t there is typically a place where a plug has been put in place that easily pops out when you push the skewer up and into the egg). Be warned, cats think this is a toy.

While you’re working on these guys I really, really suggest stabbing the skewers into a foam block. This keeps them from touching anything so they dry well and don’t roll all around messing up your paint job. This particular process also works really well for Christmas ornaments, just FYI.
Open your itty bitty bottle and keep a serious eye on your cat craft assistant, should you have one, because you don’t want to spill this stuff and waste it. Grab a small soft bristled paint brush and see if it will fit inside of the little bottle. This little brush means we can dip right into the paint without having to pour any onto a palette or paper plate or whatever to have the excess left behind wasted. Just make sure your brush is super clean. Old and stained is okay, but make sure no color from old paint or whatever comes off when the brush is wet.
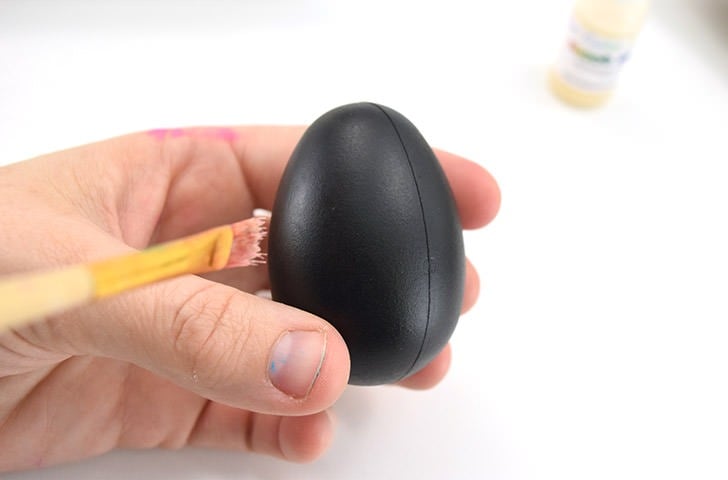
Brush on an incredibly thin coat of paint onto the egg. To do this I barely dipped my brush into the bottle, the bristles essentially only picking up a drop or 2, applying it to the egg and then quickly spreading it about. For each egg I did this 2, maybe 3 times. I’d start at the bottom, working my way up to the top.
You’re going to apply 3-4 coats in this exact same way, allowing the eggs to completely dry in between each layer. I found that 3 coats gave me good results, but 4 gave me super quick, totally awesome colors results. And since it was literally only a few drops of paint per egg that fourth coat made a minimal dent in how much paint I have left for my future projects it was a no brainer to apply the 4 coats.

Once these guys are completely dry they will change colors with heat from just about any source. When they cool down, again, the colors change and morph before your very eyes as they return to totally black. Now if you use something like a blow-dryer to play with them they’re going to take longer to cool down. But with heat from your hands the process is pretty quick and you can sit there and just play with one for days and days :) Trust me. I tossed one to my Mr. Rob and he looked at me like, why did you just hand me a black egg and then he looked down and saw it was changing colors and thought it was massively cool. ‘Cause it is. :)
Again, I’m not going to play like the paint for this project is cheap because it isn’t BUT I’ve been playing with a lot of really neat things lately and I have to say that this one is probably my favorite. Okay, it totally is. Because of how amazed my little nephew was by these mood ring Easter eggs, and the fact that I have a lot more paint, even if it is in an itty bitty bottle, for more projects and experimentation, I would most definitely purchase this stuff again (and probably will!)

Can you just use an egg that has been painted black or does it have to be a chalkboard egg?
You can paint any eggs black. It’s an extra step but doesn’t affect the end result. I’d suggest using a matte or chalk paint for the best results.
Hi there I really want to make these for my son as he has to decorate some eggs for school but can’t seem to find the eggs anywhere. Is this the only egg that this paint will work on. Thank you
Hi, Michaela! You can purchase white dyeable plastic Easter eggs from craft stores, Walmart, or Target. They are also available here at Amazon. Give them a black coat of paint (I recommend a chalk paint for the matte finish) and give it plenty of time to dry and that will work just as well.
Can I paint wooden eggs with black paint?
That would work really well.
Hi Allison,
I’m so impressed of your creativity.
That’s really cool.
Does the mood ring paint work on real cooked eggs, too?
Love to see more from you.
Yours, Andrea
While the paint would work on real eggs they wouldn’t be edible anymore. And the paint is on the expensive side so I’d really use fake eggs you can keep for next year!
Hi and greetings from Dubai! I love these and am trying to order the mood paint through the link on your sit but its not showing a product and when I’m going on the vendors website I cant figure out which one to get. Can you please help me.
Hi, Sarah! Sorry about the broken link and thanks for the heads up!
The paint for the mood paint they call “Liquid Crystal” – I found several listings with various options here: https://solarcolordust.com/search.php?search_query=liquid%20crystal§ion=product
On their shipping info it says they can ship to pretty much anywhere in the world with some restrictions on some items to some locations, so hopefully they can send it to Dubai!
I was also able to find some listings on Amazon by searching for “thermochromic liquid.” So it’s an option to try there, also. Let me know if you need any more assistance and good luck!
Have you tried using the mood paint on the regular colored easter eggs? does it still change colors? or is it just not as effective?
Honestly the paint works best on black but I have tried other colors. The darker the color, like dark purple, the better it works but it’s never as vibrant as on black. It absolutely does not work on lighter colors like pink or yellow. Hope that helps!
They look amazing and the website selling all those glitter and holographic things is sheer torture for anyone addicted to shiny things <3
Would this work on white painted eggs, or does the color change only work over dark paints? Thank you! Cool project!
Hi, Andi! Unfortunately, you need a dark base coat for the mood paint to work.I hope you can find a way to make your vision work :)
I love these! How many eggs do you think you could paint with one bottle of paint?
Thanks!
Oh, goodness… quite a lot. Maybe 3 or 4 dozen?
Loved these! I’m wondering if. You have to start with black eggs or if it would. Work with colored plastic eggs.
The colored plastic ones are super smooth and can be a pain to paint but if you don’t mind the extra work to prime them they should work okay :)
Are they still food after painting them?
No. The paint is not food safe. I highly suggest you use fake eggs made of plastic or wood.
This. Is. AWESOME!!!
I’m definitely going to invest in this paint.
So glad I found your site.