
This post and photos may contain Amazon or other affiliate links. If you purchase something through any link I may receive a small commission at no extra charge to you.
So I’ve had this project in my mind but I haven’t quite known how to complete it. Plus, I need 6 of the exact same thing which with DIY can be daunting because no two things are ever EXACTLY the same when you make something by hand. And then I thought if I could make one part out of polymer clay and another part out of resin, I’d be in business! But how could I make the thing I wanted be exactly the same every time?
So I bought some Amazing Mold Putty to make molds for polymer clay and decided to do a few test runs to see exactly how this stuff works and if I could actually manipulate it for what I need.
I decided to use something fairly detailed and difficult for my first mold so that I could, well, gauge the difficulty of using the stuff. And to be honest I’m not sure why my brain went to “let’s test this with something waaay harder than we actually want to see if the stuff will work well for something that is waaay easier.” But that’s what happened so here we are!
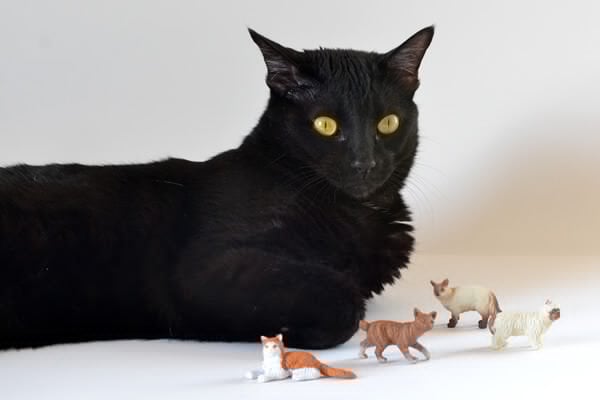
At any rate I bought these cute kitty toys from Darby Smart with absolutely no idea how I planned on using them (and I still don’t, really) but I thought they’d be awesome for a first go. And really hard, but whatevs.

There are two different types of putty for making a mold with Amazing Mold Putty – white and yellow. You take two equal sizes of each of the putties, making sure that they are big enough to cover your full object when mixed as one. Now there is no science to this as far as I can tell. I thought I overshot but I didn’t. This stuff is expensive so I didn’t want to waste anything but in the end I should have mixed just a bit more than I thought I needed.
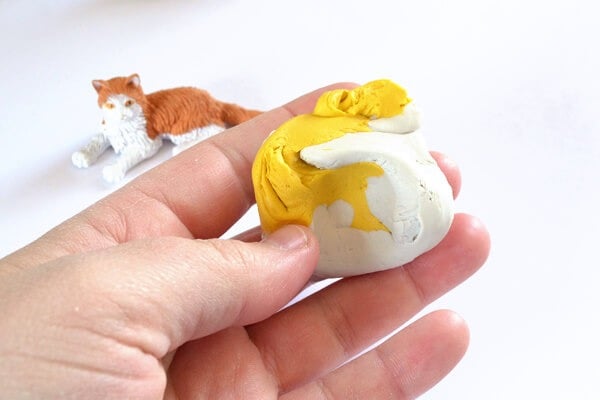
Take the two bits and mix them together to form one. FYI – you have THREE minutes to mix and make your mold putty together and make the mold so get to work quickly!

Mix until totally blended and then roll into a ball to minimize the creases.

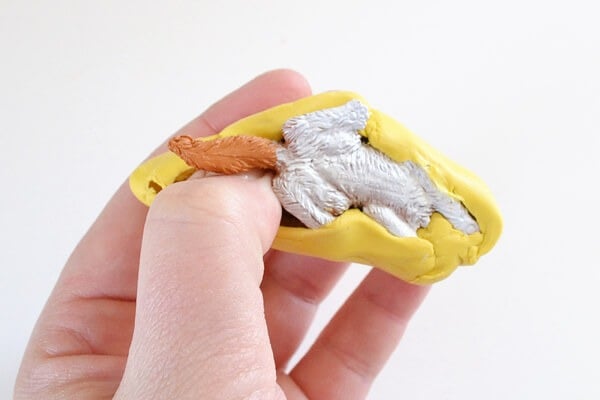
Form over your shape trying to push the clay into any odd nooks or crannies. When happy with your coverage allow to sit until cured. I let mine sit for an hour just to be safe.
Pop your original shape out of the mold. This may take some finagling because the stuff is really on there. I pried the tail bit loose with a tiny screwdriver and then was able to pop it the rest of the way out no problemo.

And look at all of that detail! You can also see where I barely covered one of the ears. See how you can kind of sort of see light through an area in there?
In hind sight I wish I would have used a sharp razor blade to remove the excess mold material from the bottom. But I didn’t which lead me to having a wonky bottom on my shape. But you live and learn and you don’t have to make my mistake.

To use with polymer clay simply jam that stuff into the mold.
And this is the awesome part… put it straight in the oven per the directions of your polymer clay! Yep, the clay stays inside of the mold and bakes so that it is PERFECT when it comes out!

Pop your copy out of the mold much like you did your original. And say hi to Marla back there.
And there we go! Now I have NO idea what I did wrong with the back of the thing (see how mine has a weird, pointy hump) but I do know why the bottom went wonky. All in all, for a first attempt with Amazing Mold Putty with a more difficult shape than I really should have chosen, I’m very happy with the results. And the fact that I can bake the clay inside of the mold, well, that means that each time I make one of my six items, they’ll all be exactly the same! It’s a win in my book!
So what do you think? Is this an awesome new wonder craft to add to the stash? And what exactly would you make molds for polymer clay of?