This post and photos may contain Amazon or other affiliate links. If you purchase something through any link I may receive a small commission at no extra charge to you.
When you spend a lot of time alone like a lot of us have here lately you start to think about everything. Or at least I have been. And out of the blue, one day, I remembered that a long, long time ago my grandparent’s had a mailbox on their house. I always thought it was neat because we had one of those multi-house mail boxes where you had to walk down the street to a big silver cube with a lock box for each address. The mailman literally walked up the driveway, onto the porch and came right to my grandparents’ door every time they had mail. You didn’t even have to put more than your arm out the front door to grab the mail!
These days when I’m not thinking a lot of my time is spent gardening. I LOVE container gardens because they can add so much decoration and color. I’ve got 2 pretty pots right by my front door. And then I’ve got 5 pretty big pots on the back porch. I love having a variety of plants in each container. I want something tall and possibly spiky, like a Dracaena. And then I want something that will grow over the planter’s edge and hang down, like Creeping Jenny. The rest I try to fill with bushy little plants of varying textures and heights. Boom. Interesting planter done!
It also doesn’t hurt that planters are small so you don’t need a ton of plants. If you’re new to gardening I’m going to let you in on a little secret… gardening can quickly turn into a very expensive hobby.
But today I’ve got a little container garden with big impact.
Using 3-4 small plants a mailbox planter that hangs on the wall is visually interesting and won’t break the bank. And at just over 2 months growing and thriving, this adorable little container garden is definitely a success! Want to see how I made my hanging mailbox planter?
To make a Mailbox Planter you will need:
- Wall-Hung Mailbox
- Fabric (I used a stained flour sack cloth)
- Moisture Control Potting Soil
- 3-4 Small Plants
Sourcing your Mailbox
My mailbox is black and basic but when I noticed I could get a used one from Amazon for less than $11 I was all in. However, I really preferred the pretty colors of these bright architectural mailboxes. But I didn’t’ really know how well this would turn out so I decided cheaper was better in case my project failed and my plants died.
Now that I know that this works and works well, I just might buy that gorgeous YELLOW mailbox and have another mailbox planter :)
Remember that places like Habitat for Humanity Restores would be a fab place to find a used mailbox. And don’t discount thrift stores, either.
Potting Soil
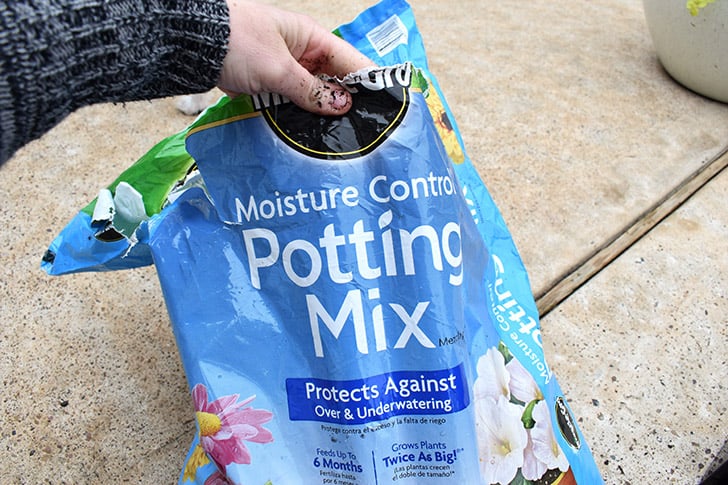
It took me a while to realize that the potting soil you use can totally make a difference in whether or not your plants live. Though it’s a bit pricier than other potting soil, I strongly recommend Moisture Control by Miracle Grow. Right now on Amazon, a bag is very reasonably priced, but their prices are infamous for crazy fluctuation. If the cost there seems a bit high, look at Walmart as that’s where I tend to get it for the best price.
Plants
One of the best things about gardening is the freedom to be creative and use whatever plants you wish! If you like the look of mine, the plants that I used are:
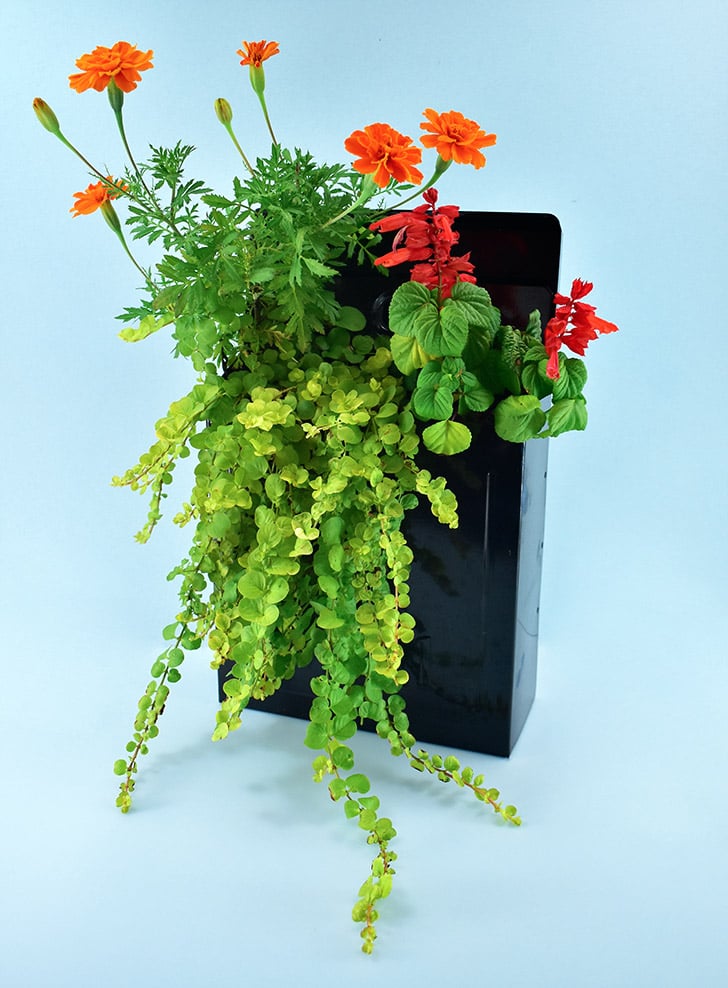
- Marigolds (a super cheap plant)
- Creeping Jenny (considered a shade plant but will grow in sunlight, just turns yellow-ish rather than green)
- Red Salvia (gorgeous tall and spiky red blooms)
How to Prepare a Hanging Mailbox Planter

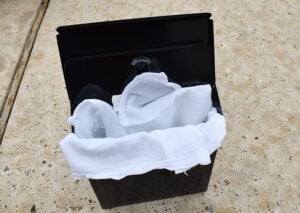
This is what the inside of your mailbox will look like… There are also two flaps on the top. One that is the decorative lid and another that locks in place.
There, also, are my pasty winter legs and my feet. And despite it being chilly enough that I wore a sweater, I went around in my bare feet because, you can take the girl out of Oklahoma… :)
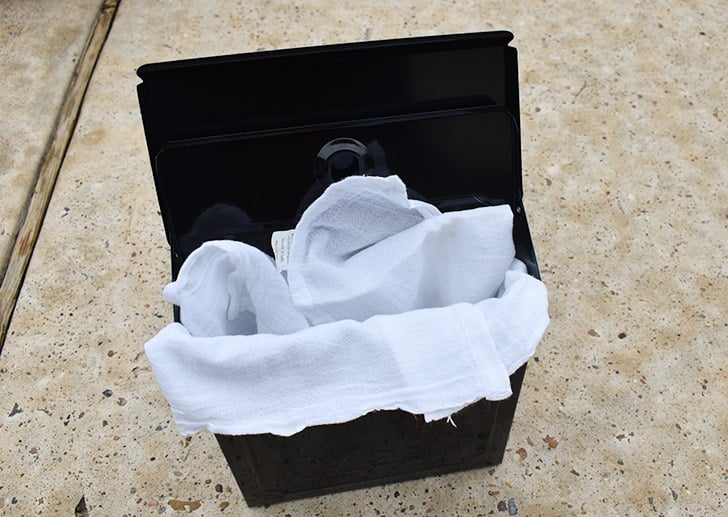
The interior of the mailbox is far too small for something like a coco liner. We’re going to repurpose fabric like a flour sack towel or an old tee shirt to line the inside of the mailbox instead. The liner will help keep the soil INSIDE of the mailbox so that every time you water it you don’t have the potting soil dripping out of the bottom and down your wall or fence.
Grab that fabric dish towel or tee shirt or whatever you found. Place the fabric inside of the mailbox so that the bottom is well covered and then try to fold and push the fabric around to cover the sides as well as possible. You definitely want to make sure the BACK of the box is also well covered as there are holes back there that can leak soil, too.

Add potting soil so that it is loosely filled about half to one inch from the lip of the box. Don’t pack the soil in, keep it loose.

Gently push the fabric down, into the soil so that it is no longer visible.
Adding Your Plants

Gently add your plants, pushing into the soil and packing it around the root ball so that it holds firm.
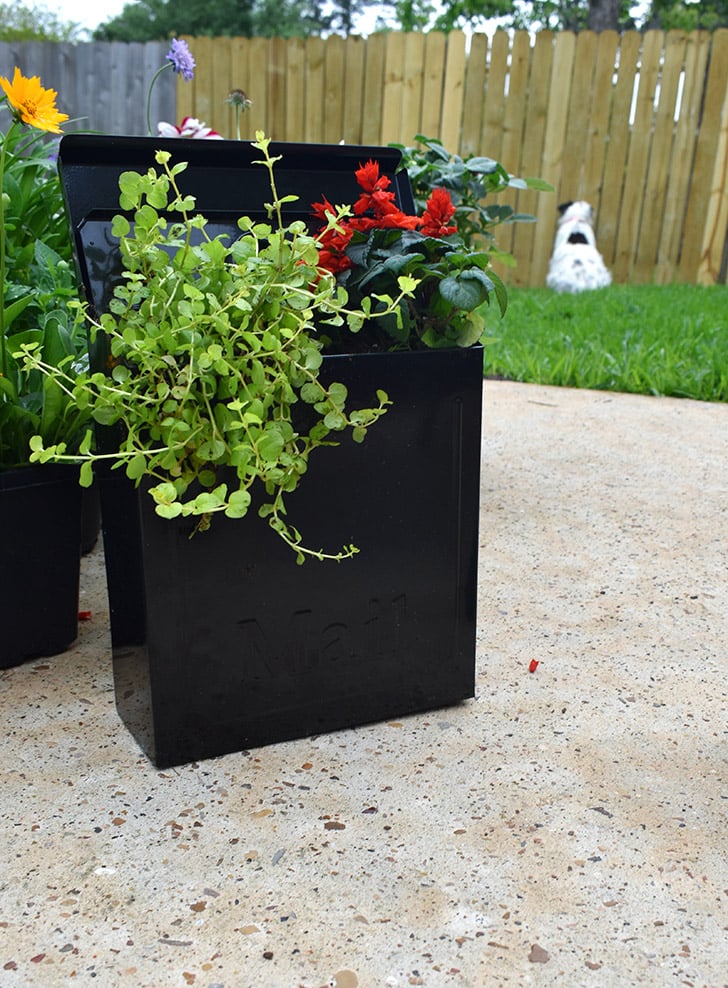
You don’t have to go crazy with plants right away… After adding my Red Salvia and Creeping Jenny, I wanted to wait a bit to see how the plants filled out the container. Water in your new plants as soon as you’re done planting them.
My creeping jenny looks a bit sad but that’s because I got it from the clearance plants from Walmart. Its soil was super dry and the leaves where a bit withered up. But at $0.50 it was the budget plant I was looking for and with a few drinks of water, you can see that it worked out in the end. Isn’t that Jenny lush, now? :)
Also, say hi to my big boy Ollie in the background, there. He does this creepy thing where he just sits and looks through the slats of the fence. He’s literally just staring into the neighbor’s yard. It feels super creepy :) But he’s really a sweet boy and the neighbor’s dog is itty bitty and I’ve found him running around with my dogs in my yard a few times. Maybe he’s just waiting to see if his little friend is gonna break out :)
You can Add Plants Over Time!
As time goes on and you can tell how the plants are going to fill out, you can add more planting. I wouldn’t advise going over 4 plants so that all of them have ample root room. See how after 12 days of watering my creeping jenny looks so much healthier and had grown quite a bit? Huzzah!
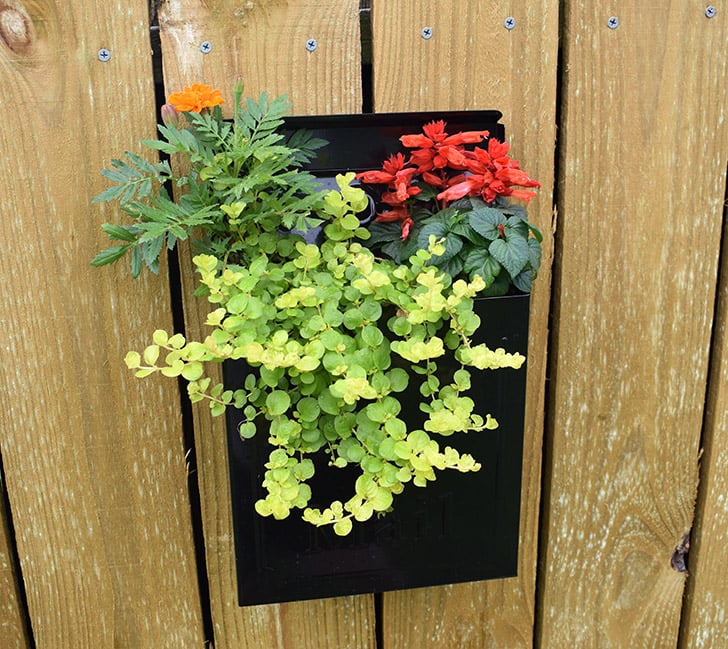
But as my creeping jenny started to grown downward, there was a big open spot that I filled in with a single marigold plant from 6-pack.

And here we are exactly 2 months out from the initial planting. With 3 plants that have taken hold and look pretty good, I’m now in search of something small and bushy to plant in the center. Because now that my creeping jenny is creeping downward, that second, weird lock flap is super visible where it wasn’t before.
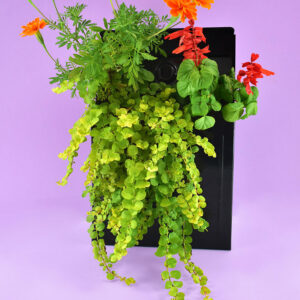
All in all, I absolutely love this planter SO MUCH. It’s fun, it’s colorful and it adds some interest to my porch.
Mailbox Flower Garden Tutorial
Equipment
Ingredients
- Mailbox
- Moisture Control Potting Soil
- Flour Sack Cloth (or other fabric like a tee shirt)
- 2-3 Small Plants
Instructions
- Line the inside of your mailbox with your cloth. Do your best to not have any gaps or openings so that the full interior is well lined. This will prevent soil from leaking out of the mailbox over time.

- Add potting soil so that it is loosely filled about half to one inch from the lip of the box.

- Gently push the fabric down, into the soil so that it is no longer visible.

- Gently add your plants, pushing into the soil and packing it around the root ball so that it holds firm. Once all plants are added water them in.

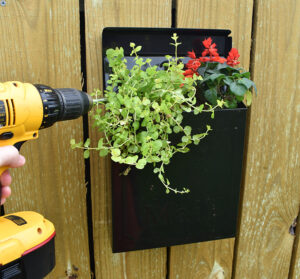
- Secure to fence or wall if desired.

- As time goes on and you can tell how the plants are going to fill out, you can add more planting. I wouldn't advise going over 4 plants so that all of them have ample root room.