
This post and photos may contain Amazon or other affiliate links. If you purchase something through any link I may receive a small commission at no extra charge to you.
Christmas decorating is in FULL SWING up over here. I’ve already done up 3 different decorated Christmas trees now and I’m feeling it, y’all. Granted, my DIY flocked tree that I’m sharing here is currently undecorated. But wait? Aren’t there photos of it decorated here? Yep. Silly ol’ me forgot to take pictures BEFORE I decorated it and so I got to remove everything. I’m not going to lie… I love decorating Christmas trees but it kind of broke my heart a little knowing that I’m going to have to do it all over again :)

But you know what? I’ll live. I’ve got even more trees in various states of decorating PLUS the 2 that I’ve already shared with you and so it’s kind of like the North Pole around here anyway. Except I don’t have any elf friends to help me wrap presents or anything. *sigh* :)

Wasn’t it pretty, though? Moving on…
Why flock a Christmas tree?
There are lots of reasons you might want to flock your tree. Maybe you want something unique and different for your tree and flocking somehow plays a part in that. Perhaps your tree is older and isn’t in the best-looking shape and covering it with flocking would hide the imperfections. It could be that you just love flocked trees as I do. Or maybe your reason to flock a tree is the same as mine… My brand new 7-foot pencil tree I ordered online didn’t really reflect the photo online. My tree looking sparse and cheap looking in real life. Oh, and it was SO much darker than the picture implied.

The picture on the left is what I thought I was going to get and the picture on the right is what I did get. Granted I’ve already started the process so it looks a bit odd but you can tell it’s not what I had hoped to get. In fact, I was so disappointed I didn’t even think to take pictures of the tree BEFORE flocking it. Sorry guys.

The good news is that flocking a Christmas tree can change it so, so much. Everybody queried about my new tree pre-flocking thought it was really pretty sad. It even garnered a “terrible” in how it looked. But post-flocking everybody loves it. Suddenly my cruddy dud of a tree became a snow-covered beauty.
Is it hard to flock a Christmas tree?
No. If you prepare your workspace and project well it’s not hard at all. And I’m sharing with you EVERYTHING I did wrong or should have done to make this go much easier.
On a side note, immediately following my first session of flocking I decided that I hate flocking Christmas tres. This is not a fun project like hand-making Christmas ornaments or something. It’s dirty and it’s hard work. But despite desperately disliking the process, I already have plans to flock a second tree this season. Flat out, the results are worth the effort.
Supplies needed to flock a Christmas Tree:
- Artificial Christmas Tree
- Self-Adhesive Snow Flock
- Spray Bottle
- Fine Mesh Sieve
- Easy Release Masking Tape
- Floor Protection
- Dust Mask & Eye Protection
The Christmas tree I flocked is a Pre-Lit 7-Foot Pencil Tree. I purchased 5 pounds of Self-Adhesive Snow Flock and used half of it applying it very heavily.
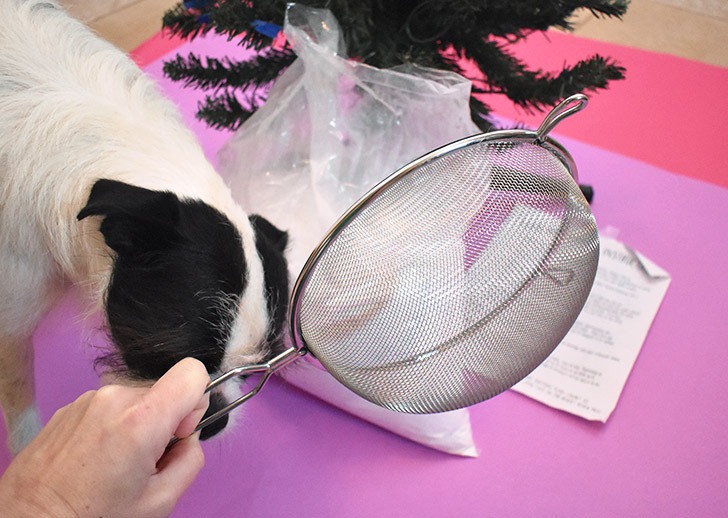
To flock a tree you’ll need a water bottle that can spray a mist (not just a stream) and a fine-mesh sieve. My sieve is gigantic and this caused me SUCH a headache because it was difficult to maneuver it over the branches. I’d strongly suggest using a sieve that is only a few inches across instead of my 8″ gigantic colander of frustration.
Protect your workspace and yourself.
Flocking a Christmas tree is dirty work. You’ll need to protect your floor with a tarp or something similar. Spread your tarp so that it extends SEVERAL FEET around your tree. I used a few pieces of paper 48″ paper off of a roll and it was a disaster. Flocking is self-adhesive and it’s going to stick to the floor or whatever you place on top of it. IT WILL STICK TO YOUR FEET and pull your floor protection up as you walk around. Placing heavy items around it to keep it down would be a good idea. Just make sure these are items you don’t mind getting ruined or cover them up, also. Think brick pavers in a plastic grocery bag or something similar.
You’ll also need a dust mask & eye protection. I hate wearing a dust mask but seeing how fine the flock is I decided to start off with one, anyway. The one time I took a break and came back and forgot to put my mask on before starting work was a disaster. I was coughing and my lungs were burning. Basically, you MUST have a dust mask before you can start this project. As far as eye protection goes, I just wore my glasses and that worked just fine.
Preparing the tree to flock.
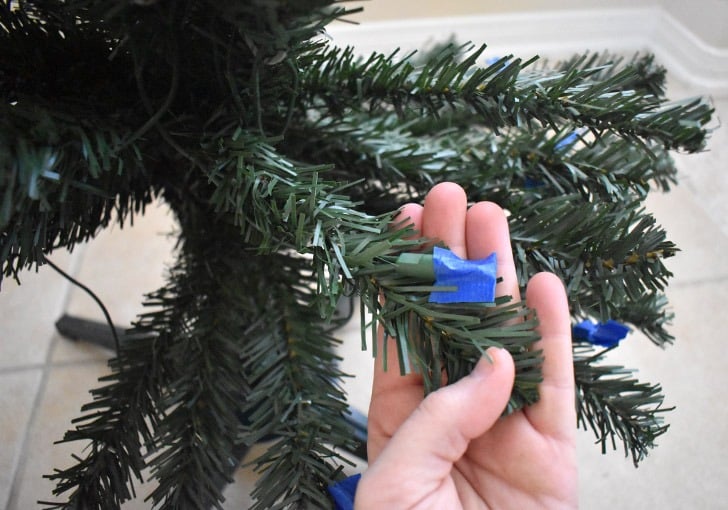
If your Christmas tree is pre-lit, you’ll need to protect the lights from getting covered and obscured by the flocking. Using masking tape, cover the little lightbulb making sure the tape fits loosely. If the tape is applied super tightly, it will be a nightmare to remove. Trust me.
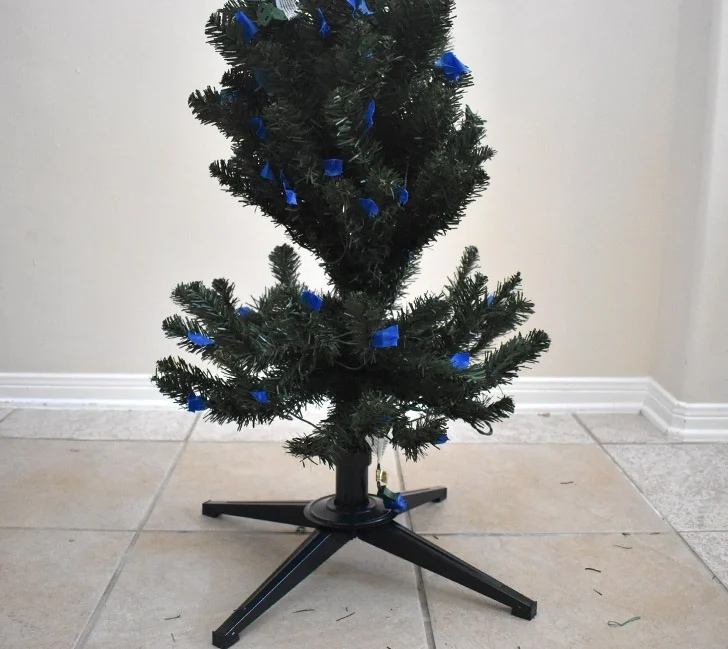
If you want a heavily flocked tree it’s easiest to work from the bottom up. Starting with the first, lowest section of your tree, fluff out the branches and move them where they look best. After flocking it’s more difficult to move things around, so be sure you’re happy with how the branches look.
Any branches you are not currently flocking, push straight up against the center pole.
How to flock a Christmas tree.

Fill your mesh sieve approximately half full with snow flock. Have your spray bottle filled with water and set to mist.
In one hand hold your spray bottle and in the other your filled sieve. Place the bottle to where your spray will hit just beneath the sieve, but not on the bottom of it. Slightly shake the sieve so that the snow flock starts to sprinkle out through the mesh. Spray into the space beneath the sieve as the flock falls. The wettened flock is self-adhering and will begin to collect on the tree’s branches and stay there.
FYI, if going for a heavily flocked tree, you’ll need to apply the flocking in several passes. Trying to apply a heaving covering all at once won’t properly adhere.

Translucent pieces that are too large to sift through the sieve will be left behind. Remove these pieces by and place them on top of the still wet flocking.

Continue building your tree up, one piece at a time, flocking the individual rounds of branches at a time.
Post-flocking…

Give the flocking on your tree plenty of time to dry. Give your tree a few gentle taps and remove any flocking that isn’t securely attached. If it doesn’t come off now, it will later and all over your tree skirt…
Next, plug your Christmas lights in. Because the lights and the tape could be hidden underneath heavy flocking plugging them in makes them become visible. If your tape is too difficult to easily remove by hand, use the sharp end of a pushpin to create a tear in the tape to remove. Always be careful when working with electrical items that are plugged in. And, just to be safe, double-check that your flocking is dry before plugging the lights in.

Decorating and storing your DIY flocked Christmas tree.
Decorating a flocked tree is a little bit different just because you can knock the flocking off. It’s on there but it’s not crazy attached or anything. Take care when placing your ornaments, especially if running hooks through thick sections of flock.
Again, when it comes to storing a flocked tree it doesn’t matter if it’s DIY or store-bought… flocked trees can lose their flock when you’re shoving it back into its box after Christmas is done. I’d suggest purchasing a Christmas tree storage bag. With the flexible plastic-fabric-like material your flocked branches can push against the sides without much pushback.

If you flocked an artificial tree note that your tree is much bulkier and heavier now and will NOT go back into its original box.
Have I inspired you to flock?
And so now I’m wondering, did I inspire you to flock a Christmas tree? I mean I really, really don’t like flocking Christmas trees but I do it because I’m in love with the results!
