This post and photos may contain Amazon or other affiliate links. If you purchase something through any link I may receive a small commission at no extra charge to you.
When the stay at home orders first came through I had a really difficult time dealing with it. I don’t actually run all over town on a regular basis. It’s just that I was no longer free to do so if I wanted to. The choice to be home or be out and about was gone… suddenly I was stuck at home. And having only moved into my new house a few months prior, it didn’t even feel like home, yet. You see, I’m really bad about change. It freaks me out and upsets me and it takes me quite some time to settle in to new things. Like this new house.
And so it became my mission to distract myself while trying to edge closer to this house being my home. I threw some white paint on the walls. It wasn’t my first choice in color but it was different than the dark tan and black walls. And it didn’t hurt that I could get it delivered to the house that same day.
Because it was so lovely outside I also spent a massive of time in the yard.
I trimmed bushes and put down fresh mulch and power washed every inch of outdoor concrete. I even started replacing my back yard fence all by my lonesome. But then other people started to work from home, too. And suddenly I couldn’t have a section of the fence down at a time if I didn’t want their dogs running at me when they were put out.
So I turned my attention to digging up the corner of the back yard for a new garden. It. Was. So. Much. Work. From a distance it looks like a sweet, LITTLE corner garden but when you get into turning the ground over it’s massive. And it was SO MUCH WORK.
And a few week’s back as I was reclined on the chaise lounge with my dog Carly reading. When I looked up I noticed that my little corner garden was massively in bloom. I was so proud of my efforts. Is there anything better than seeing results from hard work? Because I like to memorialize basically everything, I wanted to dry my flowers to use in crafts.
My grandfather, Pop, taught me how to dry flowers in books when I was little.
We’d go for walks in the alley and find pretty posies that were most likely weeds that we’d bring home. We never brought home the white rocks he stuck in my mouth to see if they were salty because they were always just white rocks and never salt. :) But we’d bring our little pretty finds home, stick them in books and forget them. And later I’d open a book and a paper thin and totally dry pressed flower would fall out of the pages.
These days I don’t have many books. I have a few coffee table books that are full of pretty pictures and I have things like yearbooks and high school literary mags my work was featured in. And so I needed to figure out a different way. So I set out to make my own DIY flower press and teach myself how to press flowers on the cheap.
For less than $14 you, too, can have a DIY flower press to save those precious posies.
Pressed flowers are an amazing thing to craft with and I hope you love this tutorial today as much as I do :)
Supplies Needed to Make a DIY Flower Press
Because we’re living in strange times where there’s been a run on everything from toilet paper to school glue I’ll discuss where I found my supplies below the list.
- 9″ x 12″ Wood Plaques, quantity 2
- 5/16 Drill Bit
- Power Drill
- Washers – 1/4″ x 1 1/4″ Zinc-Plated , quantity 4
- Carriage Bolts – 1/4″ x 4″ Zinc-Plated , quantity 4
- Wing Nuts – 1/4″ Zinc-Plated, quantity 4
- 4 Bar Clamps
- Cardboard
- Tissue Paper or Newspaper
- Craft Knife with Sharp Blade (Amazon | Cricut)
- Straight Edge (Amazon | Cricut)
- Cut-Resistant Protective Gloves (optional)
Sourcing your Wood
To make my project easier I purchased pre-cut wood plaques from the Walmart Grocery site. They were $4.47 apiece and I was able to have them delivered to the house. You can get them cheaper from Hobby Lobby for $2.99 apiece or for from Michael’s for $3.69. They’re also available at Amazon but the price fluctuates. You can also cut down scrap plywood, if you have any that is 1/2″ to 3/4″ thick to 9″ x 12″ pieces and save some $$$. Lessening a lumber hoard is usually a good thing, too :)
Zinc-Plated Hardware
You can purchase your washers, carriage bolts and wing nuts at any hardware store. I ordered mine online from Home Depot and my dad was able to pick up the order without even having to leave his truck. Nifty!
Bar Clamps
Bar clamps are nifty things that hold stuff together, like wood, so that you can cut, drill, or glue things together without them moving around on you. These bar clamps from Amazon are a good deal and can be delivered right to your house. My bar clamps came from Harbor Freight and if you can get them on sale are quite a bit cheaper.
The cost.
A small, pre-made press will run you between $40-80. The best deal I could find online was this Natures Press 7 x 9″ for around $40.
In comparison, my larger flower press cost me less than $14 .And could have been even cheaper if I had purchased my wood plaques from a craft store rather than being lazy and paying more for something that would be delivered to my door the same day :) At $4.47 x 2 for the wood ($8.94), $1.18 for the washers ($10.12), $1.18 for the wing nuts ($11.30), and $1.16 for 4 carriage bolts at $0.29 apiece ($12.46) Our total is just shy of $13 before tax. Now that’s not a bad deal at all, right? :)
How to Make a Flower Press
If using pre-cut wood plaques, place them flat sides together with the beveled edges facing your work top and the sky.
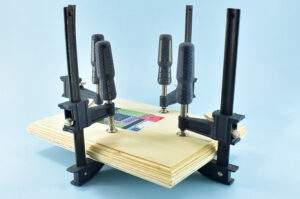
Try to even up the pieces so the sides all match up relatively well. Place bar clamps in the middle of each of the 4 sides and secure to finger tight.
Using a 5/16 drill bit in a power drill, create holes in the 4 corners keeping you drill straight up so your holes don’t go wonky.
Remove the clamps and draw a line across ONE side of both pieces. Since our drilled holes aren’t in exactly the same location on each corner, this will help us quickly put the press back together.
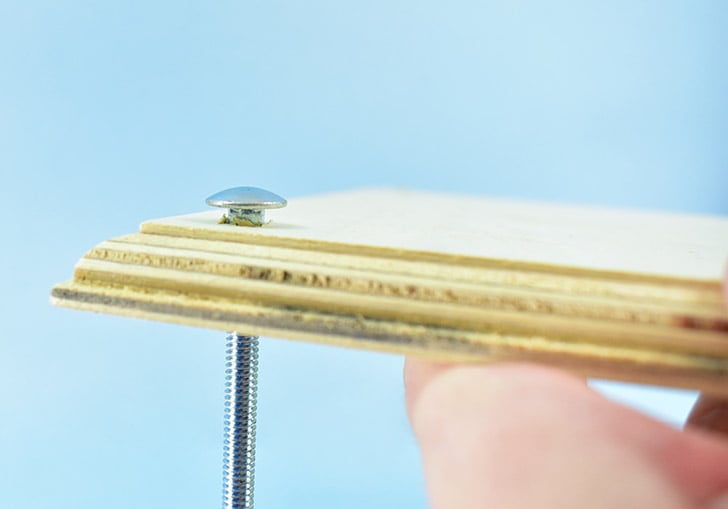
Place your 4 bolts up through fancy side of 1 of the plaques. Carriage bolts are mostly round but there is a square bit next to the bolt’s head. Using a hammer tap the bolt so that the head is flush with the wood. Flip this piece over and using your line guide top with the other plaque with the fancy side facing upward.
Place a washer over the bolt in each of the four corners and secure with a wing nut.
Before we start pressing flowers…
In between each of our wood ends you’ll sandwich cardboard, thin paper and flowers. First, let’s cut down our paper materials to fit…
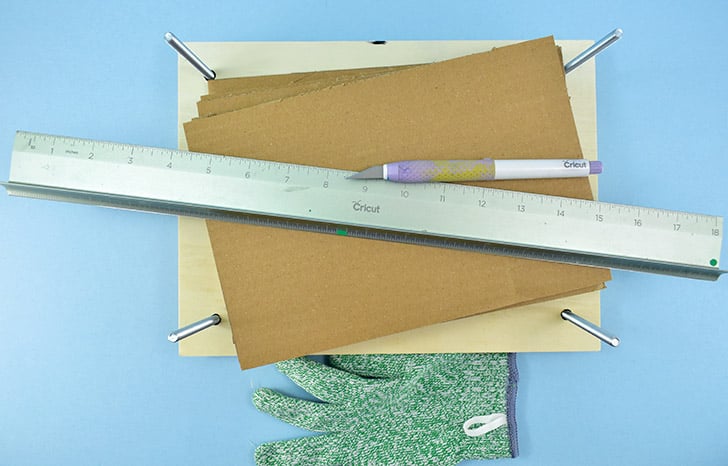
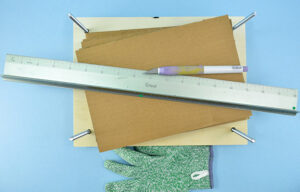
Using a craft knife and a straight edge cut pieces of cardboard to approximately 7 x 10″, or whatever fits best within the bolts. Cut an odd number of pieces. (I use 7). If you have access to thicker, heavy duty cardboard, it works better than your average moving boxes, but either will do.
Fold pieces of tissue paper or newspaper to fit within your cardboard pieces, 2 separate sheets to sandwich between each layer of cardboard.
How to Make Pressed Flowers with Your New Tool!
Before starting make sure your flowers are bug free (because they’ll start to crawl out, yuck!) and nice and dry. If it’s rained on your flowers, leave them until they’ve dried off in the sun before beginning. Use flowers that are open but not yet starting to look wilty or brown. Anything that is just a bud will remain a bud and not open up while being pressed.
You can use both flowers and green foliage – feel free to experiment!
Open the flower press and place a piece of cardboard, then thin paper on top of the wood, in between the bolts.
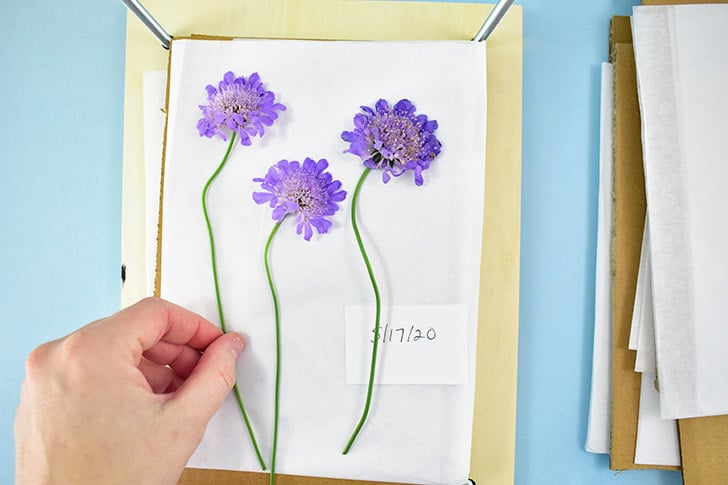
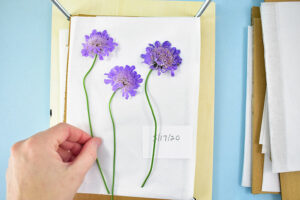
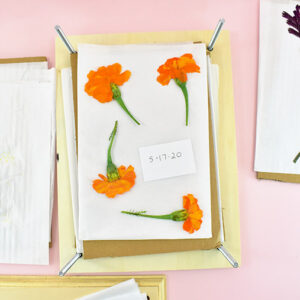
Lay out cut flowers on top of the thin paper, taking care to place them how you’d like them to be pressed. Don’t overlap the petals of one flower to another’s, though the stems overlapping doesn’t seem to be much of a problem. Add a little note with the date so you can keep track of how long your drying process is taking.
Place a piece of thin paper on top of the flowers followed by another piece of cardboard.
*Tip – it’s okay if the green stems peek out of the cardboard a little bit.
Continue adding layers of flowers to press sandwiched in between 2 layers of thin paper. Keep adding more flowers in the order cardboard –> tissue paper –> flowers –> tissue paper. When done, top the last piece of thin paper with the final piece of cardboard.
Place the top wood piece, pretty side up, onto the layered flowers, running the bolts through the holes.
Push down firmly and secure each corner first with a washer and then with a wing nut. Tighten each bolt just a little, alternating corners, securing each a little until there is no more give. You’ll want these as finger tight as possible. You can even sit on the whole thing (like a suitcase) to help squeeze business down as much as possible.
And remember, we have that line on the one side to help us match up the 2 pieces perfectly.
Place the flower press in a dry, dark place and note warmer places will dry the flowers more quickly. I place my press in the garage where it gets super hot during Texas summers :)
Helping the Flower Pressing Process Along
A day or 2 after you’ve loaded up your press with flowers, carefully unscrew the wing nuts and open the press.
The flowers are starting to become pressed and while damp can be quite delicate. Gently pull the flowers away from the tissue paper, if possible.
Replace all of the thin paper you can easily remove with fresh. For any flowers you’ll destroy trying to remove the tissue at this point, just sandwich the flowers and old thin paper with new. Leave the press in a dark, warm place for a few more days, up to a week. Replace any damp paper and put the press back into it’s hidey-hole.
* Tip – Don’t throw out your old tissue paper, after it dries you can use and reuse it.
Thicker flowers like dahlias and marigolds will need longer to press out all of the moisture than thinner flowers but they can be pressed together within the same pieces of paper. To speed up the process of drying the thicker flowers you can replace the thin paper every few days.
The process to dry will take between 1-3 weeks. Every few days tighten the wing nuts as the press will allow to help speed the process along.
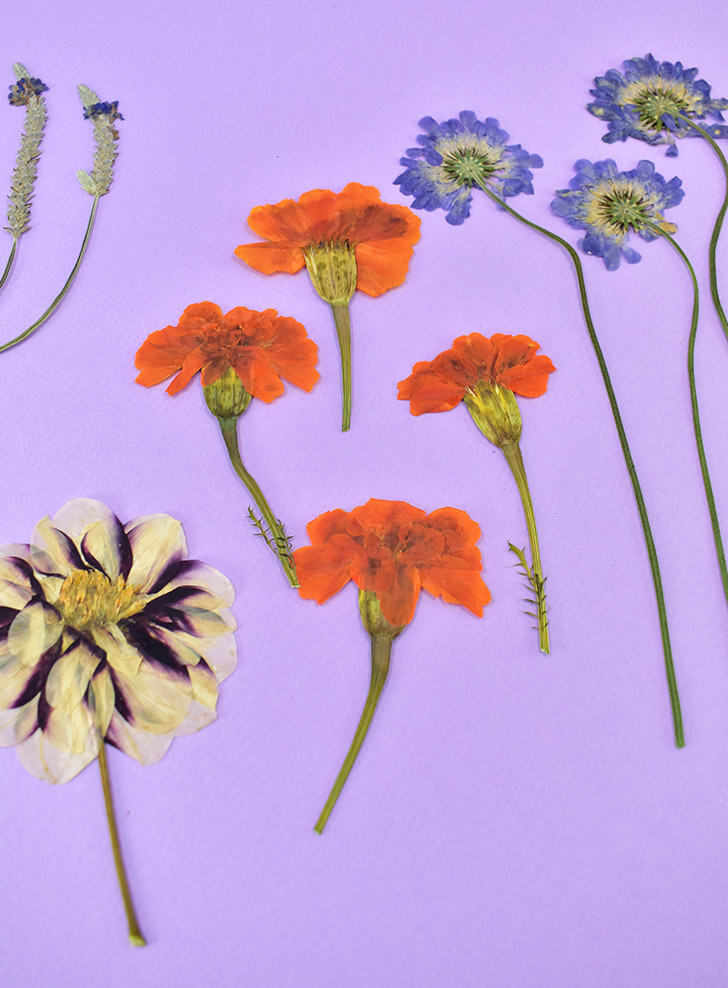
After those 1-3 weeks, depending on the thickness of your flowers, you’ll be able to remove your perfectly pressed flowers. By placing my flowers in the very warm garage, I was able to press even this thick dahlia in only 10 days!
Storing Your Pressed Flowers
To store your now delicate flowers grab 2 pieces of something sturdy, like foam core board. Cut so that it will fit inside of the largest zipper bag you can find. I actually use these ginormous Istad resealable bags from IKEA. Toss in a few paper towels on the outside of your sturdy boards to help ward off moisture. Or, better yet, toss a little bit of desiccant into the bottom of the bag. Place a 1-2 rubber bands around the boards to keep all of the flowers neatly tucked inside. You can now store your flowers horizontally or vertically without worrying about breakage!
Aren’t they just lovely? Pressed flowers to use in crafts to remind me of the gorgeous end results of so much hard work :)
Inexpensive Wood Flower Press
Equipment
Ingredients
- 9" x 12" Wood Plaques
- 5/16 Drill Bit
- 4 Washers – 1/4″ x 1 1/4″ Zinc-Plated
- 4 Carriage Bolts – 1/4″ x 4″ Zinc-Plated
- 4 Wing Nuts – 1/4″ Zinc-Plated
- Cardboard
- Tissue Paper or Newspaper
Instructions
- Place wood plaques flat sides together, making sure all sides are flush. Hold the 2 plaques together using bar clamps on all 4 sides.
- Drill holes in 4 corners.
- Run carriage bolts through each hole. Secure the 2 plaques together with first a washer and then a wing nut.
- Cut cardboard and fold thin paper (tissue or newsprint) to fit within the four bolt.s
- Layer cardboard, tissue, flowers, tissue and cardboard inside of the press.
- Place the top wood piece, pretty side up, onto the layered flowers, running the bolts through the holes. Secure with washers then wing nuts until finger tight. Place in a dark, dry place replacing the tissue paper as needed and tightening the nuts every few days until flowers are fully dry.


