
This post and photos may contain Amazon or other affiliate links. If you purchase something through any link I may receive a small commission at no extra charge to you.
Moving from one state to another is a total pain in the neck it would seem. My mail forwarding isn’t working so I haven’t gotten any mail for 3 weeks and I keep finding that things I need haven’t quite made its way down to my new place to stay. The house is staged and some of my things are still there and it would seem that the most important things are.
To get the house show ready we had to do a lot of work. Like tons and tons. My dad did the brunt of it and Rob and I picked up the slack after my dad got hurt. He literally worked so hard that he actually broke his back helping me out. He’s having surgery soon to repair the damage and he is in more pain than I can possibly fathom. It breaks my heart. But he doesn’t complain and he has never said a negative word about the fact that it wouldn’t have happened if it weren’t for me. I truly don’t think he even thinks of it that way though it is.
While he was in a lot of pain Rob and I needed to get the kitchen cabinet doors repainted. Daddy had painted the bases weeks before and the doors were just left. He wound up devising such a genius plan to get the doors painted super quickly and when we couldn’t quite figure the sprayer out even came out and sprayed them leaving us the cogs in the nifty little assembly line he put together. In the end 25 doors and cabinets were repainted in around 2.5 hours.
Now this doesn’t count the prep time sanding the doors. I did some and my dad did some so I can’t quite tell you what amount of time went into that but as for putting paint to wood, that was less time than the last movie I watched!
For this project you will need:
- wire hangers
- wire cutters
- drill with a small bit
- screw in eyes
- HVLP paint sprayer
- sawhorses and rails OR another way to hang
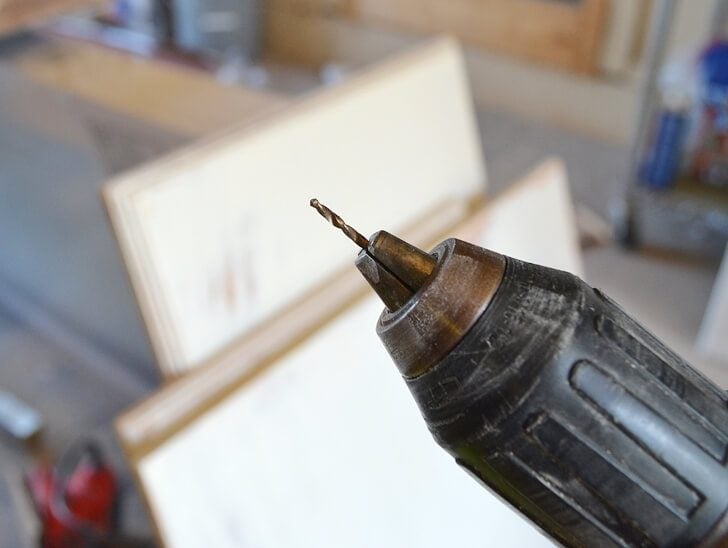
Find a drill bit that is just smaller than the width of the screw in parts of your eyes. Set the bit in deep so that it is shorter than the length of the hook eye by just a smidge. This ensures you won’t get crazy and go too deep.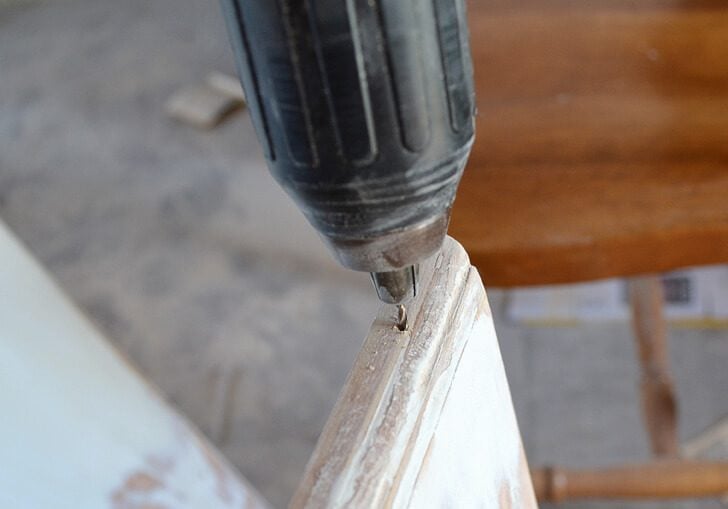
On the least visible edge of the door (top edge for top doors and bottom edge for bottom doors) drill two holes on that edge, one toward the left and one toward the right.

Bust out those annoying wire hangers…

…and use your cutters to snip around the middle of the straight part at the bottom.

Screw your hook eyes into the holes you created. In case you were wondering, these are the eyes I am talking about. These only need to be finger tight so don’t get crazy with this either! You don’t need to bust out the superhero strength to get these in enough!

Run one side of the wire hanger through the hook eye…

And wrap the wires around like crazy, or just good enough to hold. Repeat for the second side.

In the end you have a cabinet door that will hang by the hanger part. For really big doors, like my almost 4 foot tall linen cabinet doors, I used 2 hangers together to hold the larger amount of weight, FYI.

It only took about half an hour to prepare 25 doors to be hung and painted. Not bad at all!

Now I forgot to take pictures of the actual painting or any decent pictures of our hanging system BUT you can kind of get the idea here. We used super tall, 5 foot saw horses (we had made ourselves) with metal conduit pipes running across for hanging the doors.
A door would be grabbed by yours truly and handed to my father who would paint the door while Rob assisted moving it around or whatever needed to be done from that end while Daddy sprayed one side. I would take the newly painted door and hang it back up, while handing him the next door to be painted.

Once the fronts were done the backs were then painted. After a few days of drying (because we were SO busy with other things) Rob and I reattached the hardware and rehung the doors. We put them on soon after but didn’t have to worry about scratching the doors all up by stacking them.
To install the doors remove the hook eyes and screw back on to the cabinet bases. After they are all installed go around with dabs of wood putty to fill in the holes (it takes a tiny, tiny amount) and allow to dry. Touch up with a tiny dab of paint and you’re all set!
Don’t all of those nice, newly painted doors look lovely? For a house my size this kitchen is HUGE! Gone is the fluorescent light ceiling, the ugly wood 80s spindles and dark orange stained wood!
With my dad’s genius idea, you too can quickly paint your doors for an inexpensive kitchen makeover that is fresh and clean and totally updated!
