This post and photos may contain Amazon or other affiliate links. If you purchase something through any link I may receive a small commission at no extra charge to you.
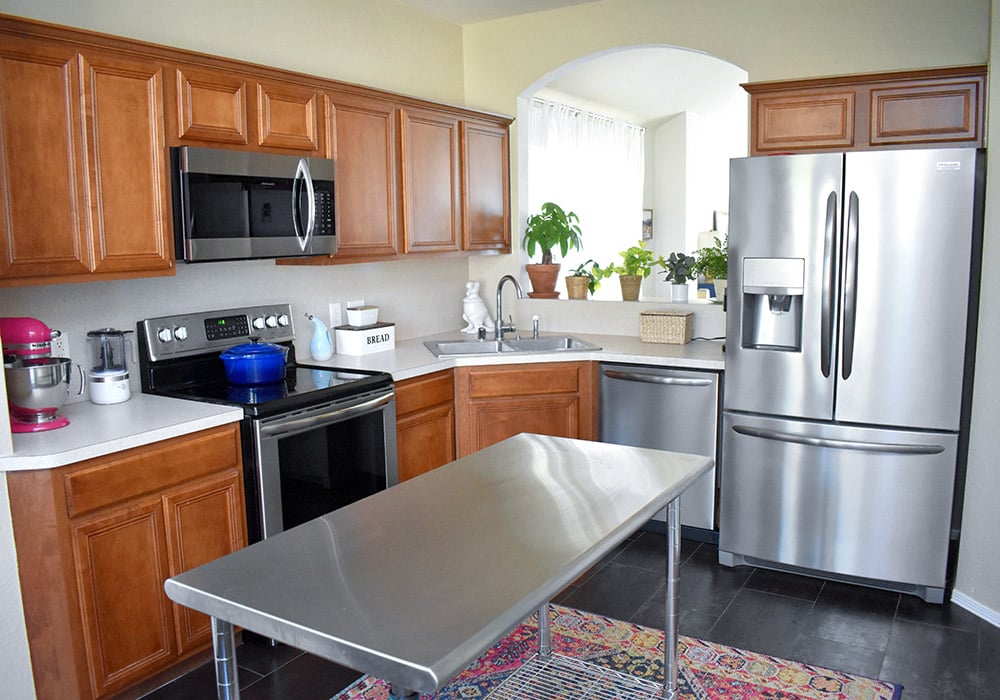
When I was shopping for houses in 2019 I knew what I wanted. And on that list was granite or quartz countertops. But the house that I wound up choosing had Formica. I started looking at solid surface countertops before even closing on the house but I couldn’t make up my mind what I liked best.
But new countertops are quite expensive. And so I decided to shelve them for a while and put my DIY budget into small projects that would make the whole house more “me”. But every time I looked at those countertops with their perfectly matching backsplash I found my little voice in my head going “ugh”.
And so, I decided to do something about it. Initially I had found some stick and peel tiles at the store in the bargain section. I purchased a package to see if I liked them. And when I decided I loved them I went to every. store. around. but they were all sold out. Well, I messed that one up, now didn’t I?
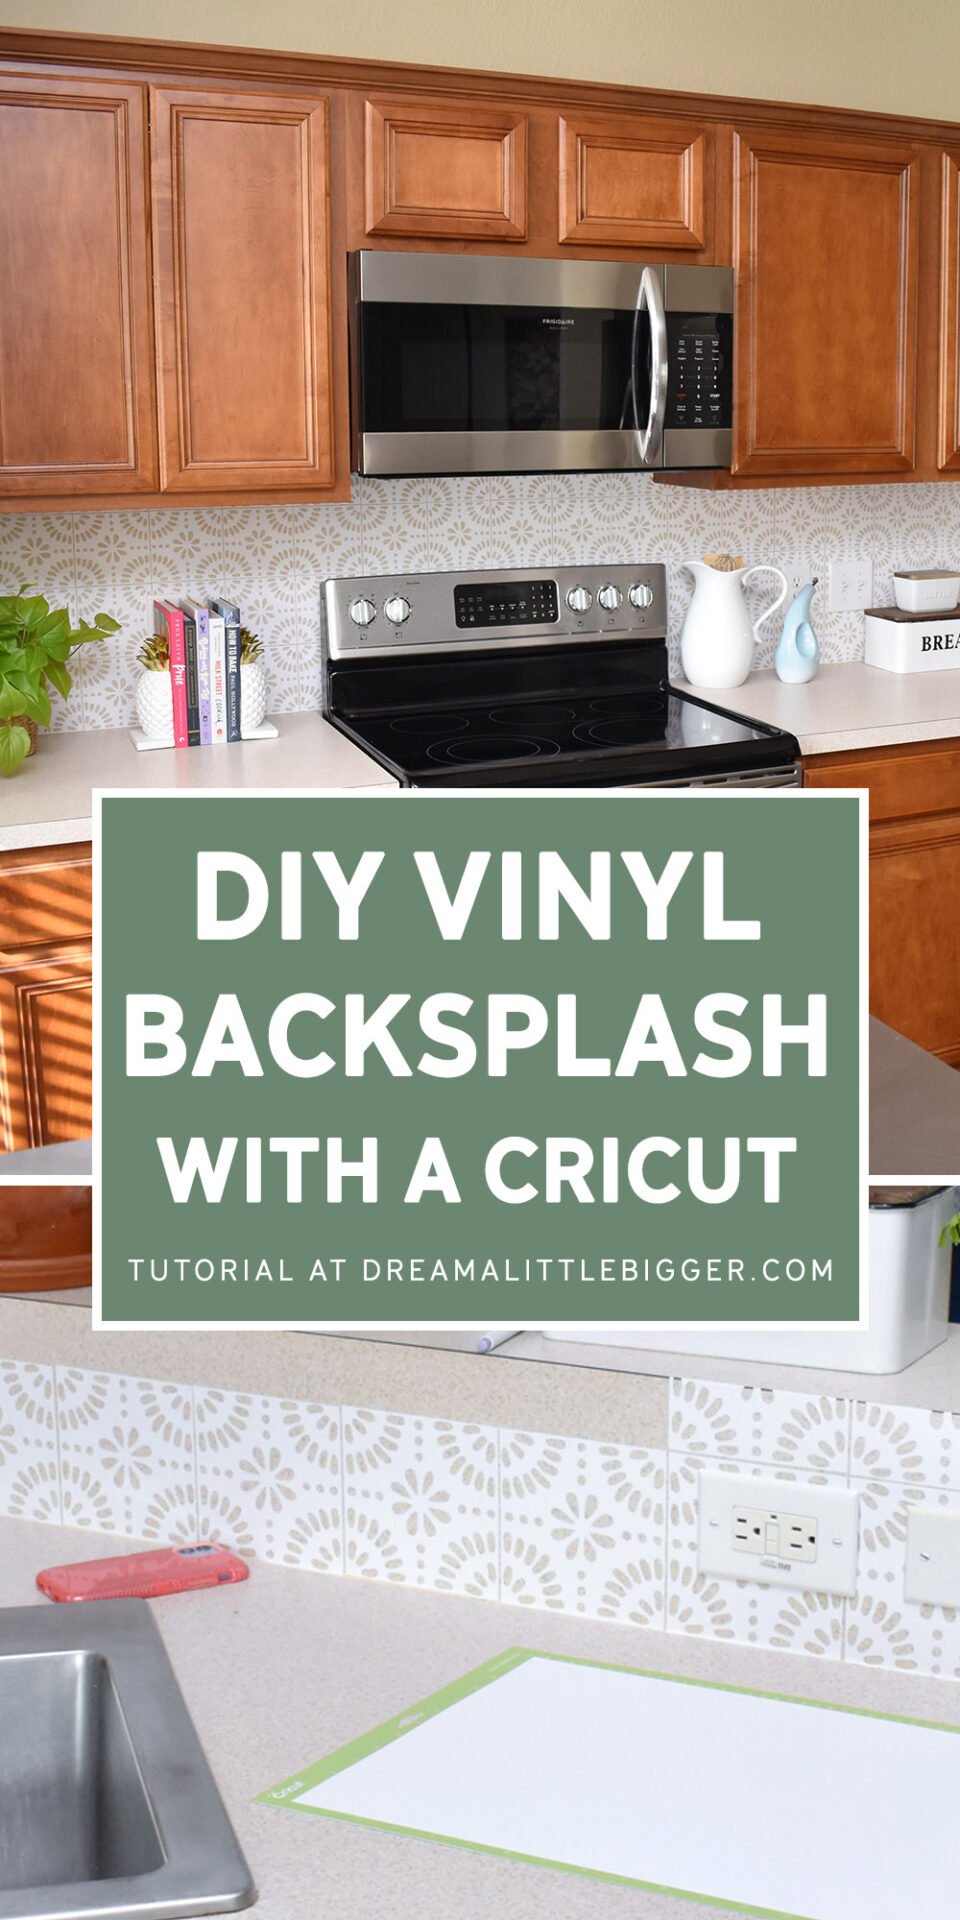
But after a while I realized, I can make my own DIY peel and stick tile with my Cricut Maker! Want to know the cost of my vinyl? $60 retail. But I got it on sale for only $17. You read that right… I was able to revamp my kitchen with materials that cost less than $20!
Can You Use Peel and Stick Vinyl Tile as a Backsplash?
This post was originally published on March 23, 2021 and has been updated after over 2 years of regular use.
Of course you can! But, honestly when I DIYed my vinyl backsplash in 2021 I really didn’t know just how long it would last. Afterall, a kitchen is a busy, messy place. And during this timeframe I started a food blog which I’ve sort of abandoned. But this meant that I was constantly cooking for a good 6 months and this kitchen had even more use than normal.

In the beginning I was super careful not to get anything on the backsplash because I worried I might damage it. But in the end my inner Swedish Chef came out and the backsplash got dirty regularly. And sometimes very dirty…
So in the beginning I realized that you absolutely can use vinyl as a kitchen backsplash, but should you?
Is Vinyl Good for a Kitchen Backsplash?
In my experience vinyl is great for a kitchen backsplash on a budget. Can it get damaged? Of course it can. But even though I’m messy and clumsy, I only experienced a few problems with my peel and stick backsplash.
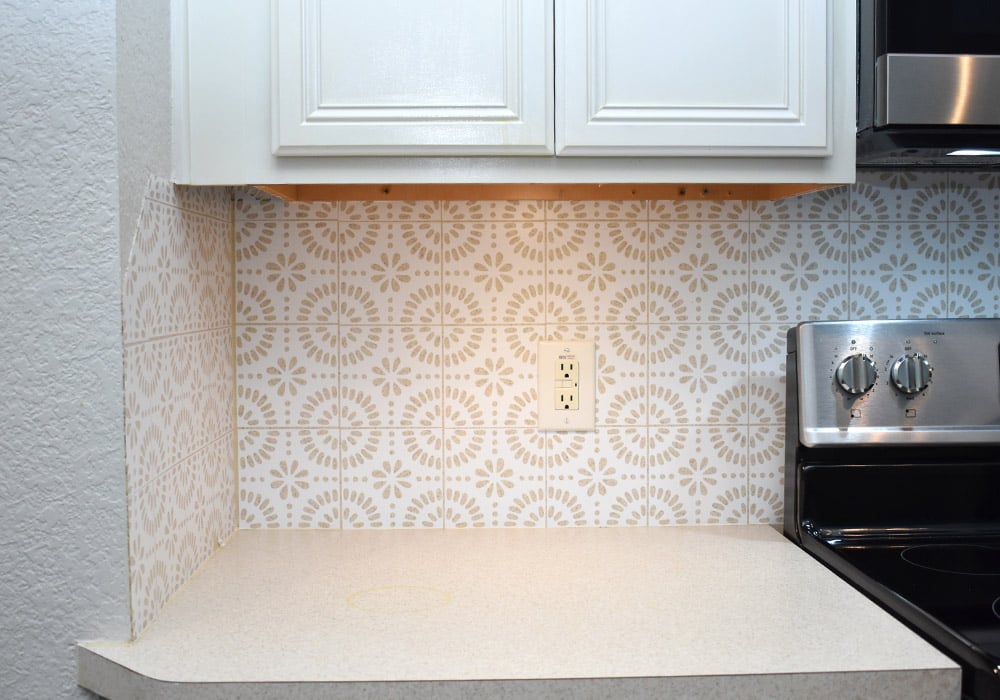
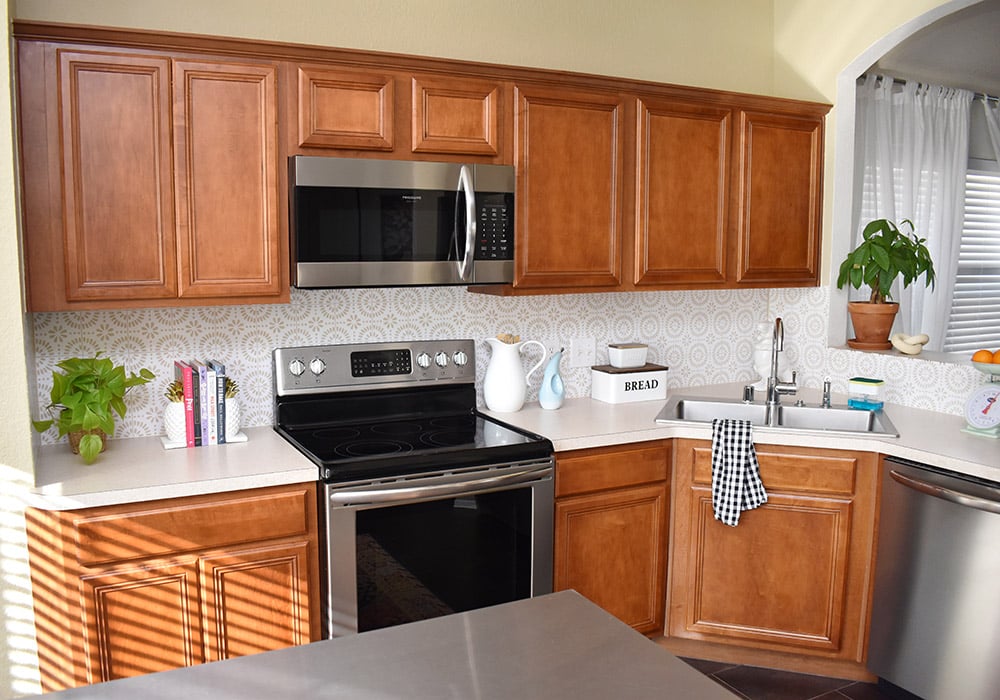
As far as cooking goes, this area right here is the most frequently used section of my countertop. This is where my Stand Mixer lives and if I’m not working off of my stainless steel island I’m chopping and mixing and getting ready to use the stove or oven. For the most part this section looks pretty great even after 2 years, right?
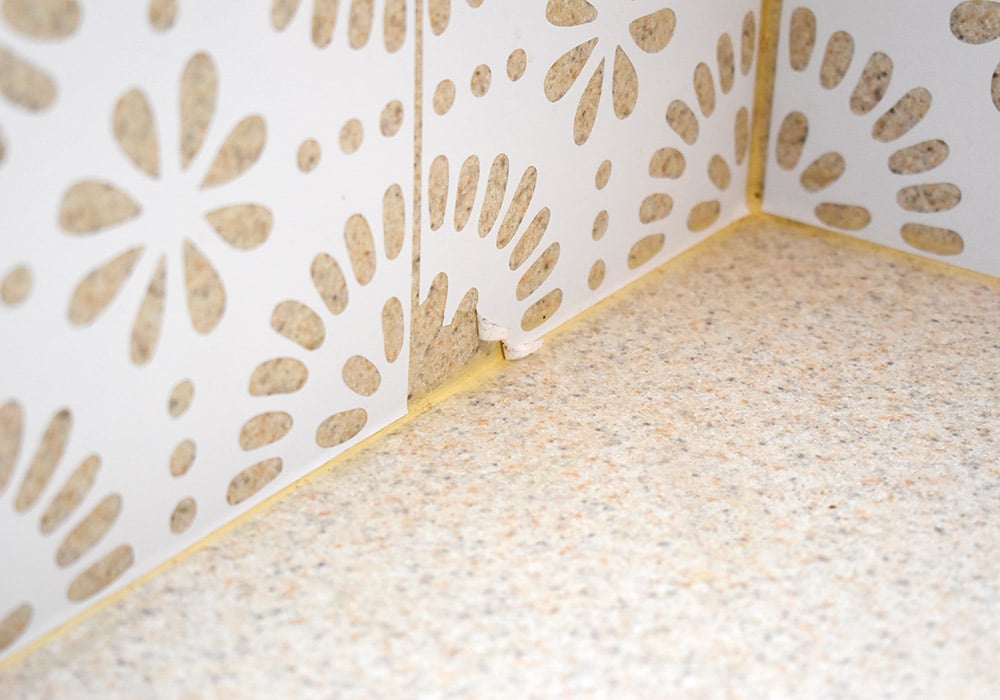
But if you look closely you can see one section where the vinyl is peeling away from the wall. This little defect occurred not from cleaning the cake batter and whatnot that was regularly flung over there with the mixer as a neighbor. Rather it occurred when I would move the mixer back in its place after using it. When I picked it up an awful lot of the time I would scrape the backsplash with the mixer as I set back into place.
But damage from cleaning the backsplash was pretty much non-existent. Had I been more careful with that heavy stand mixer I doubt I would have had a problem in this section at all!
Where are bad places to use vinyl in the kitchen?
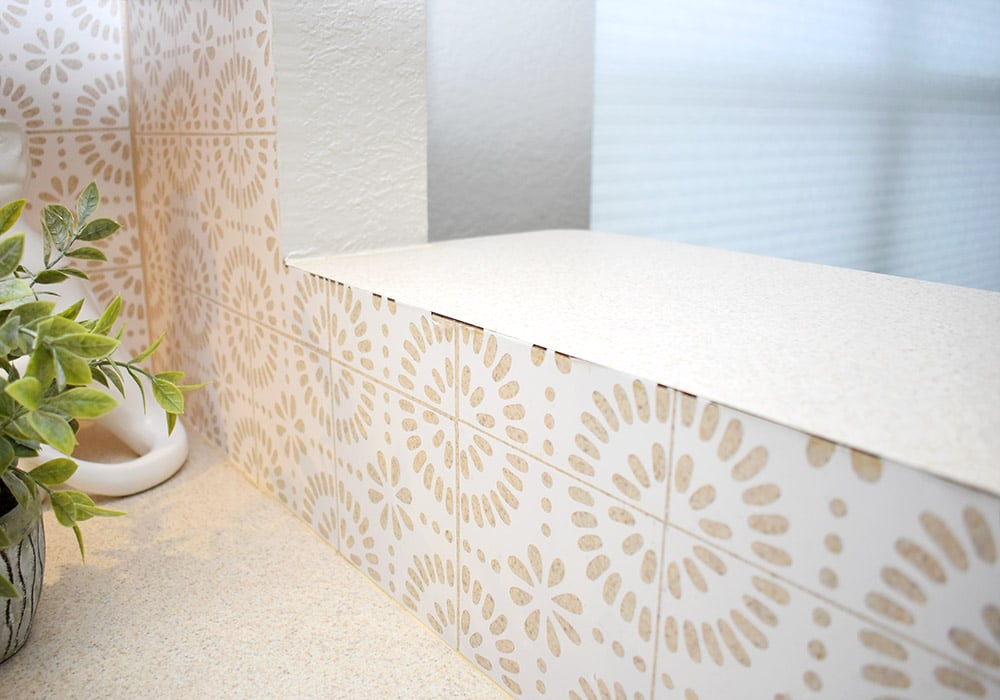
The place in the kitchen where I had the most wear and tear on the vinyl tile was in the kitchen’s pass through. When I cook things or make things I often place them on the elevated shelf that looks into the dining area of the house. And when I am cleaning up after a meal, I often reach over that shelf to put the dirty dishes and whatnot back into the kitchen. This little area gets a lot of use on a day to day basis.
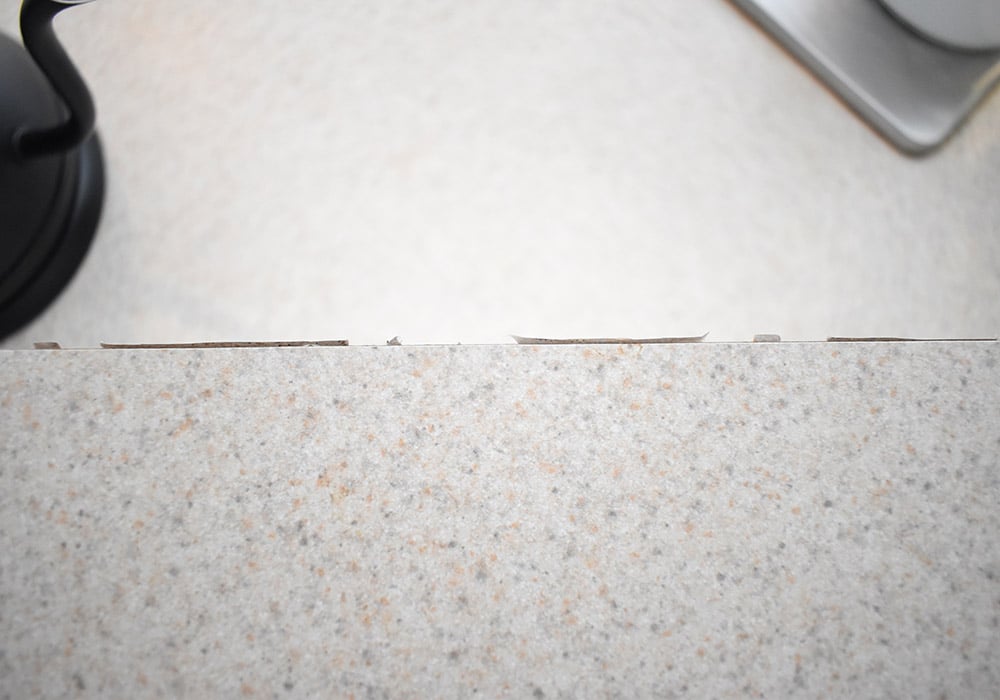
Though you can’t really see the problem looking at it straight on, you can looking at it from above. Where my arms would naturally slide over the corner of the shelf the backsplash eventually began to pull away from the Formica. But, as you can see, it was really only a tiny bit.
How to Minimize Damage to the Vinyl Backsplash on Corners?
The only places where this damage did not occur is where I accidentally cut the vinyl a bit shy of the edge of the shelf. If ever I do a vinyl backsplash again, I’d simply trim each tile to be just short of any corners like this. Problem solved!

Can You Use Vinyl Tile Behind Stove?
Yes! So I really did worry about grease popping up and hitting the backsplash and causing damage because your girl likes to fry. And, you know what? It did happen every once in a while. But, luckily, the hot grease never burned or bubbled the vinyl even once.
I did, however, have a little more trouble with bubbling stuff behind the stove. You know how when you simmer something like pasta sauce for a while and it starts to bubble and pop? That was the instance I found I got the most stuff on the backsplash and honestly it did happen quite a bit.
So, How Do You Clean a Peel and Stick Vinyl Backsplash?
I tried a lot of different cleaners and found that what worked the best for me was Mrs. Meyers All-Purpose Cleaning Spray. It’s strong enough that it can pull grease and whatnot away from the vinyl tile but gentle enough it doesn’t remove them from the wall.
Spray the cleaner directly onto a lint free microfiber cloth and gently wipe away any gunk. Be sure to clean any messes ASAP as things that can stain, like tomato sauce, eventually will.
Don’t use paper towels or anything that can leave fibers behind because they will eventually build up and start to cause the tiles to pull away at the edges.
Hang on to Some Vinyl for Patch Ups.
On a few occasions I did royally screw up one of the tiles in the beginning before I really got a feel for how not to damage it. Whenever a tile did get stained or pulled away from the backsplash I would peel that one away, cut a new one, and slap it on the wall. Easy, peasy, and cheap!
How Easy is a Vinyl Backsplash to Remove?
I used permanent vinyl and kept that sucker on for over 2 years. The morning the Formica was set to be demolished I decided to see how easily the vinyl could be removed. Now in the first few months I was pulled damaged tiles to replace a few times without any problems at all. But the first tile I attempted to remove after 2 years came off easy as you please. But every single tile I tried after that wouldn’t pull away in a single piece and would tear.
I found that in order to remove the torn tile I’d have to get a scraper in on the action. But sometimes I would accidentally scratch the Formica as I used it. Goo Gone worked really well to get those torn scraps left behind.
Can you remove a peel and stick vinyl backsplash after a few years? I’m going to give it to you straight… you can but it was not fun, at all, to remove.
Is a Vinyl Backsplash Renter Friendly?
As long as you use removable vinyl that you remove in 24 months or less this project should not cause any damage. Leave the tiles up longer than the 24 months and they might eventually get more permanently stuck on. If you’re in a temporary renting situation a peel and stick vinyl backsplash could be great way to personalize your space without a lot of cost.
What Does the Newly Updated Kitchen Look Like?
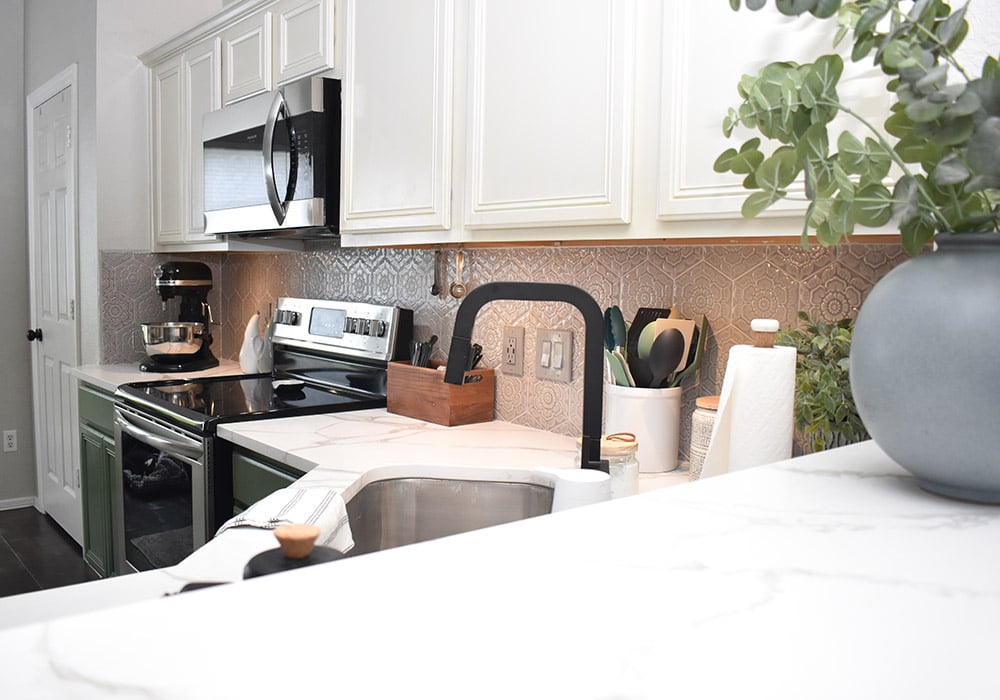
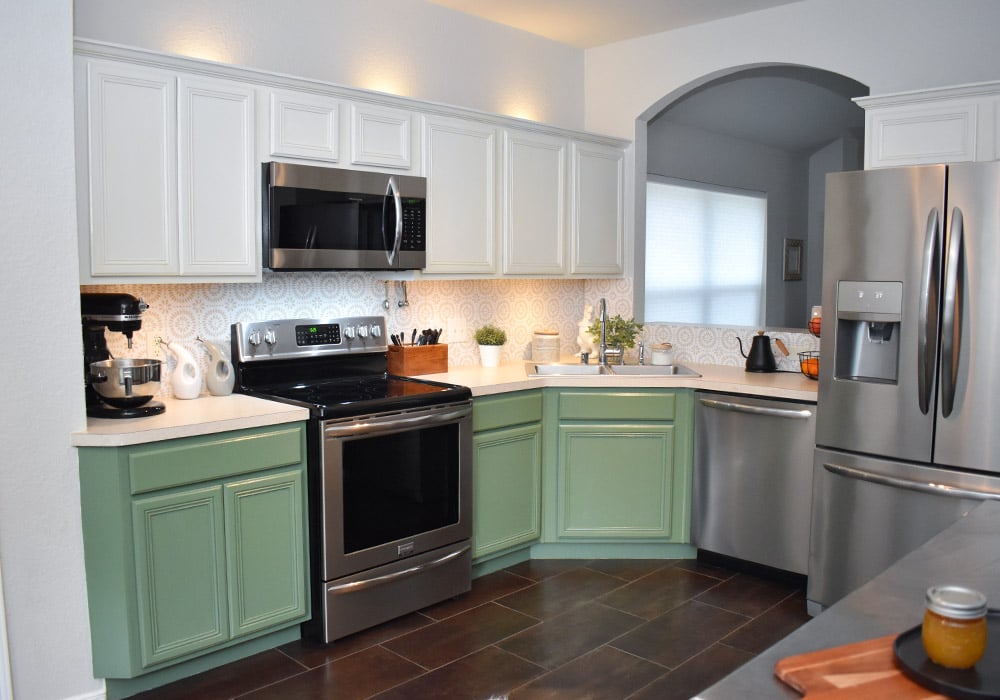
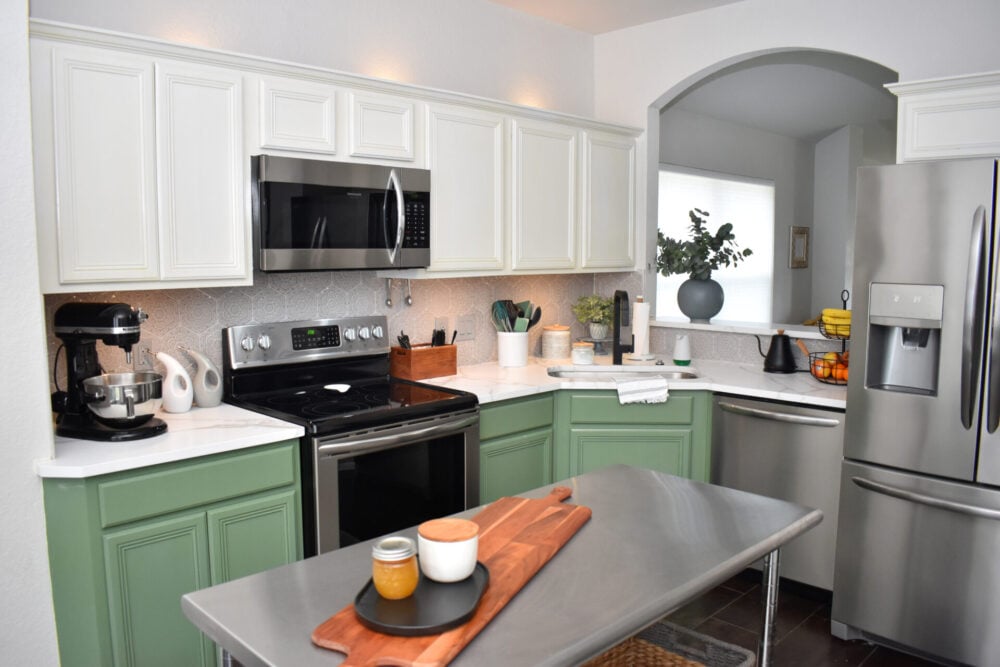
I know that if I was reading this post I’d be like, but what does the new backsplash look like? :) Gone are the Formica countertops and away went the Formica backsplash.
Nowadays my kitchen is so pretty Ibiza quartz and a Gashira Hex Ceramic Tile. My favorite thing in the kitchen? It’s probably that really awesome kitchen sink faucet with a pull down sprayer, the Delta Junction Faucet in Matte Black! The double sink was traded in for an undermount single basin and I love not having that divider in the center so it’s a close second.
All of the electrical was redone and the white outlets were replaced with gray. And one of the gray outlets has USB ports so that I can easily recharge my motion sensor automatic soap dispenser.
But it’s Not Quite Done, Yet!
I still need to touch up paint around the new backsplash and there are some places where the tiler didn’t get grout that I need to fill in. Since the new square matte black air switch is on backorder until late June, I still have the old chrome one to run the garbage disposal.
And now the undersides of the greige painted cabinets really sticks out and needs a coat of paint. But during the backsplash install, somehow, paint got scratched off of the lower cabinets so they will need to be repainted anyway. But from a distance, like a Monet, it’s already pretty great looking :)
So, Now with All of the Facts, What Do You Think?
Now that you know how well a vinyl tile backsplash works, and what the limits and potential issues could be, want to temporarily gorgeous up your kitchen? Let’s check out the original vinyl tile backsplash tutorial:
What Size Peel and Stick Tile Do You Want to Cut?
Simply because of limiting waste and expense, I decided to cut 5.5″ vinyl tiles because it is best use of the material. I’m not super amazing at math so everything I’m going to be sharing in this project is based around the 5.5″ tile size. If you absolutely want to cut a different size, you’re going to have to do your own math (sorry!).
Let me give you a quick visual of WHY I suggest 5.5″ tiles and maybe you won’t need any fancy math :)

These tiles are 5.5″ (my recommended size) and use up almost all of the material on the mat.

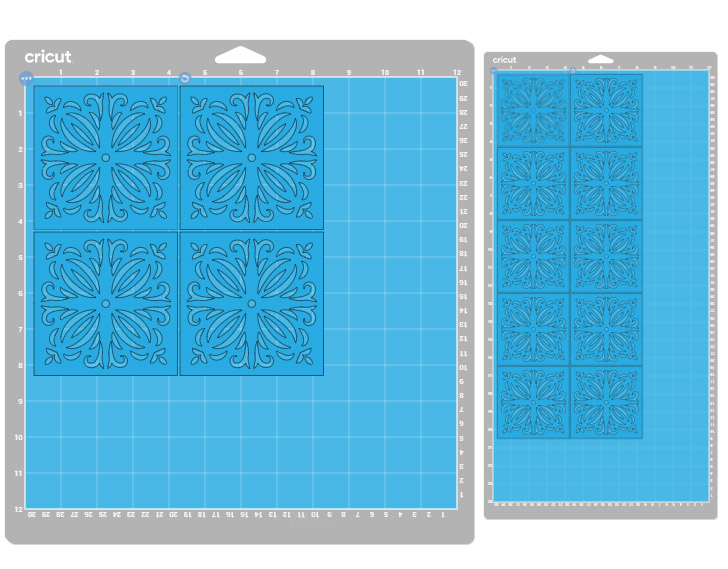
Increase your tile size to 6″ and you’ve got a ton of waste which means a lot more material and cost. Or I suppose you could to take the time to cut out the vinyl out to be slightly larger than the tile size, but that sounds like whole heck of a lot of work to me…
Even if you go DOWN in size to 4″ tiles, you’re still only getting 4 out of a 12 x 12 mat, but look at all of that wasted space!
Because you’re likely going to be cutting a lot of tiles (I had to cut the equivalent of 120 tiles at 8 per mat – total of 15 12×24 mats) it makes sense to not have to fuss with the material as much and just slap it on the mat and get as my tiles out of the material as possible.
Lastly, another benefit to the 5.5″ tiles is that since we are getting so close to one square foot of tile out of one square foot of material, you can pretty much say, I need 20 square feet of tile so I need 20 square feet of vinyl.
What is the Square Footage of Your Backsplash?
Before you start buying vinyl you need an idea as to how much you will need by determining the square feet. Ugh, math, right? Let’s get this bit over with :)

Sketch out the basic shape of your backsplash onto a piece of paper. Measure the width and height of each section using a tape measure. Round up to the nearest inch.
Divide the sketch into neat little squares (you can see how I divided my backsplash up with the red pen marks). This will make it much easier to figure out the area of the backsplash.
To determine the square feet within each section, multiply the length by the width and then divide that by 144. (L)(W)=in2/144= ft2
So for the very first section from the left my measurements were 18″ x 21″. 18 x 21 = 378in2/144 = 2.625 square feet
For convenience I’d suggest rounding up to the nearest half square foot. So at 2.625 ft2 we’ll call this area 3 square feet. Tallying up my other areas I found that I need a total of 25.5 square feet (this number doesn’t account for any mistakes, so I’ll technically need to pad that number, but more on that in a minute).
Note* If you don’t feel like doing the math you can also use an online square footage calculator like this one.

Which Vinyl Should You Purchase?

There are 3 different length rolls for Cricut Vinyl. All are 12″ wide with lengths of:
- 48″ = 4 square feet (Removable • Permanent)
- 180″ = 15 square feet (Removable • Permanent)
- 360″ = 30 square feet (Removable • Permanent)
Since the 180″ and 360″ were similar in price per square foot, I chose to go with 180″ rolls because they wouldn’t be as heavy as the 360″ rolls when placing the vinyl on mats.
The shortest 48″ rolls are more expensive per SF but you have a lot more color options, so keep that in mind.
Because I needed 25.5 square feet, I ordered 2 of the 180″, equal to 30 SF, giving me a little bit of overage in case of mistakes. Which I did need.
Prep Your Backsplash
Important! * Plan on prepping your backsplash at least a few days before you intend to start applying your peel and stick tile. *
Supplies & Tools Needed:
- Metal Scraper
- Vinegar
- Kitchen Caulk
- Dish Soap
- Isopropyl Alcohol
- Non-scratch Scrub Sponge
- Microfiber Cloth
I purchased a 4-ounce squeeze tube of kitchen caulk rather than the gigantic 10 ounce tube that you have to use a special caulking gun with and recommend you do, as well. It’s just easier and it’s unlikely you’ll need more than 4 ounces. Take note of the color of your current caulk – see how mine isn’t white? I replaced this caulk with one with the color “almond” and it blends in perfectly with the color of my Formica.

The first thing you’ll need to do is take a look at the caulking. It will be in the corners and where the counter and backsplash meet.
If your caulking is cracked, like mine was, you’ll need to replace it. But no worries, it’s super easy.
Remove the Old Caulk.
Take a metal scraper and gently push it beneath the caulk and run it along toe Formica to loosen. Take care as you can accidently scratch or gouge your Formica. At some point you might be able to grab the caulk and pull it to peel it away. If your caulk is very old and very dry, however, you might need to apply some vinegar and allow it a little time to soak. The acid in it soften it up and make it easier to remove.
If you still have some residue of dried caulk once the bulk is removed, gently run the scraper along it and it should roll up and peel away. If it is proving difficult, apply vinegar and let it sit for a while and then try again.
Clean the Formica.
Since we want the vinyl to stick well to the backsplash we need to make sure that it is super clean. Use a non-scratch scrub sponge and wash everything with warm soapy water. Dry completely.
Next, clean the backsplash with Isopropyl Alcohol (rubbing alcohol) and the microfiber cloth to remove anything greasy that lingers. Why microfiber? It doesn’t leave any fuzz behind!
How to Apply New Caulk.

Snip the end off of your caulk tube with scissors and squeeze to get the caulk flowing. While squeezing, run the tip of the tube along the seams and cracks, leaving caulk behind as you drag the tube.
Wet your finger and drag along the seam to remove the excess. Wipe away the caulk that accumulates on a paper towel in between swipes with your finger. If any caulk crawls up the backsplash or down onto the countertop, wipe it away with a clean paper towel.
Allow the caulk plenty of time to dry. It can take anywhere from one day to one week for the caulk to fully set, so keep this in mind when planning on the timing to stick your tiles to the backsplash.
Remove any plates on electrical outlets, phone outlets, etc.
This part can wait until right before you intend to begin sticking tiles. Be sure to have a vacuum or whisk broom handy as there might be some stuff that wants to come out (especially if your house is older) that you’ll need to clean up. Store your outlets and their screws together so they don’t get lost.
Back to the craft room!
How to Cut Peel and Stick Tile Out of Vinyl
First you’ll need to choose the design to cut…

In Cricut Design Space either open this cut file to use the same tile shape I used or you can search for “Tile Stencils” in images. When selecting a design keep in mind that the more intricate the cut, the longer it will take to cut. Also, if the tile has a lot of empty spaces, there might not be much vinyl to hold onto when applying which can cause some trouble, too.
Note * I’d strongly suggest that if you’re torn between a few styles (or colors), cut 3 sample tiles of each from removable vinyl. Apply them and see if you like how they look together on your backsplash AND see how easy/difficult each design is to handle. It might help you to decide on a pattern.

Select your tile and then resize to 5.5″. Copy and paste the sized tile 8x for each 12 x 24 mat you have and want to cut on one after another. (So if you have 2 mats, have 16 squares in your Design Space work area. For 3 mats, 24 and so on… For 12 x 12 mats, you’ll want 4 tiles per mat.

If cutting on the longer mats be sure to change that before continuing the cut.
If your current fine-point blade has a decent amount of wear on it, you might want to change to a new one. I started with a fresh blade and cut all of my tiles without needing to replace it which I was super happy with!
Apply the Vinyl to Your Mat.

Keeping your vinyl on the roll, apply your vinyl backing side down onto your StandardGrip Mats. While unrolling the vinyl, apply gentle pressure along the center of the vinyl as you tack it down to the mat.
Using your TrueControl knife and a ruler, cut the vinyl on the mat to come away from the roll. Use your hands to smooth any bubbles out. It might be necessary to gently pry up the vinyl and lay it back down in the event of big ol’ bubbles or creases.
Use Your Cricut to Cut the Peel and Stick Tiles.

Load the mat into your Cricut, select Premium Vinyl as your material, and cut.
I was able to cut 8 tiles on a 12 x 24″ mat in just under 20 minutes. As a reminder, I used Tile Stencil Image #M1903D823.
I’d suggest cutting several mats worth of tiles at once so that you can get a considerable stretch done each time you actually apply the tiles to your backsplash. You can buy a 3 pack of the 24″ long mats here.
How to Apply DIY Vinyl Peel and Stick Tile.
Weeding Your Tiles.
Depending on the tile pattern you choose you can either have no weeding necessary or a lot of weeding.

If you are cutting vinyl tile that don’t have any tiny pieces you can literally just slip your Cricut scraper under a corner of the tile and peel it away from the backing sheet in one piece.

See! Isn’t that cool? No weeding necessary!

Before I had run my trial and decided the tile image file I wanted to cut, I had also considered #M1903D7F8. Isn’t it a pretty tile design? The only trouble is that the weeding is more intricate meaning I’d have to take the time to sit down and weed all of my tiles before applying them in the kitchen. After applying both designs to my actual backsplash I decided that this one was too fussy for the look I was going for and saved myself some weeding time!

Looking at this more intricate tile design do you notice how in the center there are 8 petals, a circle in the center, and 4 diamond shapes that aren’t attached to anything? In order to move these elements over we will have to use Transfer Tape. This adds time and cost to the project. If you decide to go this route, you’ll need to purchase the same square footage of transfer tape as vinyl. Luckily, Transfer Tape comes on Bulk Rolls, too!
Applying Your DIY Peel and Stick Tile to the Wall.
Before you start it is advisable to TURN OFF THE POWER to your outlets by switching the power at your breaker box.
Note * Don’t apply lotion to your hands before sticking tiles. If you accidentally touch the sticky side you’ll lose the sticky anywhere the oil from your hands make contact.

I suggest starting at a corner of your backsplash where is the most difficult to reach. For me this was behind my kitchen sink that is on an angle. I literally sat with my feet IN the kitchen sink as I stuck my tiles in this area and it wasn’t comfortable. BUT I couldn’t imagine having to measure and hand cut vinyl tiles to fit if I had finished in this corner. Making sure you get the hardest part done first means you can use full size tiles for the bulk so that it won’t be quite so difficult.
Starting in that first corner stick your tile so that the side runs along the seam where the 2 corners meet and the bottom runs along the counter. How far apart you want to place these is totally dependent on the width you want your “grout lines”. I wanted small lines and so mine are pretty close to the bottom and the corner.
As I learned, the best way to work is not in a totally straight line while tacking down your tiles. Instead a tile and then one to the side and one above. When necessary, you can continue in a straight line, but stair-stepping the application makes it less likely that your lines will go wonky.

When you get to an outlet, apply your tile as much as possible to the backsplash surrounding the outlet. Use your knife with a sharp blade to carefully trim away any vinyl that sits on top of the box. Another quick reminder, be double sure the power is off so you don’t zap yourself.
How to Deal with Vinyl Tiles that Extend Beyond the Formica.

Sometimes you’ll have to stick a tile that is a bit larger than the area you need to cover. To trim these hold the vinyl taut and slide your TrueControl knife along the edge of the Formica to trim. A sharp blade works best.
Cutting at Corners and Half Tiles.
It might be necessary when meeting new corners to cut tile to fit. Stick the tile as much as possible and slide the knife along the corner, or what have you. It’s best to do the areas where you will need to cut before moving to the other side of the corner where you can start using full tiles again. If convenient, use a small ruler to help cut a straight line.
When you get to the top edge of your backsplash, just beneath the upper cabinets or appliances you will likely need to use the same size tile over and over. Pre-cut these tiles with scissors to the correct size prior to applying them to save time.
Continue Adding Your Tile, Replacing Outlet Covers when Possible.
Note * When screwing your outlet covers back into place do not overtighten as it can cause the plastic to crack. If you do crack an outlet cover, they are inexpensive (less than a dollar, for most sizes) and can be purchased at stores like Walmart or a hardware store.
What if Static Electricity is a Problem for Application?
The third photo up is where I stopped after about 4 hours of work. I had only applied 13 full tiles and 2 half tiles and I had ruined a full cutting mat of tiles. My problem was static electricity made the tiles difficult to manage sticking down right where I wanted them to be. Several had to be scraped away after sticking to the wall wrong (and hopefully not another tile, too).
The best thing I could find to combat static electricity is to remove the tiles from the backing and cutting mat and gently tack the tiniest bit of the corner of the tile to something and allow it to hang.
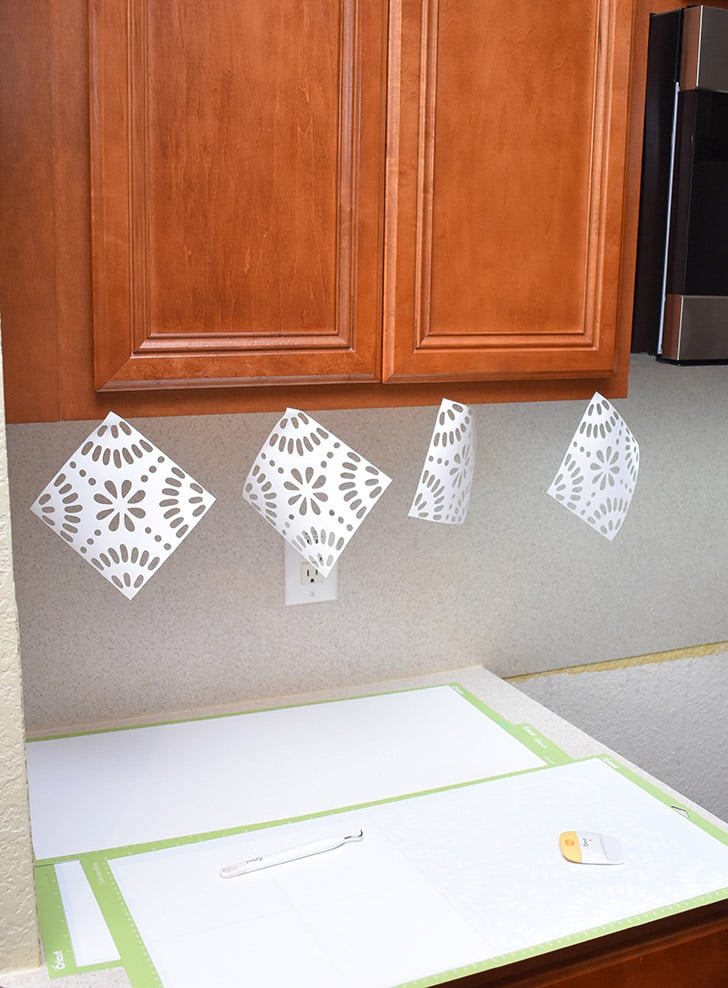
For me, I was able to hang 8 tiles to my upper cabinets like you see here. After about 15 minutes the static would have dissipated.

To test you can place your hand close to the tile. If the tile moves closer to your hand it’s still too charged to easily work with. Allow it another 10 minutes or so and try again.
Now I know this seems like it would cause considerable delays. But honestly, working with tiles that just stick to the wall right where you want them rather than shifting and sliding around means you’re just knocking those tiles on to the vinyl backsplash like bing, bang, boom. It’ll save you time and frustration in the long run. I promise! And before you know it, bing, bang, boom, you’re done!

This DIY Peel and Stick Vinyl Backsplash is one of my favorite projects I’ve made in a long time!
It’s super clean looking, has totally transformed and brightened up my counterspace, and even my dad likes it. And my dad is the opposite of Mikey. He doesn’t like anything :)
Every time I walk into my kitchen right now I’m really pleased with it. And now I’m inspired to change up some paint colors and brighten the space even more!
