
This post and photos may contain Amazon or other affiliate links. If you purchase something through any link I may receive a small commission at no extra charge to you.
So I absolutely HATE holding on to a water bottle. It’s like, this terribly dreaded thing and it seems kind of ridiculous when I truly take the time to think about it but it is what it is… straight up hate it.
If out on a hike I’ll shove my water bottle into some pocket and hope the weight of it doesn’t bring my elastic waist shorts down around my ankles as I make my way down a path. If my purse is around I’ll toss that sucker inside and, wouldn’t you know it, ruin half of the paperwork I have inside from the condensation. Hopefully, I get the lid on that sucker good and tight, or I’m going to be dripping water out of the bottom of my purse as I truck it on down the middle of the mall. Yes. It has happened. Yes. I immediately worried that people I passed thought I was peeing myself.
And while I hate toting water around with me, like every other creature on the planet I need to stay hydrated. Just ask my doctor. She’ll tell you ALL about the virtues of staying hydrated. They include but are not limited to, flushing out the urinary system to help prevent infections, or help in flushing out an existing infection, hydration keeps your skin full and moist keeping your skin from appearing quite so wrinkly. I wish I knew that wrinkle business one sooner :)

After pawning my water bottle off again because I didn’t want to hold it, only to be irked when I got it back empty, I decided that I needed to take matters into my own hands. Yep, I needed to put on my big girl panties and start carrying my very own water bottle all of the time. Ugh. Haha! :)
But since I decided I was just gonna tote my own around whether I wanted to or not, it didn’t mean I had to be happy about it. And it didn’t mean I had to hold onto it with my own two hands. So I grabbed a skein of bright teal Red Heart Super Saver Yarn that happened to be on the top of my crazy craft stash and got after it at the doctor’s office. And as I explained what I was making, I learned all of those reasons WHY drinking water for proper hydration was so important. And as it just so happened, I worked up my first crochet water bottle holder and strap right there in the waiting room and examination room and only had to attach the strap to the body of the piece when I got home.
Now I’m guessing that from start to finish, that was around 3 hours, but that includes the time to figure out what in the heck I was doing and occasionally converse about health insurance or get my blood pressure checked or whatever. It seems that subsequent versions seem to take between 1.5-2 hours while watching TV, so it’s a pretty good steam a Netflix movie project!

The pattern for this water bottle holder is kind of big. In fact, it perfectly holds the 2 water bottles I use most frequently. If I don’t have my 25-ounce stainless steel water bottle filled, I’m carrying around a liter bottle of Evian and it holds both perfectly well. The stainless steel water bottle I carry has the benefits of being better for the environment and it kind of magically keeps my water cold for a long time. Like, you can go out on a hike in 100+ and your water doesn’t start to warm up until you’re heading to the car kind of amazing-ness. The larger, 25-ounce bottles will run you around $20 which seemed crazy steep to me when I first bought mine, but think of all of the money you’ll save on bottled water. Cha-ching, right?
But I’ve been chatty excessively about a pretty boring topic here.
Want to learn how to make a crochet water bottle holder with a free pattern?
Ooh, but wait. I want to show you my new crochet hook!

Now, in all honesty, I really didn’t NEED to use my light up crochet hook but I really WANTED to try it out. I mean, new stuff, hello. Now it might seem that a clear hook is going to be a pain in the rear to work with but I found that not to be the case. And if it did get a bit difficult to see…
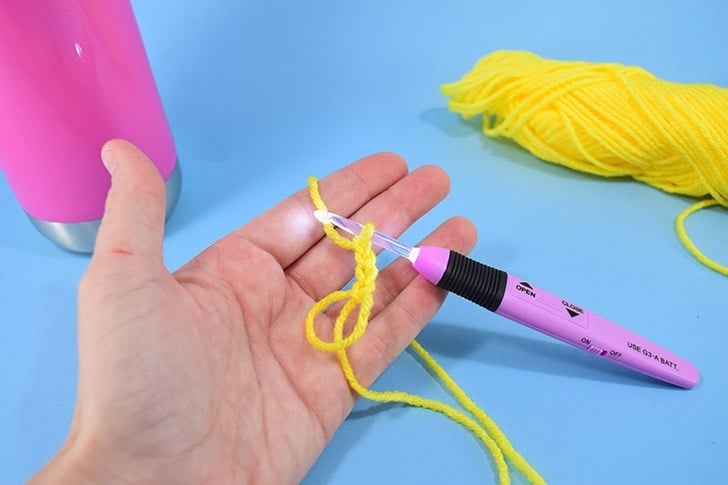
KAPOW! Flip the switch and turn that baby on and it glows. Look at that business. I mean it. It really GLOWS.
Cool glowing doesn’t do a darn bit of good when you’re crocheting in decent light but is super helpful in less than ideal lighting situations, like riding in the car and wanting to get just a few more stitches in as the sun is setting. It’s just perfect for that. But there was also a side effect I totally didn’t anticipate. Because the handle houses the actual lighting whosit whatsit and the battery and all, that handle needs to be bigger than on a normal hook.
In fact, the hook is wide and almost half an inch thick. And as it turns out, this flattened, wide handle is amazing for me and my arthritic hand. Like, I take a lot more Ibuprofen than I should when I’m rocking the crochet hard and heavy because my hand is miserable. I broke my thumb when I was a kid and I lost my pinkie finger on the opposite end and had it reattached as an adult. Then I broke some bones in the palm of my hand a few years later and then some bones on top of my hand a few years after that My hand is just this miserable looking thing that wants to curl up into a claw and it HURTS when I force it to hold onto something, like a crochet hook, for a long time. So, glowing is cool and all, pain-free crochet is AMAZING. If your hands hurt or if you like to crochet in the dark, I’d straight up order a set right now :)
And now back to our project at hand, haha!
Seriously, now, grab the yarn and let’s hook up a crochet water bottle holder with my free pattern.
For this project you will need:
- Yarn (I’m using Red Heart Super Saver)
- Appropriately sized hook (I’m using one of my awesome lighted hooks from this set)
- Free crochet water bottle holder pattern
- Yarn needle to weave in ends
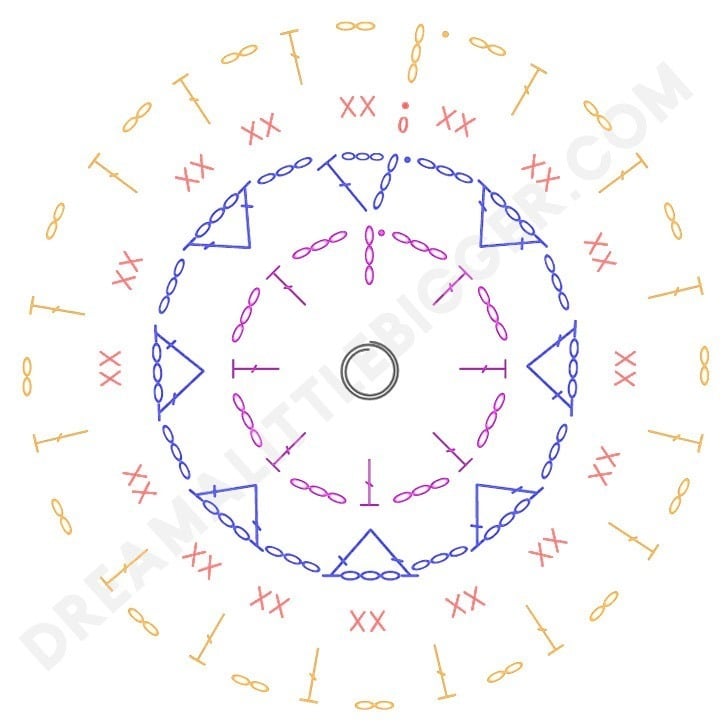
This is the crochet chart for our water bottle holder. It’s hooked in the round with a magic ring to start. Need help with the magic ring? Learn how to make one here.

Chain 6 times off of your magic ring. This will act as your first double crochet and chain 3 for this round.

Double crochet into the center of the magic ring and chain 3, repeating this process 6 more times.

Slip stitch the first round closed. At this point, you should have 8 “spokes” coming off of your magic ring, much like on a wheel.

Chain 6. This will act as your first double crochet and the following chain of 3.
Double crochet into the first double crochet stitch from the previous round and chain 3. Double crochet again into the same stitch. Chain 3. Repeat this process around 6 more times. Slip stitch the round closed.

Chain once. Single crochet twice in each gap around the previous round. This will be a total of 32 single crochet stitches. Slip stitch to join to the first chain of the round and close it up.
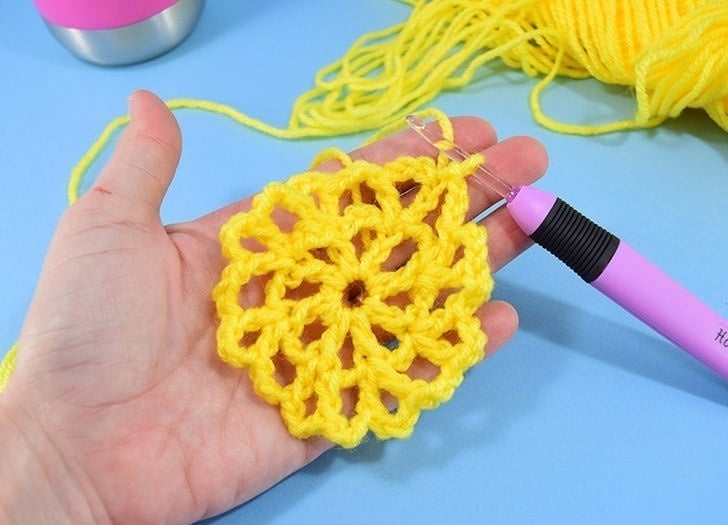
At this point what you have is the bottom of your water bottle holder done. Now we are going to start the fourth round and work “up” to make the sides of the holder. This is the same round repeated over and over until we get the proper length.

To start the fourth round, chain 5 to act as the first double crochet and the following chain of 2. Double crochet in the gap between the pairs of single crochet stitches in the previous row. This will make your double crochet match up exactly with the double crochet in row 2. See above how it looks like that second round the spokes are growing outward? That’s just what we want.

Repeat the same steps from fourth round 5 more times. Around the second or third round, you should actually start to see your piece pulling upward, starting to shape up much like a bowl.
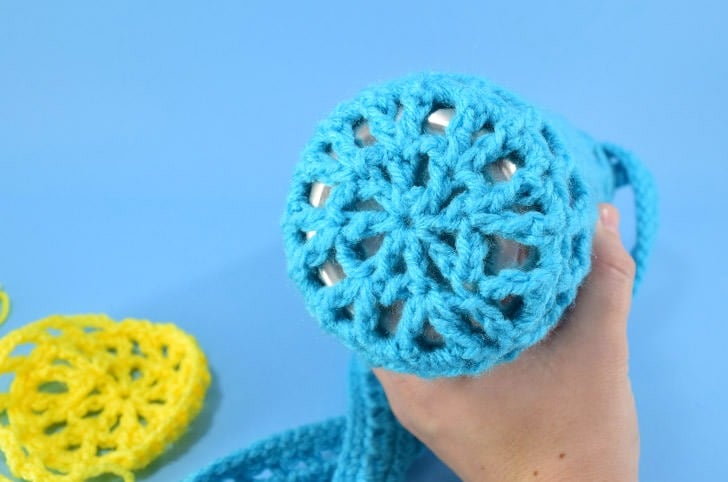
Once you’ve finished round 9 it’s time to create the decorative edge in the next 3 rounds.
For round 10 chain once. Now single crochet twice in each gap from the previous round for a total of 32 stitches. Slip stitch the round closed.
For round 11, chain 3 to act as the first double crochet. Now double crochet in every stitch from the previous round and then slip stitch the round closed. This will be a total of 32 stitches around.
For the last round, 12, chain once and then single crochet in each stitch from the previous row, again for 32 stitches total. Slip stitch the round closed. Tie off the end and weave in your tails.
To make a shoulder length strap, take your yarn, leaving a tail of 6-8 inches dangling from the end and chain 100. Single crochet in the second stitch from the hook and down the length to the end. Chain once and turn to complete a single crochet in every stitch from the previous row. Continue on for one more row, chain once and turn to single crochet in each stitch down the length. Tie off your yarn leaving a tail of 6-8 inches.
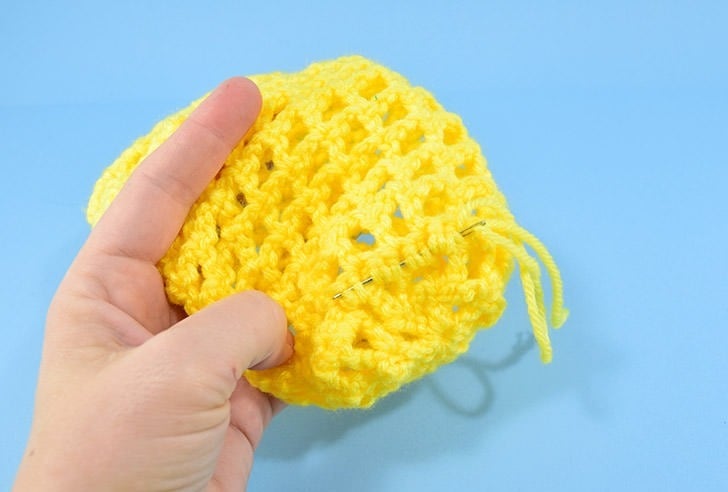
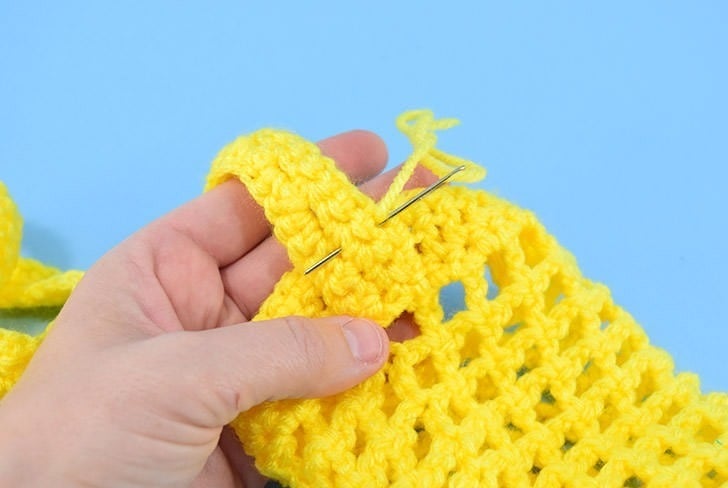
Turn the bottle holder inside out and using the tails and a yarn needle, stitch the tails securely into the first 3 rounds. Once a good tug proves the strap to be well attached, weave in the ends. Turn the holder back right side out and this baby is ready to hold water!

Crochet Water Bottle Holder Pattern
Make a magic ring.
Round 1: Chain 6 (acts as first double crochet and a following chain 3). *Double crochet into the center of the magic ring. Chain 3. Repeat from * 6 times. Slip stitch into the third chain at the beginning of the round.
Round 2: Chain 6 (acts as first double crochet and a following chain 3). Double crochet into the first chain of the current round. Chain 3. *Double crochet into the first double from the previous round. Chain 3. Double crochet again in the same stitch. Chain 3. Repeat from * 6 times.
Round 3: Chain once. Single crochet in the gaps from the previous round 16 times. (32 stitches total). Slip stitch to join to the first chain in the round.
Round 4: Chain 5 (acts as first double crochet plus a chain 2). *Double crochet in the gap between the third and fourth single crochets from the previous round to match up with the double crochet stitch from round 2. Chain twice skipping next 2 stitches from the previous row. Repeat from * 14 times. Slip stitch into the third chain stitch at the beginning of the round. (Note: All double crochet stitches in this round will be evenly placed with the double crochet stitches of round 2.)
Rounds 5 -10: Chain 5 (acts as first double crochet plus a chain 2). *Double crochet into the DC from the previous round. Chain twice. Repeat from * 14 times. Slip stitch into the third chain stitch at the beginning of the round.
Round 10: Chain once. Single crochet twice in each gap of the previous row. (32 stitches) Slip stitch to the first chain to close the round.
Round 11: Chain 3 (acts as first double crochet). Double crochet in every stitch from the previous round (32 stitches) and slip stitch the round closed.
Round 12: Chain once. Single crochet in each stitch from the previous round (32 stitches). Slip stitch the round closed. Tie off the end and weave in the tails.
For an over the shoulder strap:
Chain 100 leaving a tail of 6-8 inches
Row 1: In the second stitch from the hook single crochet. Single crochet down the end.
Row 2-3: Chain once. Single crochet down the length in every stitch. At the end of row 3, leave a tail of 6-8 inches.
Turn bottle holder inside out. Using the tails, stitch the strap into top 3 rows. Once firmly secure, weave in the tails to finish this crochet water bottle holder.