This post and photos may contain Amazon or other affiliate links. If you purchase something through any link I may receive a small commission at no extra charge to you.
Sometimes simple things are the best things. And repetitive things can be super calming. Since I’ve been stressing myself out like it’s my superpower or something, I started folding paper. Because, if you ask me, Origami is a fab way to keep my hands busy and my mind off of all the hubbub going on in my life right now.
And since origami paper can be so dang cheap, it’s not a project that will break the bank. It is also great to do while travelling. Give the older kiddos a lap desk and a stack of paper and let them go. This 16 point origami star is especially great because you continue to fold the same shape over and over until you get 16 total!
For this project you will need:
- Solid color origami papers (the bigger the easier to fold, especially for beginners)

Take your piece of paper and turn the square so that it looks like the shape of a diamond like above.
 Fold the top and bottom points together and run your finger along the crease in the middle to set.

Fold the left and right points together to form a triangle like you see above. Use your finger to press down the crease nice and firmly.

Open your paper and place like a diamond with the pretty side facing DOWN.

Fold each point into the middle where the two creases from your previous folds join. Smooth new creases with your finger to set. Continue for all 4 points until you have a small square shape.

Turn your square to a diamond shape again and fold the right side so that the upper right angle is flush with the center line of the diamond shape…

…and continue for the other side. Remember to really work those creases. Now see how the shape looks like a big triangle over a smaller one?

Flip the shape over and fold the bottom part that looks like a smaller triangle up. Crease along the edge of the “larger triangle”.

Turn the piece over and fold in half from left to right like seen above. This crease will take some doing because it’s so much paper bound together, FYI.

Now to connect them to start making a star… see the little triangle shaped pockets on the right side of each piece? And see on the yellow how you have two sides of the piece from where we folded the paper in half? Those act like legs.

Simply slide those pieces into the pockets of another piece. Because there are legs on both sides and pockets on both sides, the resulting hold is fairly sturdy BUT if you want to use the star as decoration, you’ll need to glue the pieces together.

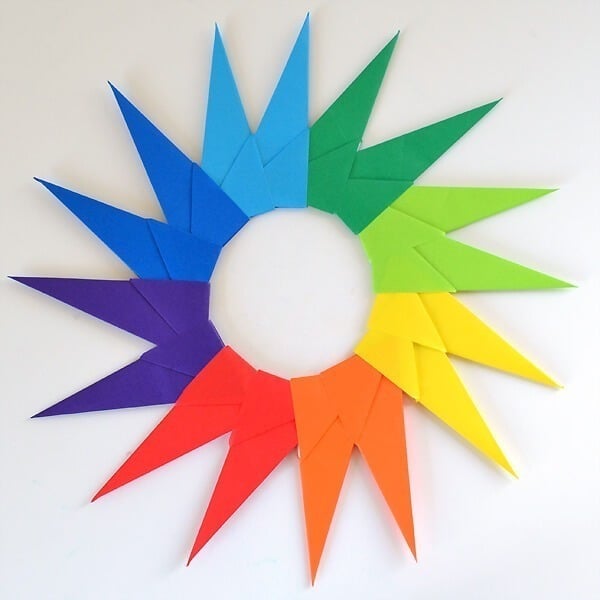
I decided I wanted a rainbow star where the colors seamlessly turned into another. To do that I used 2 pieces of 8 different colors of paper and placed together the colors that most naturally blend into each other. And that is that! You can use patterned paper or whatever you please! Because I used big 6 inch paper, this sucker is huge. Like 11 inches wide and would make a fun and inexpensive wreath or decoration for a kid’s room!