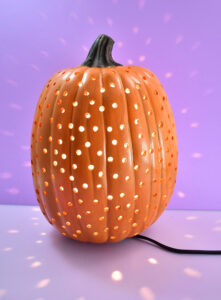
DIY Drilled Pumpkin Light
This easy to make drilled pumpkin light is a great piece of DIY decor that you can keep up all fall long for years to come!
Cost 20
Equipment
Ingredients
- Foam Craft Carving Pumpkin
- Acrylic Craft Paint in Orange
- Himalayan Salt Lamp Assembly Base
Instructions
- Measure the size of your Himalayan Light Base. Cut a whole in the bottom of the fake pumpkin, directly in the center. You can use a hot knife, craft knife, or hole saw.
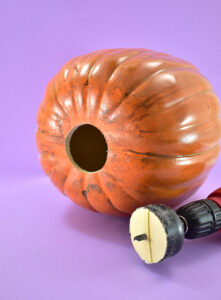
- Use small screws (whatever you have on hand that will fit in the holes that will work) to attach the lamp base to the pumpkin. Remove the assembly and place your screws somewhere you can easily find them again.
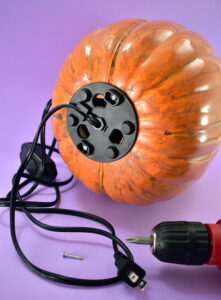
- Slowly drill holes randomly around the pumpkins surface.
- Use a q-tip and orange paint and cover the foam of each drilled hole. Reattach the lighting assembly.