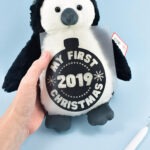
How to Apply HTV to a Stuffed Animal
Learn how to put HTV on a stuffed animal and grab our free annual Christmas SVG.
Cost -
Ingredients
- Flocked Heat Transfer Vinyl
- Stuffed Animal (we chose a penguin)
Instructions
- Measure the stomach area of your stuffed animal and determine the size you need to cut out your HTV design. Place your flocked HTV onto a cutting mat shiny side down. Mirror the image and run the cut. Weed appropriately.Center the HTV design on the toy's belly or other location. Press the carrier sheet into the fabric so that the HTV holds in place.

- Heat up your EasyPress Mini to its medium setting. Apply heat through the clear transfer sheet. Use a good amount of pressure so that the adhesive pushes deeper down than just the fuzzy surface.*Note - if you do not have an EasyPress Mini you can use another mini crafting iron or even a household iron, in a pinch.

- Test the HTV by trying to wiggle a finger beneath the design. If well adhered remove the carrier sheet according to your vinyl’s instructions. If not, apply more heat.Peel your vinyl (warm or cool) according to your package directions. Remove the carrier sheet very slowly, adding heat where necessary to any parts that the HTV did not affix to.

- Once the carrier sheet is removed, place a Teflon sheet on top of the design. Apply heat to the vinyl ensuring that it is well adhered.*Note - If you do not have a Teflon sheet you can use parchment paper.
