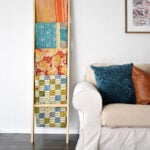
DIY Blanket Ladder
If you've got a lot of blankets this DIY blanket ladder is just what you need! With easy to follow directions, make your own gorgeous ladder!
Cost -
Ingredients
- 2 1″ x 3″ x 8′ Pine Appearance Board
- 2 1.25" x 48" Wood Dowel
- Wood Glue
- Nails
- Wood Stain
Instructions
- Align 2 - 1" x 3" x 8' wood boards together. Clamp together firmly. Trim both boards while clamped together to a length of 7Cut one end of the board at a 10° angle. This will be the bottom of your blanket ladder. To cut the top end of the ladder first mark 2" from the front of the legs along the top of the board. From the top of the board measure and mark down at 3.25" along the back side.Connect the marks and cut this angle on both boards at the same time.

- From the top of the ladder's sides measure down and mark in the center (1.25") of the board at the measurements 8.5", 20.5", 32.5", 44.5", and 56.6".Using a 1.25" hole saw drill though both boards at the same time using these marks to guide the center of the drill. Make sure you hold the drill perfectly level so that you cut straight holes down and not at an angle. Be sure to place a piece of scrap wood beneath your ladder's legs so you don't damage your work surface. (In my case the living room rug because it's freaking hot in the garage.)Separate your 2 sides and stain both legs and your 5 ladder rungs to match.

- Lay one side of the ladder on a flat work surface. Apply a thin line of glue just to the very end of one dowel.Push the dowel into place in one of the rung holes. Lift the leg up slightly to make sure that the edge of the dowel is flush with the edge of the leg.Glue in all of the rungs for this side of the ladder. Clean up any stray glue and allow time, at least 45 minutes to an hour for the glue to dry.

- Run a small bead of glue around inside of each of the rung holes on the other ladder side. Place it on top of the ladder making sure that the bottoms and tops are on the same ends. Pop the second leg onto the ladder, using a rubber mallet, if necessary, to connect both pieces.At this point you can use a level to ensure that your ladder legs are even. If the legs are not level, tap the higher end with the mallet to push the rungs further through the holes until level. It might be necessary to sand any dowel that you do this to and re-stain the end if it noticeably sticks out more than the other rungs.Once happy with your ladder, allow the glue a some time to begin drying, at least 30 minutes.

- Flip your ladder over so that the back side is facing you. Tap a trim nail into the hole you created. Repeat for all of the rungs on both legs of the ladder.
